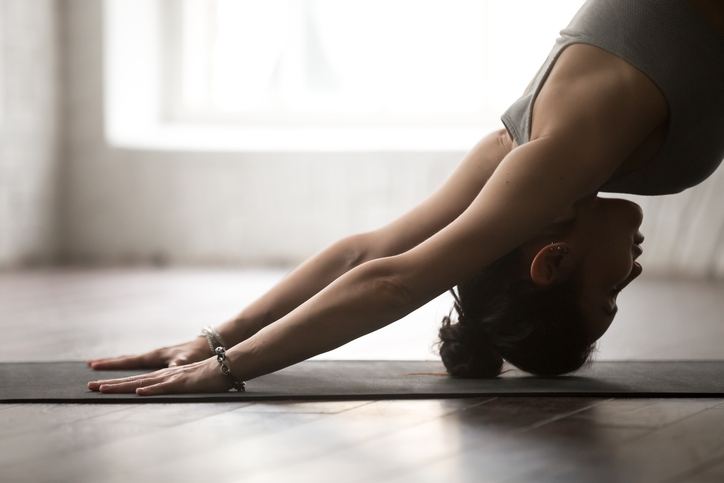
Yoga enthusiasts swear by their poses to maintain feeling open, strong, and stable in their bodies. But utilizing yoga to feel good in your body and relieve pain doesn’t necessarily require a regular practice. Once you learn what areas of your body need be to refreshed and renewed, you just have to find the right postures. In this article we will dive into a few yoga poses for lower back pain. If you experience lower back pain you’re not alone – an estimated 80% of the population will experience back pain at some time in their lives. Back pain can affect people of all ages, from adolescents to the elderly. The below yoga poses can be done at home with limited props and don’t require any previous yoga experience.
Yoga Poses For Lower Back Pain
Its important to understand that back pain is not a universal experience and that those experiencing severe pain should seek insight from a professional physician, or physical therapist before attempting any poses that could potentially create further damage. As always, its important to focus on how a posture feels, and not on how it looks.
1. Child Pose
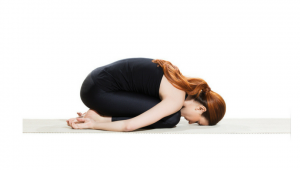 Child pose is a relaxing way to elongate your spine and relieve stress. Even though your mind might be resting, this pose offers an active stretch that helps elongate your entire back. To try it, start in a table top position (on all fours) and then begin to push your hips back so that your seat ends up on, or close to, your feet. Reach your hands forward to add length to the sides of your torso and let your forehead rest on the floor or a blanket. If your seat doesn’t reach your feet, you can fold another blanket over your heels for some extra support.
Stay in the pose for 5-10 breaths, allowing yourself to become heavier and softening towards the floor with each breath out. This is a great pose to practice before bed or even first thing in the morning to help center yourself for the day and stretch out your back after sleeping.
2. Cat and Cow Pose
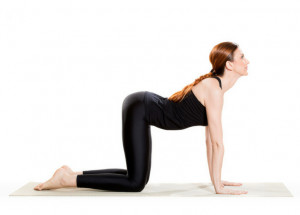 Cat and Cow are poses that provide both a rounding and an arch of your back, and they flow nicely from one to the other. This set of poses is perfect for an achy or sore back and will loosen your spine while also warming up the trunk of your body for any additional movement or workout.
Starting in all-fours position, move into Cow by letting your belly drop down, your tailbone lift, pressing your shoulder blades back and lifting your chest and head forward. Stay for the inhale. When ready to exhale, slowly round your spine up by pressing into your hands and release your neck so your gaze drops to your navel. Pause for a few seconds and then move back and forth from Cat to Cow. This helps position your spine into a neutral position, relaxing the muscles and easing tension.
Repeat 7-10 times, flowing smoothly from Cat into Cow, and Cow back into Cat.
3. Standing Forward Bend
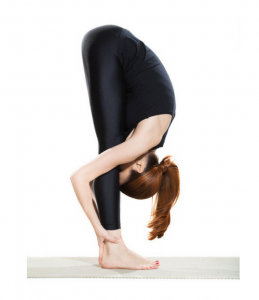 With Standing Forward Bend, its important to note that in some instances of back injury this can hurt the back further. You should have flexibility in the hamstrings while attempting this pose – if there isn’t a good stretch coming from the hamstrings, or if the hamstrings are tight – you could create further injury to the lower back. You should also do your best to keep the spine lengthened and more straightened than rounded.
A standing forward bend stretches the hamstrings and lower back muscles while providing a release for tight, tense shoulders as well.
Stand straight with your feet shoulder-width apart and your knees soft, not locked. On your exhale, fold at your hips – not the waist – and bend forward toward the floor. Don’t worry if your hands can’t reach all the way to the floor at first; just stop wherever your hamstrings feel a comfortable stretch. The neck should be relaxed with the top of the head facing the mat, and both neck and head in line with the spine to prevent injury. You can keep a soft bend in your knees to prevent any strain in the low back – bending forward with straightened legs together can compress the spine. If you have yoga blocks, place them under your hands for additional support. Stay for 3-5 cycles of breath and repeat as needed.
To exit the pose, bring your hands to your hips, bend the knees a bit and press yourself up to stand, but move slowly. Stand tall for 30 seconds and breathe fully into your belly and chest.
4. Supine Twist
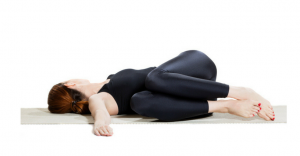 Spinal twists can be the most dangerous for those with back injuries – however the easiest on the spine would be a supine twist. A gentle twist offers tension relief for the entire back, as well as the neck. Allowing gravity to help release the back also makes this pose ultra relaxing for the rest of your muscles and your mind.
Lay on your back and bring your arms to a T-shape or cactus shape on the floor. Allow your knees to come up and in towards your chest and then slowly lower both knees to the left until they come down to the floor. Keep your head neutral or feel free to look in the opposite direction of the bent knees. Your knees might have a little space between them – if so, grab a blanket or towel and pad up the space so that your legs feel supported. Try to keep your upper chest broad and allow gravity to keep your shoulders heavy to the floor. Inhale to find some length and use your exhale to allow the twist to deepen. 7-10 cycles of breath will bring a nice physical release as well as a mental one! To switch sides, pull your knees back to your chest, and repeat on the right side. (Hint: don’t try this after a big meal.)
5. Sphinx Pose
 This backbend is a great pose to strengthen the back and also stimulate the natural curves of the spine, which we sometimes lose from sitting for too long. When we sit a lot, the lower back tends to move into a more flattened shape, which can cause pain and discomfort over time. Sphinx pose promotes the natural curvature of the lower back which aids in overall spine health.
Lay on your stomach with feet hip-width apart, and bring your elbows to the floor and rest them under your shoulders. If there is too much pressure on your lower back, bring your elbows slightly forward. If you would like a deeper or more intense bend, place a block under each elbow. Hold this pose for several breaths, feeling yourself get longer with your inhales and allowing the hips and legs to heavy on your exhale. To exit the pose, lower yourself onto the floor, turn one cheek to the side and gently allow your hips to rock side to side.
These are just a few yoga poses for lower back pain to help your back feel healthy and spacious. Always take it slow and ease into postures in a safe way for your body. If something doesn’t feel right, listen to your intuition and exit the pose.


