The weekly class theme for this week is the ✨journey✨
It can be easy to get caught up in the physical aspect of yoga, how we think our yoga asanas look, or where we are in our yoga journey. Remind yourself and your students that you will never be perfect at yoga or ever be finished with your practice. Yoga is about the journey of ever-evolving growth and learning. Every time we step onto the mat is like a new time. The gifts from your yoga practice are gained throughout the journey of your practice, not the destination. You will always be learning and growing from your practice, so it never truly ends. Just like in life, we become who we are through our journey of life.
Take time to slow down each day and just enjoy the path you’re on. Reflect on your past experiences, recent successes, and your current situation and consider how all these things have taught you valuable life lessons. Without these lessons, you may have never gained the priceless wisdom that you have now.
Our peak pose is Virabhadrasana III (Warrior III pose)
Warrior III is your full warrior! It is the last of the Warrior poses and engages your arms, legs, core and hips. Warrior III is perfect to represent the journey because it is the finale of an evolution of poses. When incorporating Warrior III into your class, you can have your students warm up with the following poses outlined below.
Uttanasana (Standing Forward Bend)
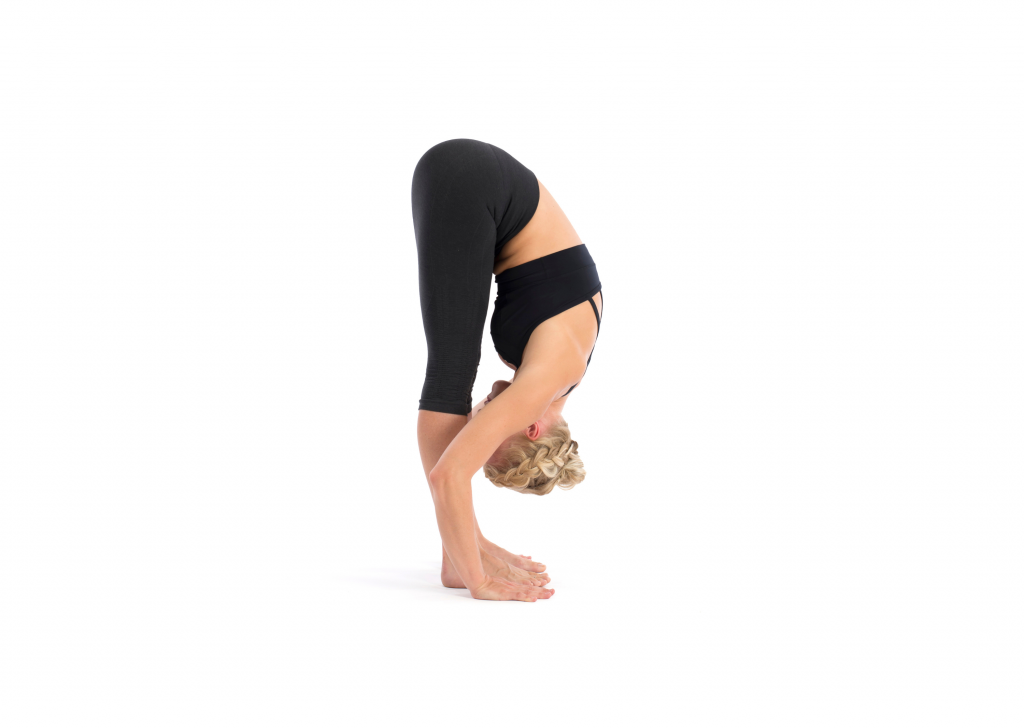
How to:
- Begin in Mountain pose.
- Bend your knees and bring your body over your knees. Be sure to hinge from your hips and not your back.
- Inhale to lengthen the spine.
- Exhale to go deeper into the forward bend.
- Your hands can be free by your feet or placed on the ground beside them.
Virabhadrasana I (Warrior I)
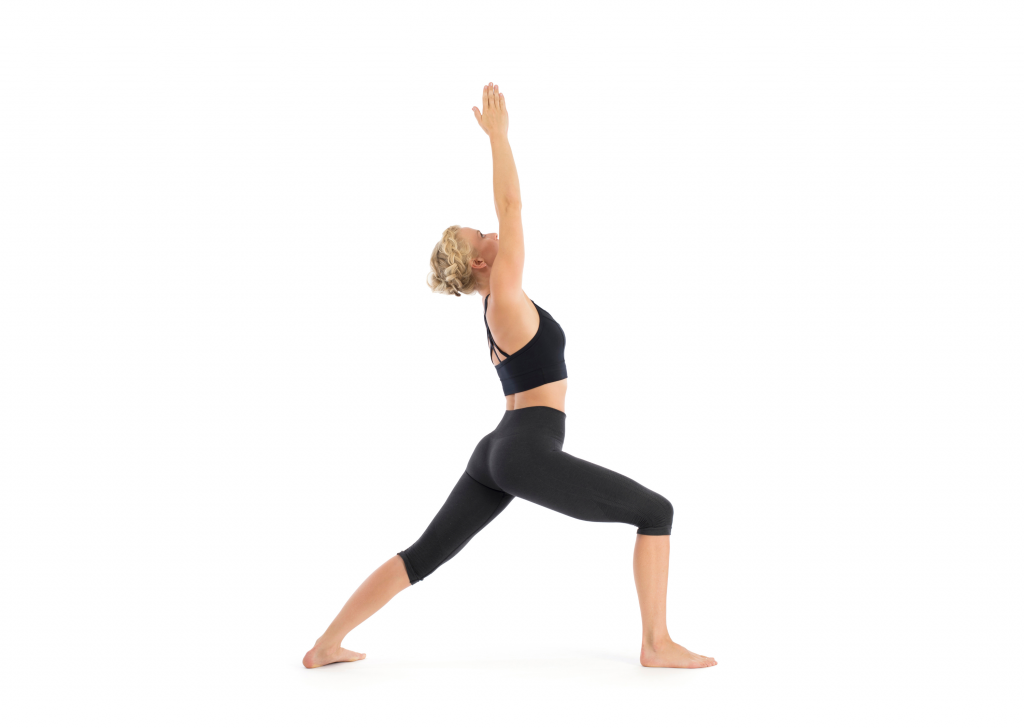
How to:
- Start in Mountain and step your back foot 3-5 feet back depending on your flexibility.
- Turn your front foot 90-degrees toward the front short edge of the mat and your back foot roughly 45-degrees in.
- Keep your front heel aligned with the arch of the back foot.
- Press into your back heel as you bend your front knee to relatively 90-degrees. Make sure your front knee is aligned with the ankles or slightly behind the ankle if you are not as flexible.
- Draw your belly into the spine and point your tailbone down while also lifting your ribs up.
- Keep your hips squared to the front of the mat.
- Bring your hands to the sky with palms facing each other. Lengthen through the crown of your head and draw your shoulders down away from your ears. If this is too much, bring the hands together in prayer at your chest. An option is to gaze up towards the hands keeping the neck soft or gaze softly ahead.
- Hold for several breaths and switch sides.
Virabhadrasana II (Warrior II)
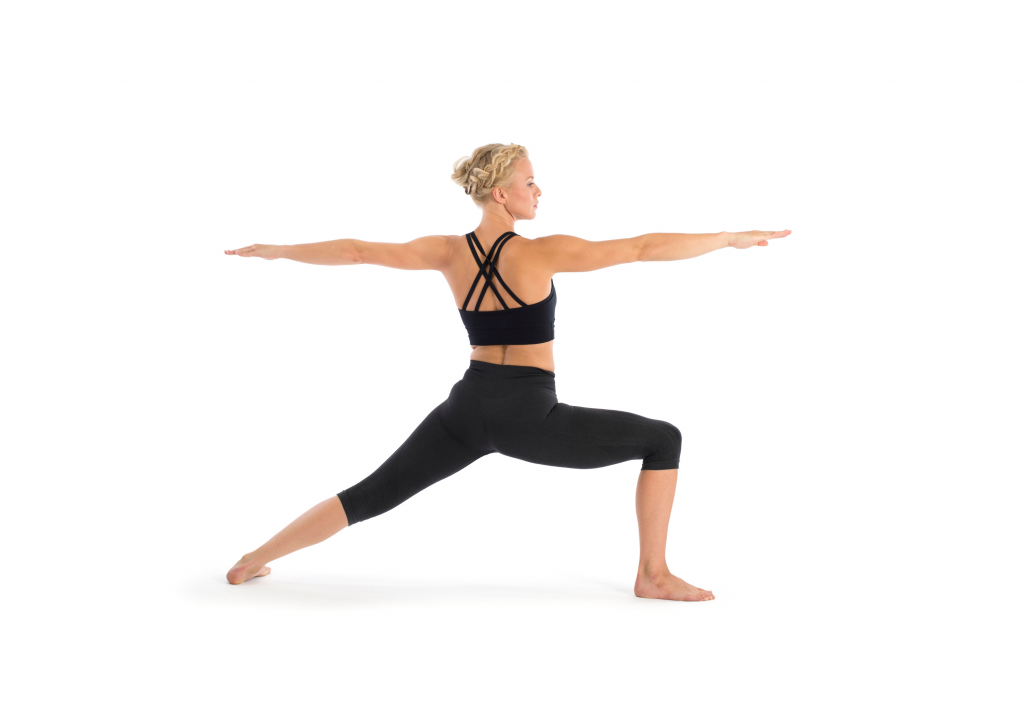
How to:
- Begin in Mountain. Step your feet apart 3 and a half to 5 feet apart. This distance will vary from student to student depending on flexibility.
- Point your front toes 90-degrees toward the front short edge of the mat and your back foot parallel to the back of the mat. Your front heel should bisect the arch of your back foot.
- Draw energy up through the inner arches of your feet.
- Lift your arms up and out so that they become parallel to the mat. Bring your palms down and shoulders directly under your hips. Imagine a line of energy pulling through both fingertips.
- Bend your front knee so that it stacks over your front ankle or slightly behind it.
- Lengthen your tailbone down while lifting your crown up to the sky.
- Keep your torso straight up and aligned directly over your hips.
- Gaze over your front fingers and hold for several breaths. Switch sides.
Finally: Virabhadrasana III, or Warrior III pose!
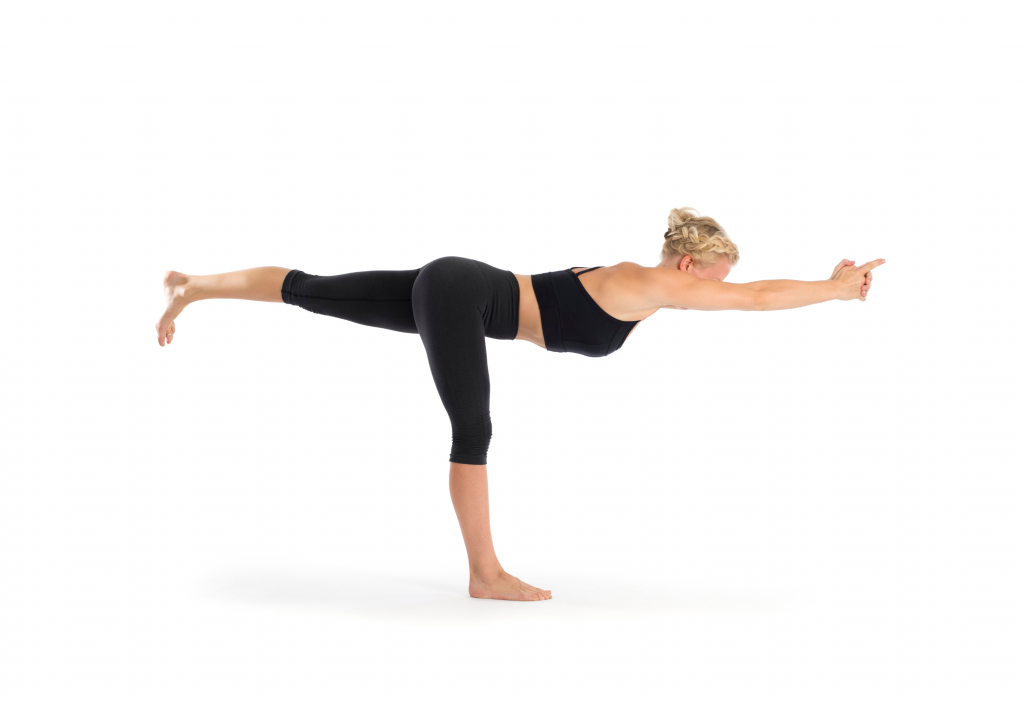
How to:
- Start in Mountain, with your feet hip-distance apart.
- Engage the core muscles and begin to shift your weight to your right foot and lift the left foot back.
- Keep the left leg relatively parallel to the mat. Rotate the leg slightly inward to keep it straight back.
- Flex your left foot down towards the mat and keep your front right toes pointing forward.
- Begin to tilt the torso forward so that your arms, neck, head, and body become parallel to the mat.
- Reach your arms forward in front of you.
- Let your neck soften as you gaze slightly up and ahead or straight ahead on the ground a couple feet ahead of you.
- Imagine a long line of energy through your fingers and back foot.
- Root down in your standing leg and imagine feeling your kneecap lift upwards.
- An option is to interlace your fingers together or bring your palms together to touch.
- Hold for several breaths before releasing your back leg down. Switch sides.