Our next stop through the Yamas is Brahmacharya. Remember, the Yamas are considered jewels by which to live in order to experience life through a yogic lens (because what better way)! Brahmacharya is literally translated to “walking with God,” and is more commonly known as living with non-greed or non-excess. This Yama asks us to consider in every moment the sacredness of life and to be aware of when we are going from “enough to excess.”
Most of us may be able to relate to the feeling of eating too much, drinking too much, or sleeping too much to the point that it takes away from our ability to be fully present or content. It’s not that we shouldn’t indulge ourselves…that’s quite the contrary! But it’s the overindulgence that has us overlooking and taking for granted the pleasures of life and life itself.
Brahmacharya asks us to examine our lives in all aspects: work, play, material possessions, relationships, even our spiritual practices, and to notice when we are overdoing it. Subsequently, we are invited to create balance and rhythm in our lives between the doing and non-doing to experience a productive, yet utterly fulfilling life.
Peak Pose: Forearm Stand (Pincha Mayurasana)
If you ask me, all arm balances should have the teachings of Brahmacharya highlighted. Forearm stand (same with handstand), while we are upside down is an arm balance as opposed to being in the inversion family. It’s easy to get swept up in the “doing” of this pose…trying and trying followed by failing and frustration. I am picturing some of my students trying to get into the pose and eventually when they do muscle their way into it, the look on their face is of pure stress and strain. My personal journey to forearm stand has taken years and I’ve realized it doesn’t end when you are able to “get into the pose.” It requires us to check our ego at the door and approach it with patience, compassion, and non-excess…for overdoing it can surely put us in harm’s way physically, mentally, emotionally, and spiritually.
Supporting Pose 1: Sphinx (Salamba Bhujangasana)
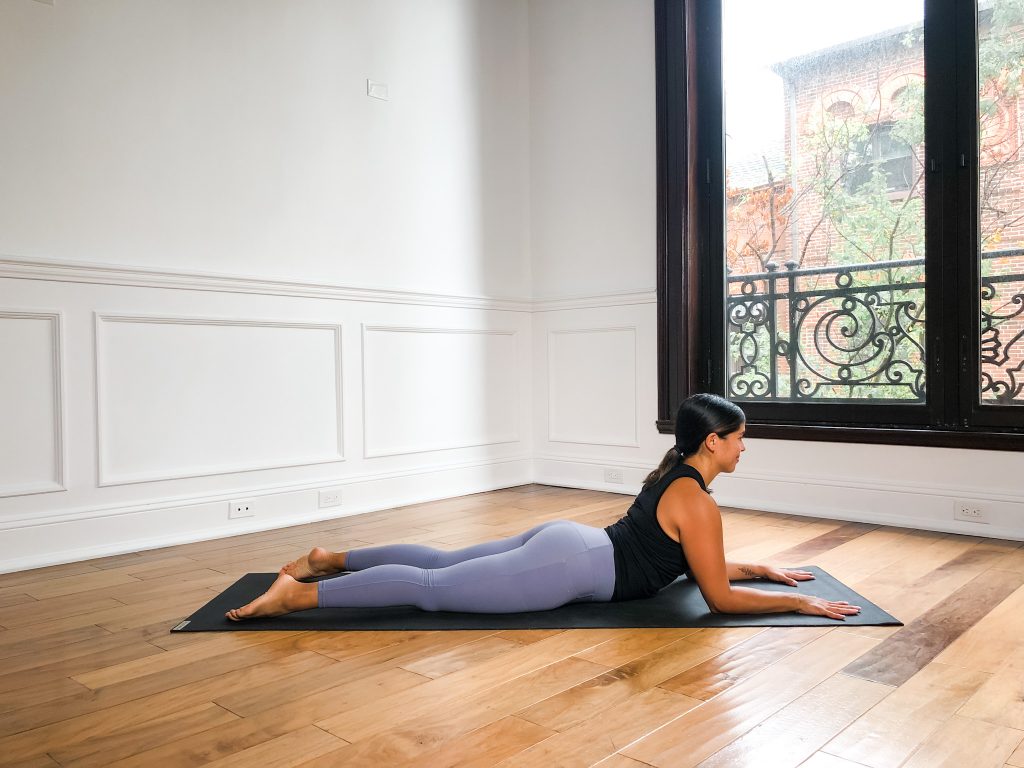
Sphinx pose seems like an obvious choice to get the forearms on the ground to receive feedback from the surface below. It is fairly accessible and can teach the positions and actions of the hands and forearms before balancing the entire body on them.
How to:
- Lie on your belly with your legs fully extended and the front of the pelvis and tops of your feet pressing down into the ground.
- Bring your forearms to the floor parallel with one another (and the edges of your mat) and your elbows beneath your shoulders.
- Press your palms and forearms firmly into the ground as you energetically drag your arms back. The arms should not actually move, but the result should be the shoulder blades drawing back and down and it should feel like the collarbones are spreading.
- Keep the back of the neck lengthened.
- To incorporate this in a seamless way, you can replace cobra with sphinx pose during your warm up portion of class.
Supporting Pose 2: Triangle with Arm Overhead (Utthita Trikonasana)
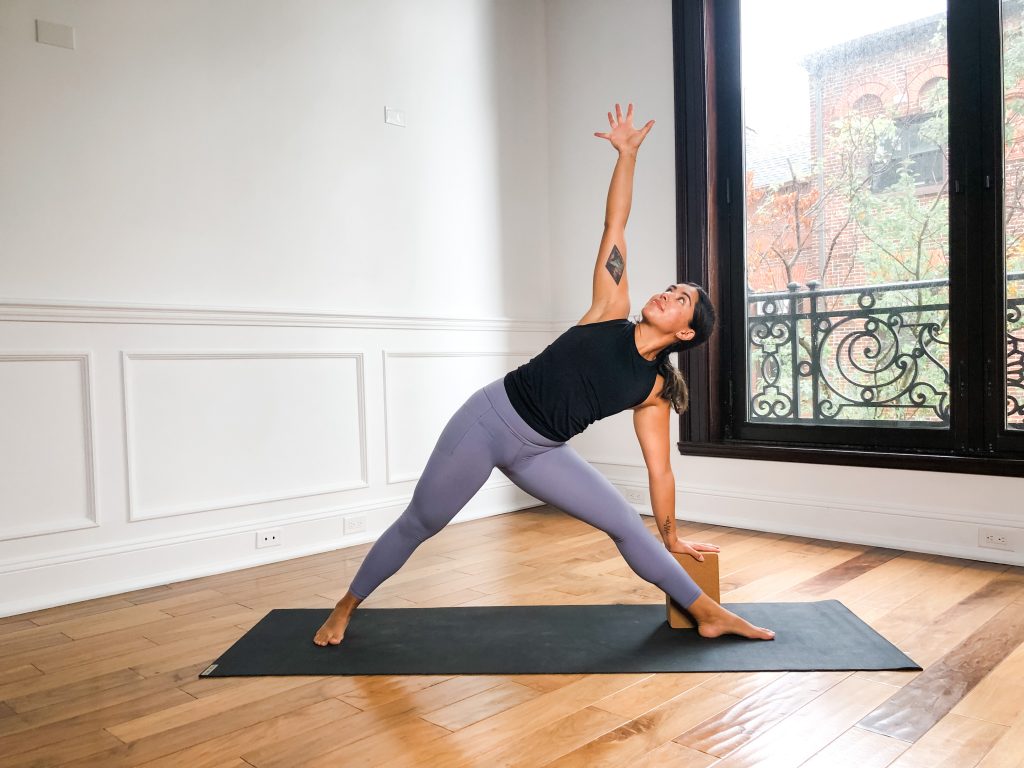
Triangle helps to teach the practitioner about strong, clear and straight legs which is necessary for forearm stand. Taking the arm over the ear resembles the arm and upper back position for the peak pose.
How to:
- From Warrior II, straighten your legs and lift your kneecaps.
- Bend at your right hip and bring your right hand down to a block (or shin or ground) on the outside of your leg. Keep the arm straight.
- Take your left arm up to the ceiling and then over your head so the upper arm is alongside your ear.
- Ensure the front of your rib cage is in check by pulling the front ribs in and filling out the lower back.
- Press the crown of the head towards the front of the room to lengthen the neck and then either keep the gaze towards the side wall or turn the gaze to the sky.
Supporting Pose 3: Full Wheel (Urdhva Dhanurasana)
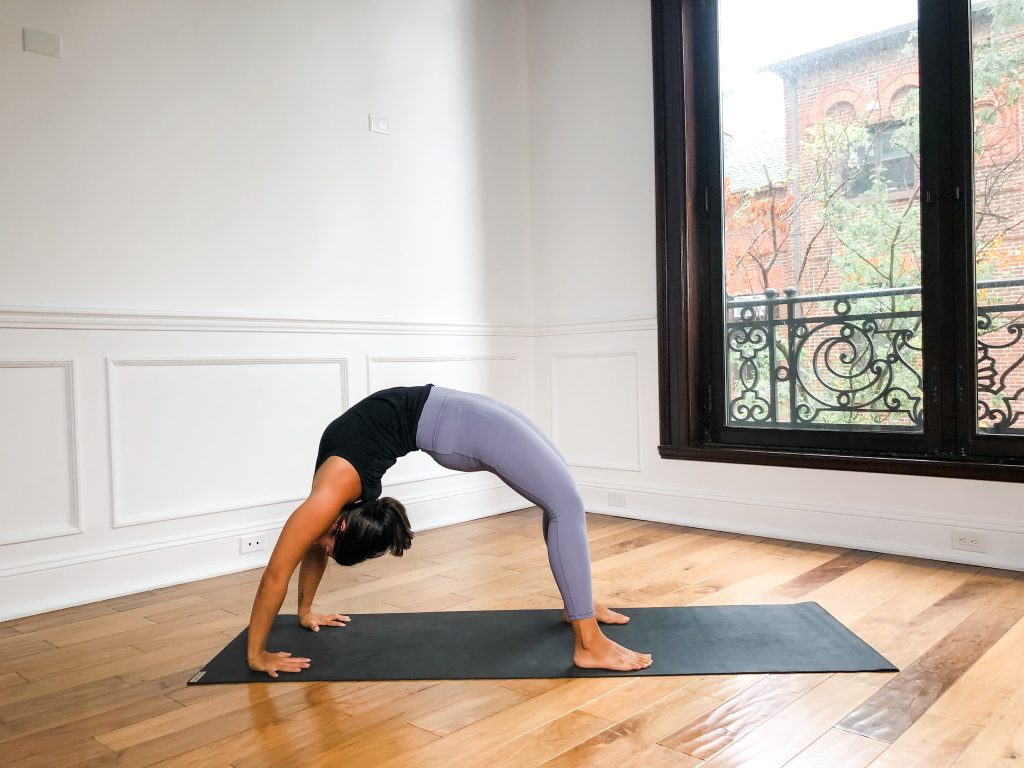
Full wheel has multiple components which contribute wonderfully to the learning of forearm stand. Arm position, upper back action, pelvis and leg action are all ways in which full wheel helps the practitioner to prepare the body for pincha mayurasana. Depending on the level of students, you might consider doing a double peak class or doing this only if you have ample time to adequately teach/practice both.
How to:
- Lie on your back with your knees bent and the soles of the feet planted on the floor with the heels under your knees.
- Reach your arms straight up to the sky and then bend your arms to bring the palms to the floor beneath your shoulders with the fingers facing the heels of your feet.
- Press your hands and feet into the ground as you lift the rest of your body away from the floor. You can either come to half-wheel (crown of the head planted to the ground) or right into full wheel as pictured.
- Firm the back of your pelvis towards the sky and firm the upper back in to move your chest towards the back of the room and the head between your arms.
- To exit, bend your elbows and slowly tuck your chin to lay down the back of your head, the upper back, middle back, and lower back.
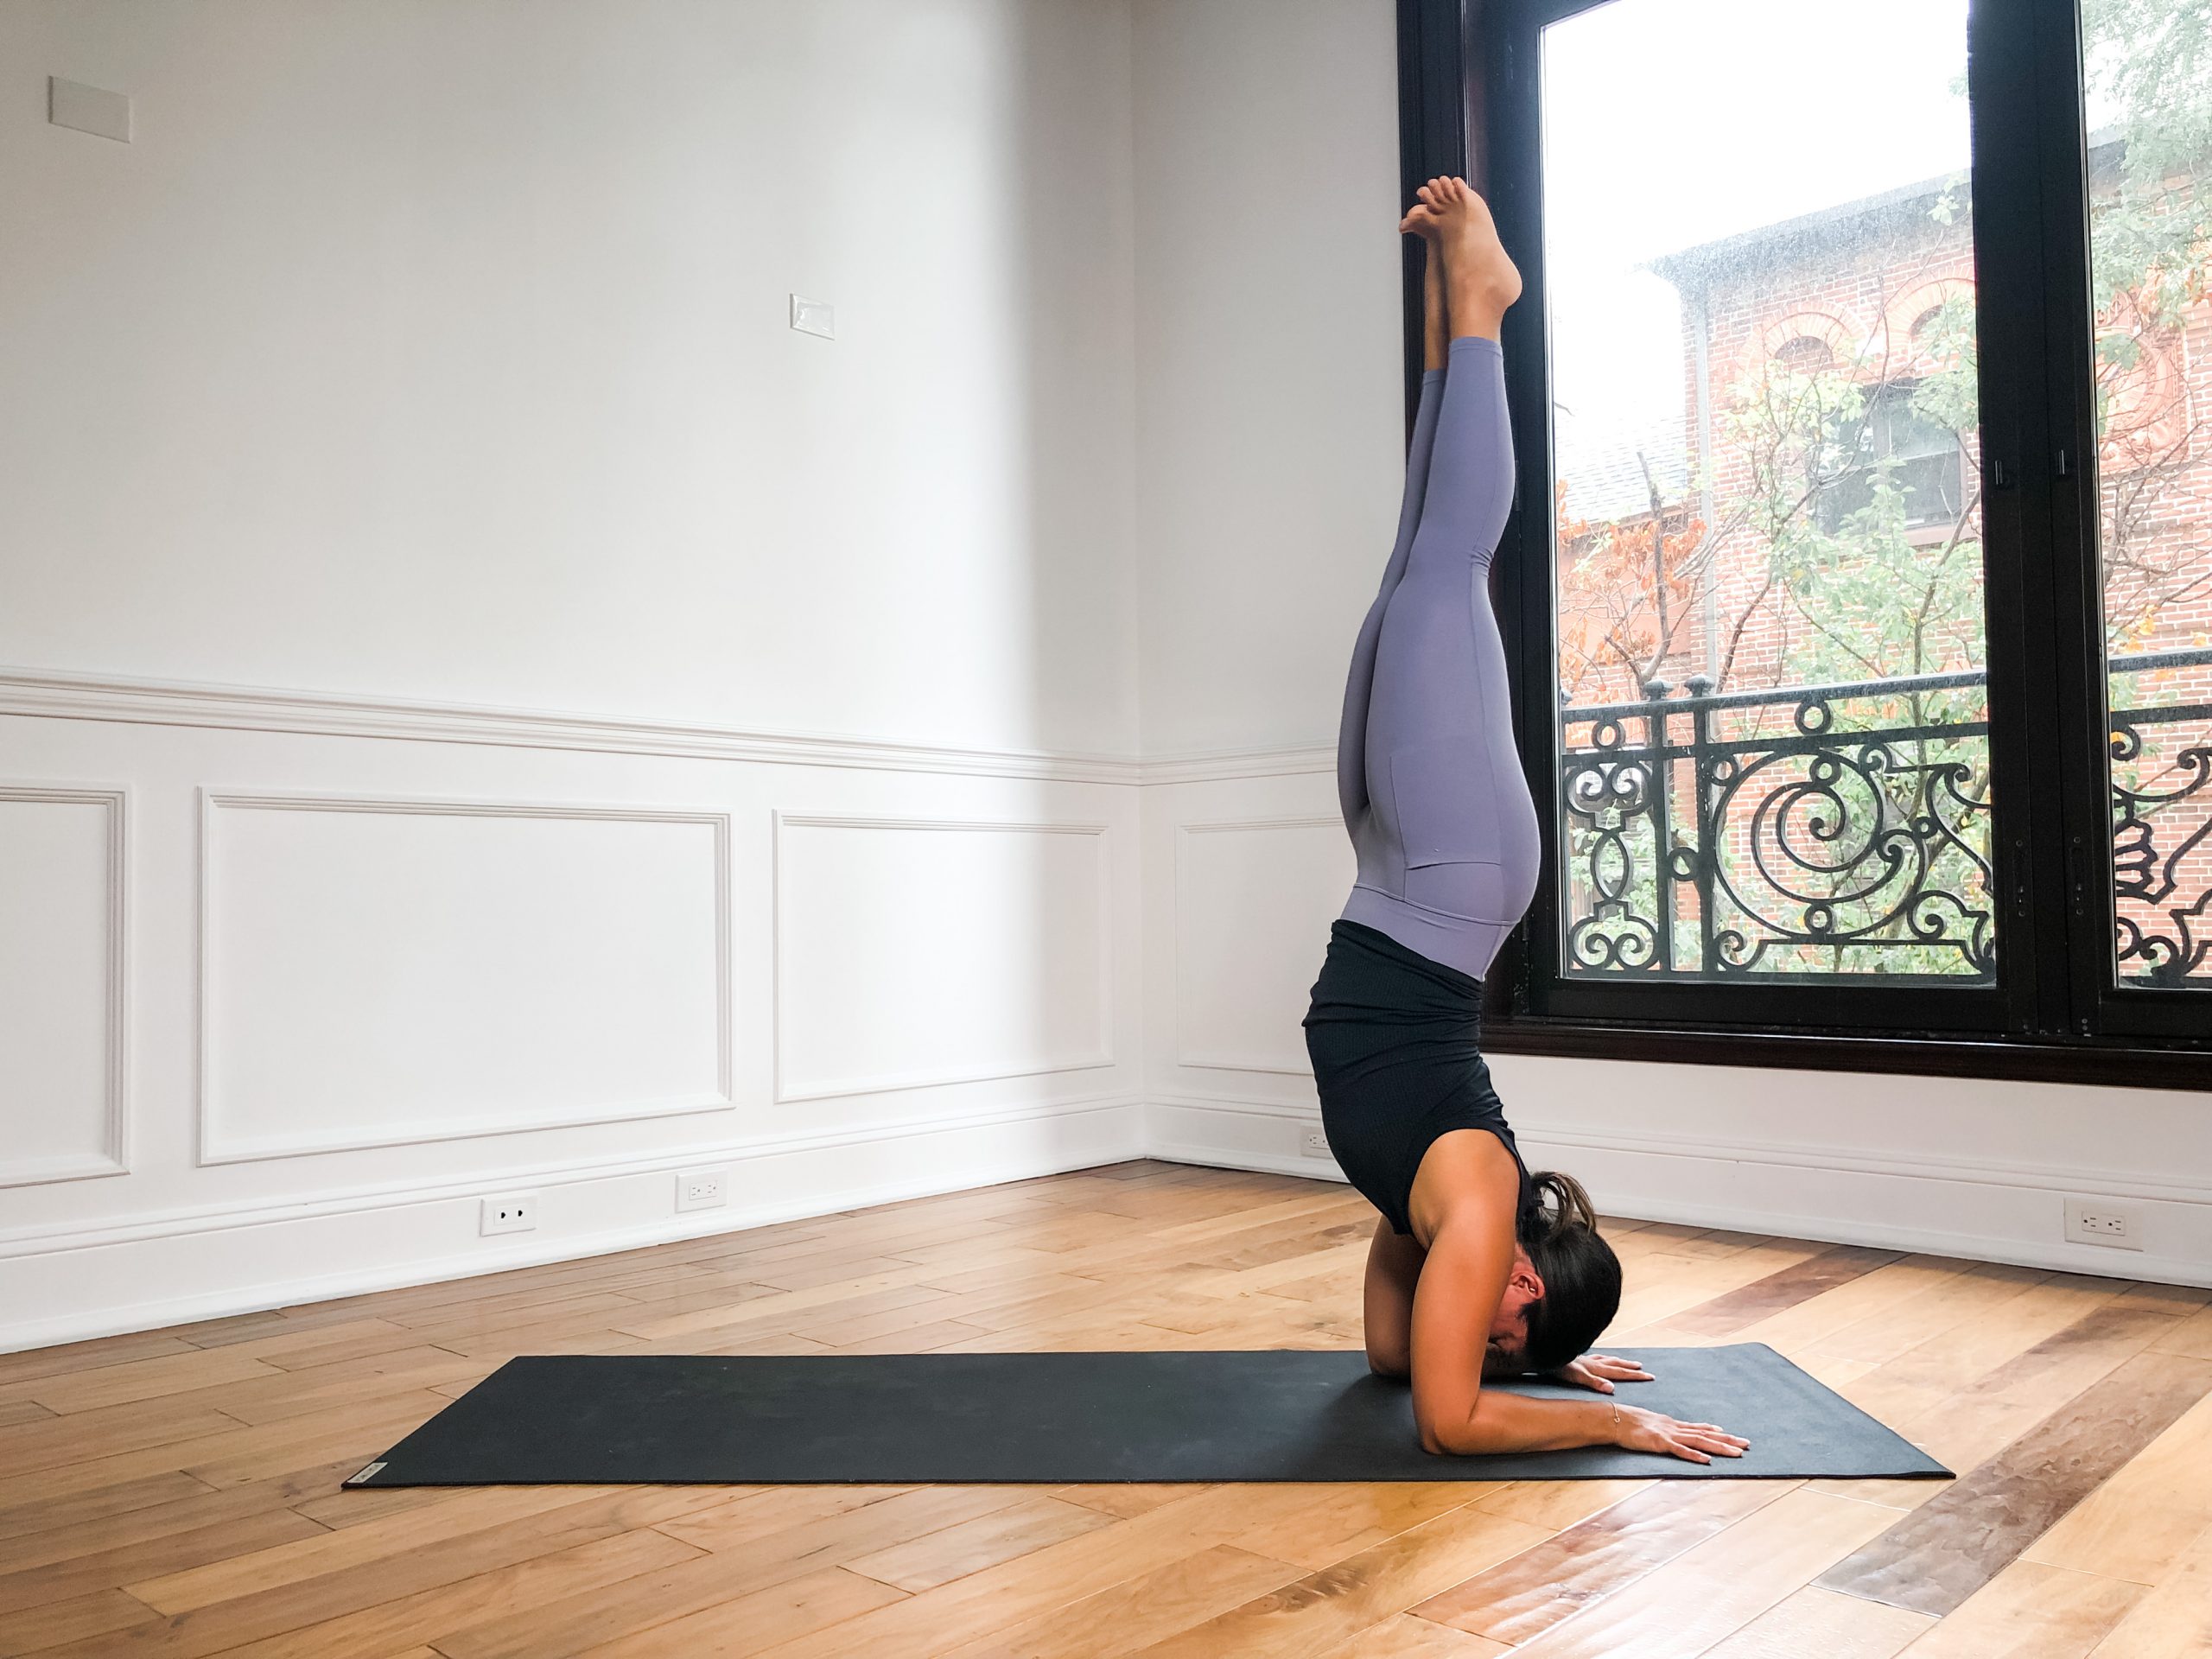
And finally… Forearm Stand (Pincha Mayurasana)

How to:
- Come to sphinx pose as described in supporting pose #1.
- Then, enter into a forearm plank by tucking the toes, lifting the legs, pelvis, and belly off the floor.
- Walk the toes in towards the elbows while simultaneously piking the hips towards the sky (like in downward facing dog). Keep the legs sharp and straight while you do this.
- Once you feel like the hips are at the highest point that is within your capacity, lift one leg off the floor. You can consider starting by lifting your non-dominant leg as you’ll be kicking off the floor with the dominant leg.
- Gaze between your thumbs as you bend the bottom leg just enough to push your lower body off the floor and towards the sky. If you are against a wall, bring your top heel to the wall and then bring your bottom heel to meet it. If you are in the middle of the room, you can use the split leg position to find a pelvic position that allows you to balance upside down.
- Eventually, bring the legs together, flex and spread the toes, tone the thighs as you reach the balls of the feet up towards the ceiling.
- Pull the front ribs in and firm the sacrum in (probably could have done this a little better for the picture!), and allow the head to drop between the arms.
- To exit, start by lowering one leg to the floor followed by the other and land as quietly as you can manage.
Interested in learning more about forearm stand? We have a course for that. 🙂
Sources: The Yamas + Niyamas by Deborah Adele