When I think of the 4 facets of general wellness – physical, mental, emotional, and spiritual – in the past I have often had trouble “defining” what it means, to be spiritually well.
As I have embarked deeper and deeper into a journey of self-realization, which includes gaining awareness and contributing effort towards all categories, I have found myself defining my level of spiritual wellness by how connected I feel.
How connected I feel to myself.
How connected I feel to the environment.
How connected I feel to source.
Everything, I have realized, comes back to source which everyone might define differently. Someone may say fate, another may say God or Vishnu, and someone else may say the Universe or the Divine. But there seems to be an agreement that there is a higher power which exists and that we all emanate from. It’s from this source power where everything begins and dies and from where everything ultimately exists. And so being connected to source means being connected to what is.
When we are connected to source, we are connected to all the possibilities and frequencies within the present moment.
Source is always present and it is always available for us to plug into. Whether we choose to plug in or not is up to us.
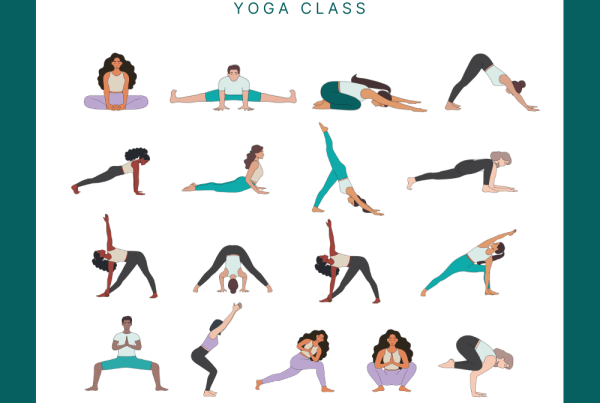
I prefer to start in the physical realm and work inwards from there. So doing any practices which can get us into our bodies in order to embark on a deeper journey. Practices such as Yoga, exercise, dance, or anything of the nature can help us to step into ourselves so that we can participate in the quieter practices of mindfulness and meditation to take our mental and emotional bodies to another level in preparation for our overall spiritual journey.
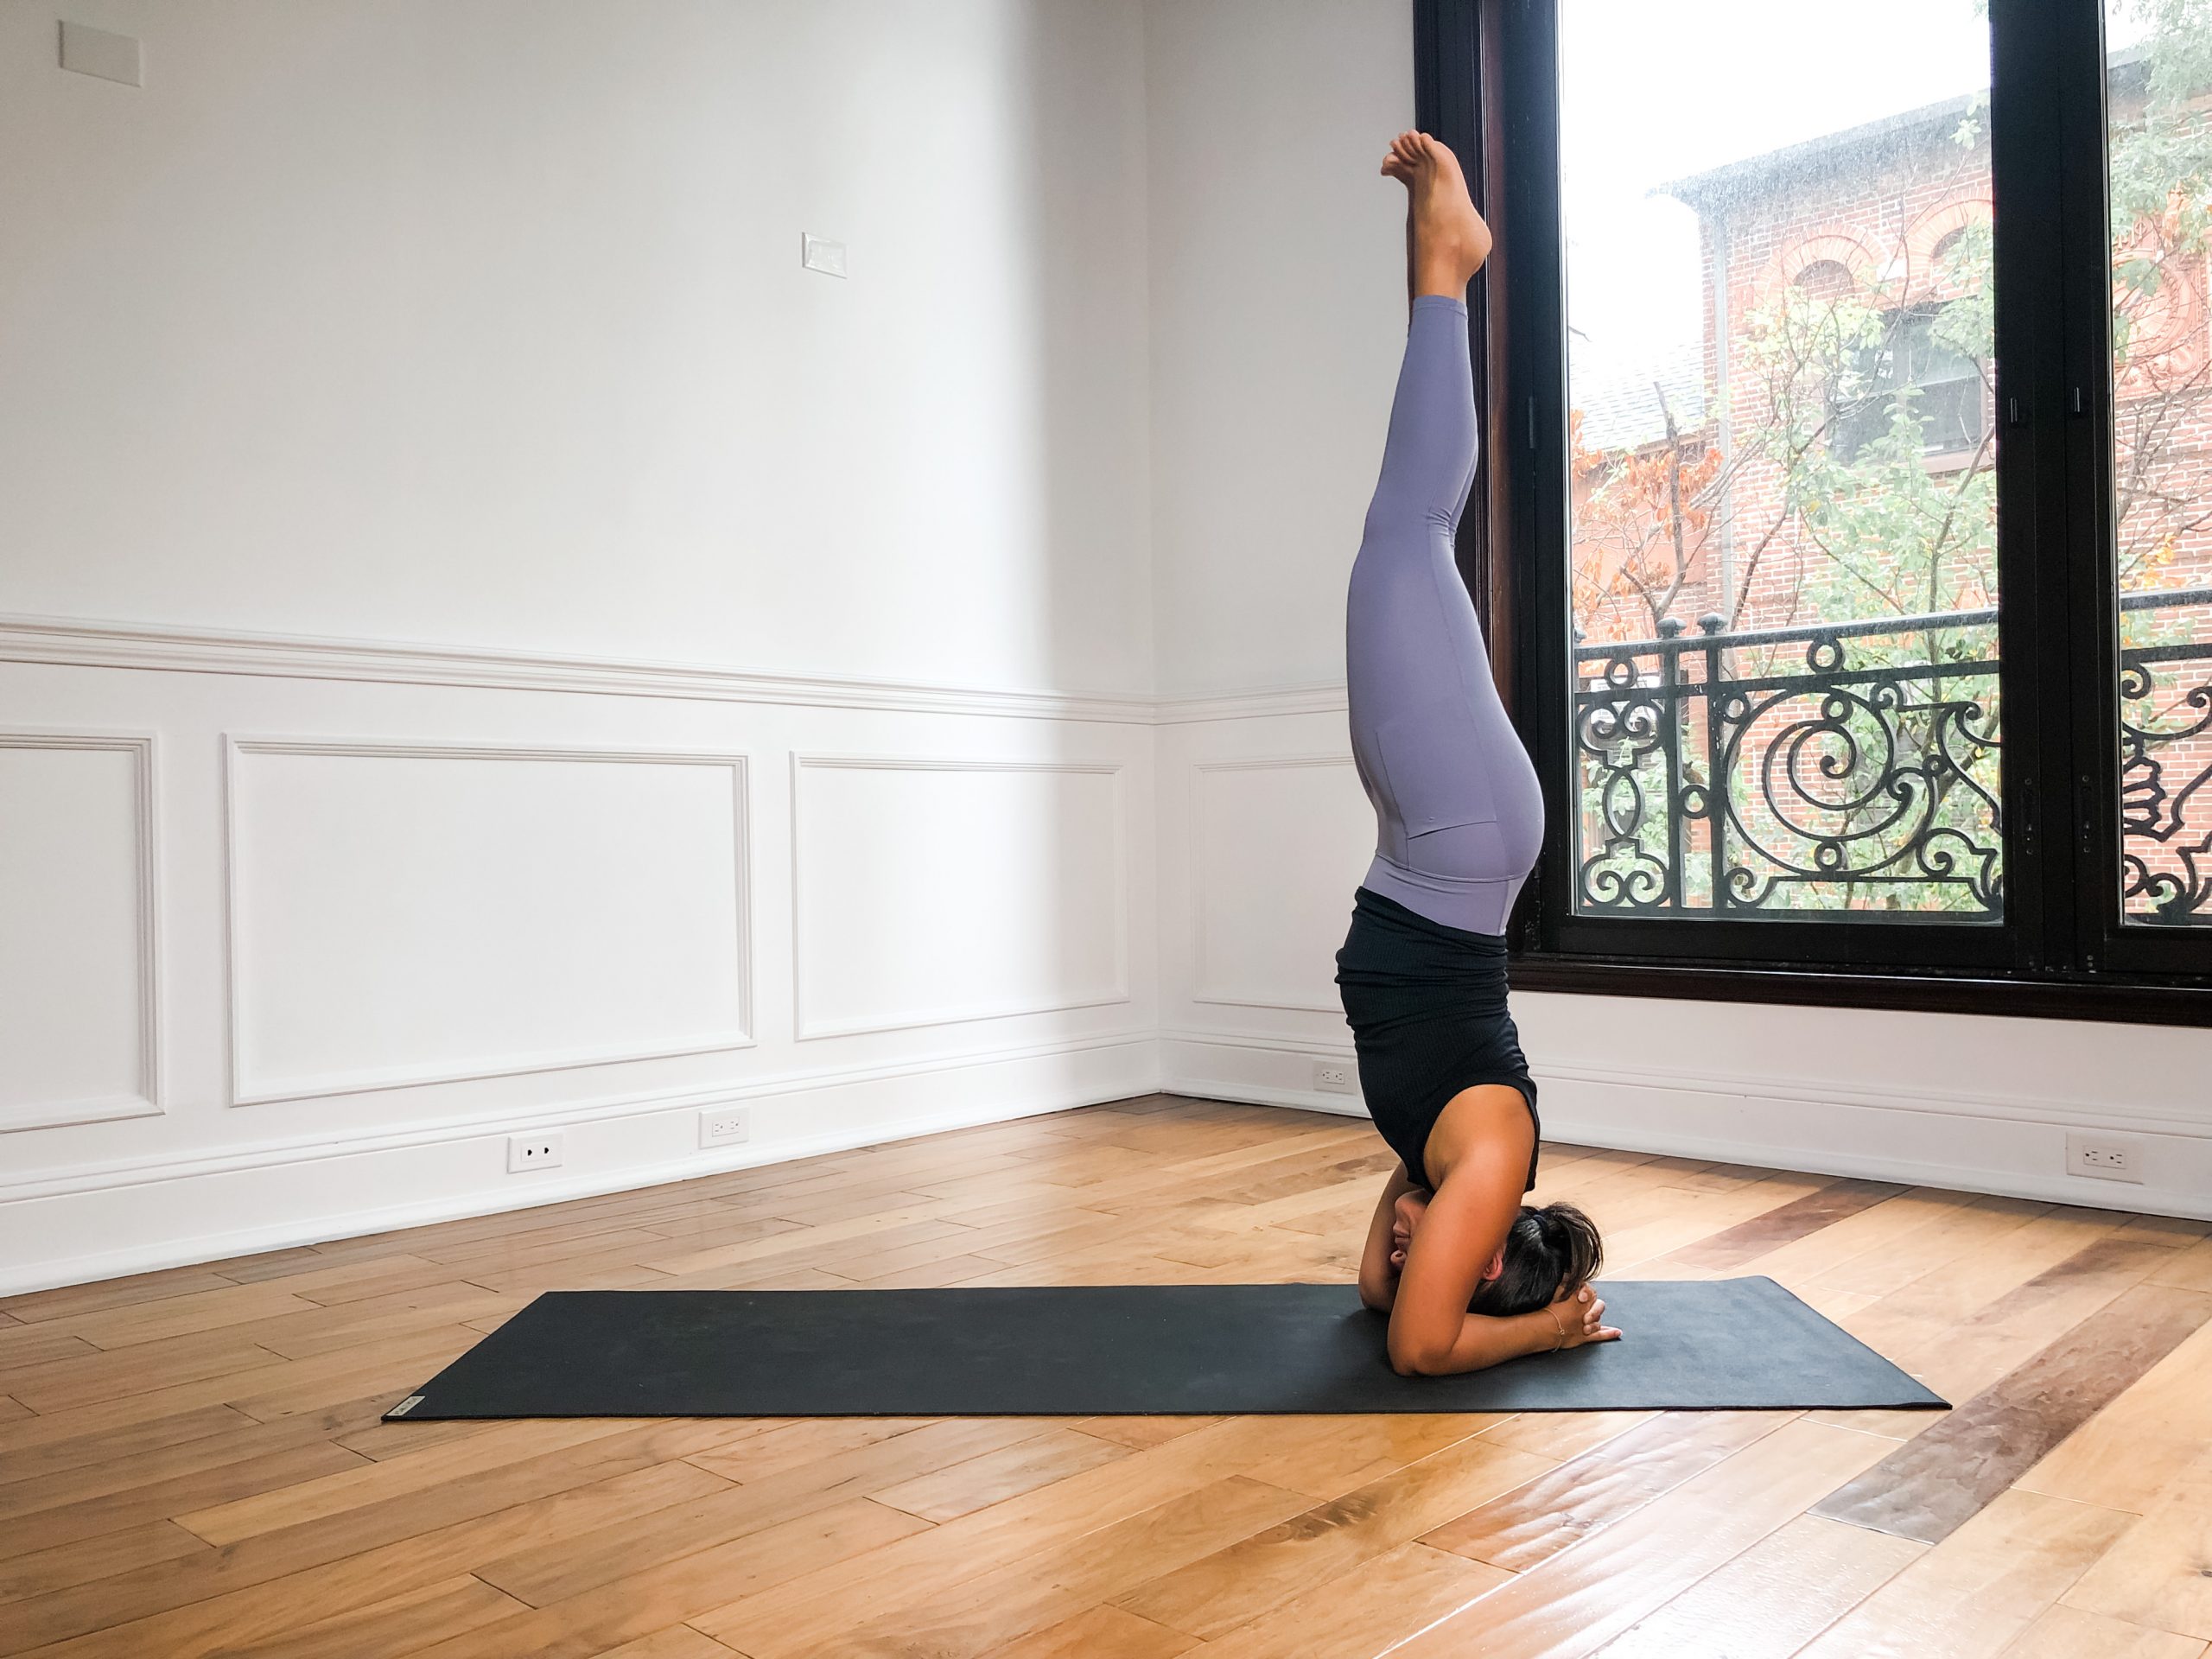
Headstand seems like a clear choice when talking about connection to source (at least to me). This pose brings the crown of the head down to the ground, which is the location of our 7th chakra aka the chakra dedicated to connecting to source. Also, it’s an inversion that requires consistent practice overtime for the practitioner to bring everything together to float the legs up towards the sky.
Supporting Pose 1: Wide Pyramid (Parsvottanasana)
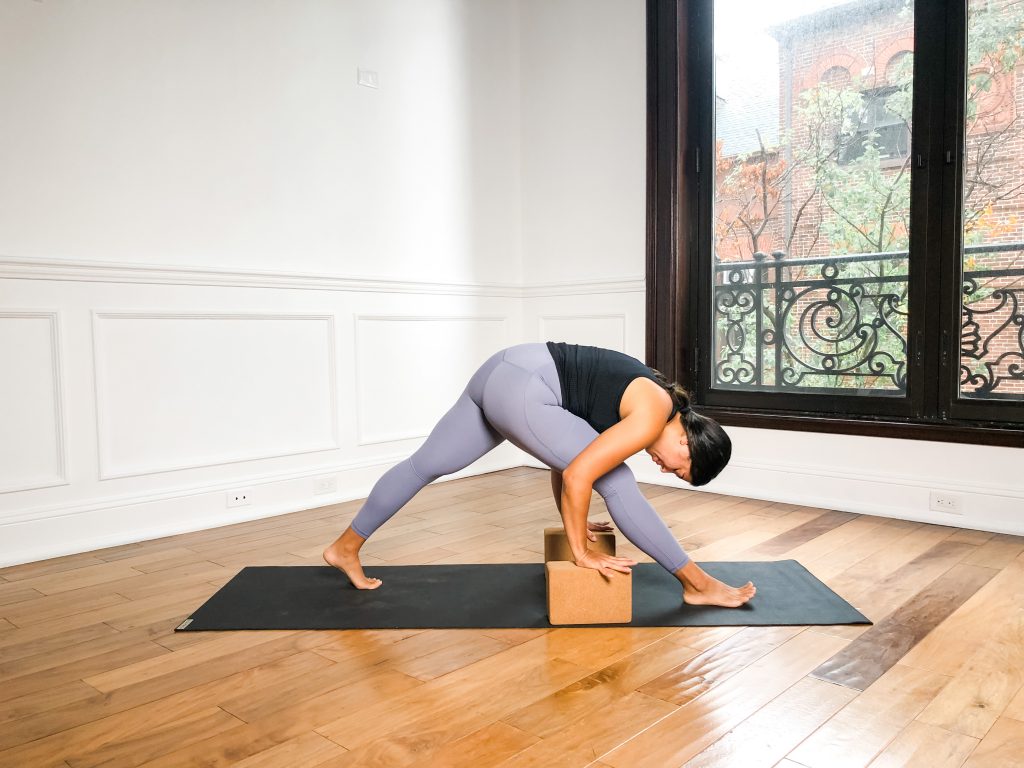
Pyramid is a great pose for learning to ignite the legs in order to fold and bring the crown of the head down. In headstand, the practitioner needs to engage the leg muscles to reach the feet towards the sky. The legs are also straight. Pyramid gives us the opportunity to practice 2 straight, engaged legs and has the head going down but with the feet on the floor.
How to:
- From low lunge, place the hands around the front foot. Place the hands on blocks if you’re reaching to touch the ground.
- Straighten the legs.
- Lift and spread the front toes (just the toes, keep the ball of the foot down) and lift the kneecaps up while pressing the back thigh towards the back of the room.
- Keep lifting the fronts of the thighs as you fold to bring the nose towards the front knee.
*This is the wide variation with the back heel lifted. This makes it a bit more accessible to keep the sides of the pelvis in one line. Teaching the traditional version with the heel down would also be appropriate.
Supporting Pose 2: Half-Moon (Ardha Chandrasana)
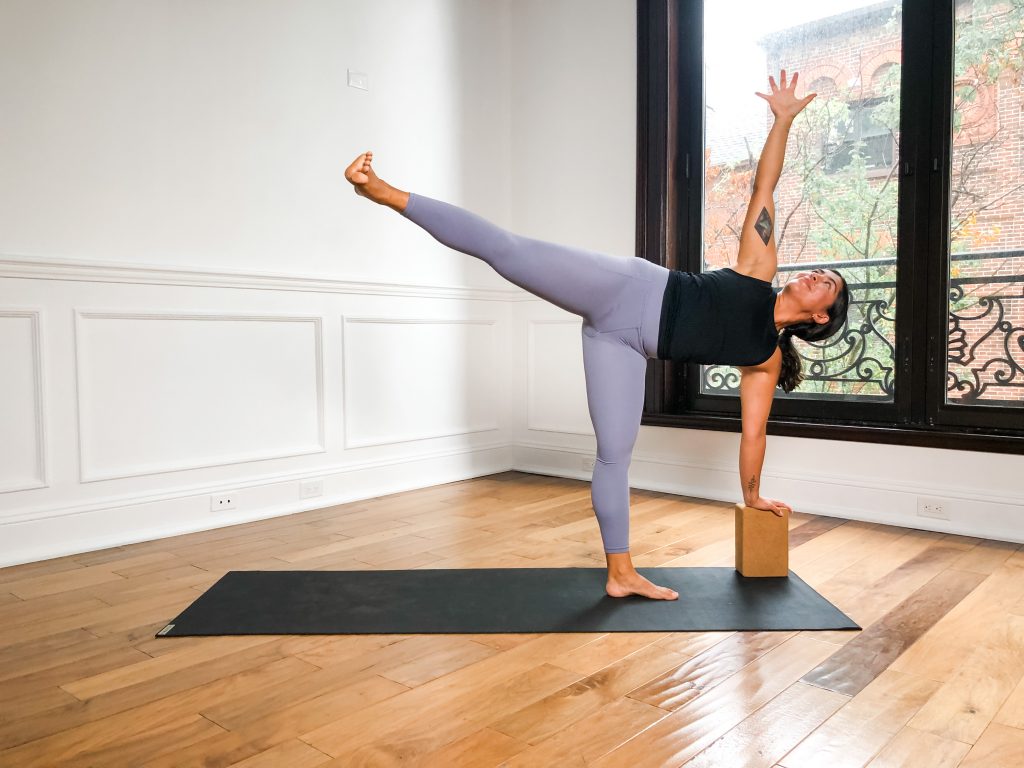
I love half-moon for headstand because the practitioner is given the opportunity to practice 2 straight and engaged legs, but now one leg is in the air – great for headstand prep! The contrast between the two legs (meaning one on the ground and one in the air), can serve the action in the top leg which now has no feedback from the ground. So the practitioner can get used to engaging the leg even without solid ground beneath it.
How to:
- From triangle pose with the right leg forward, soften the front leg to shift the torso forward over the toes.
- Place the right hand onto the ground or block. Attempt to have your torso be more or less parallel to the floor, meaning if you’re diving down to take your hand to the floor…use a block.
- Lift the back foot off the ground and as you take the weight into the right leg, straight the leg by lifting the kneecap and pressing the thigh back.
- Reach your left foot to the back of the room. Spread your toes and reach the ball of the foot back, as well as engage the front of the thigh.
- Take your top arm to the sky and roll your belly to the side wall.
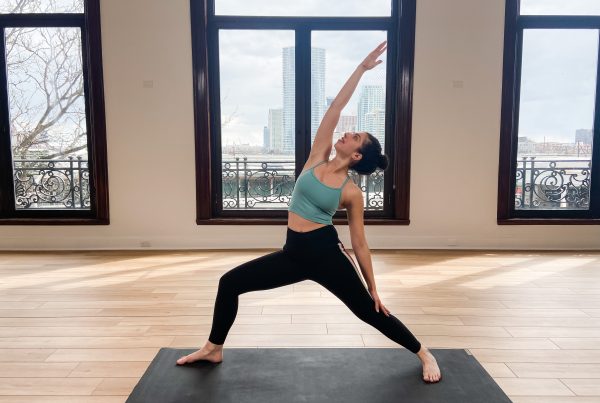
Supporting Pose 3: Warrior 1 (Virabhadrasana I)
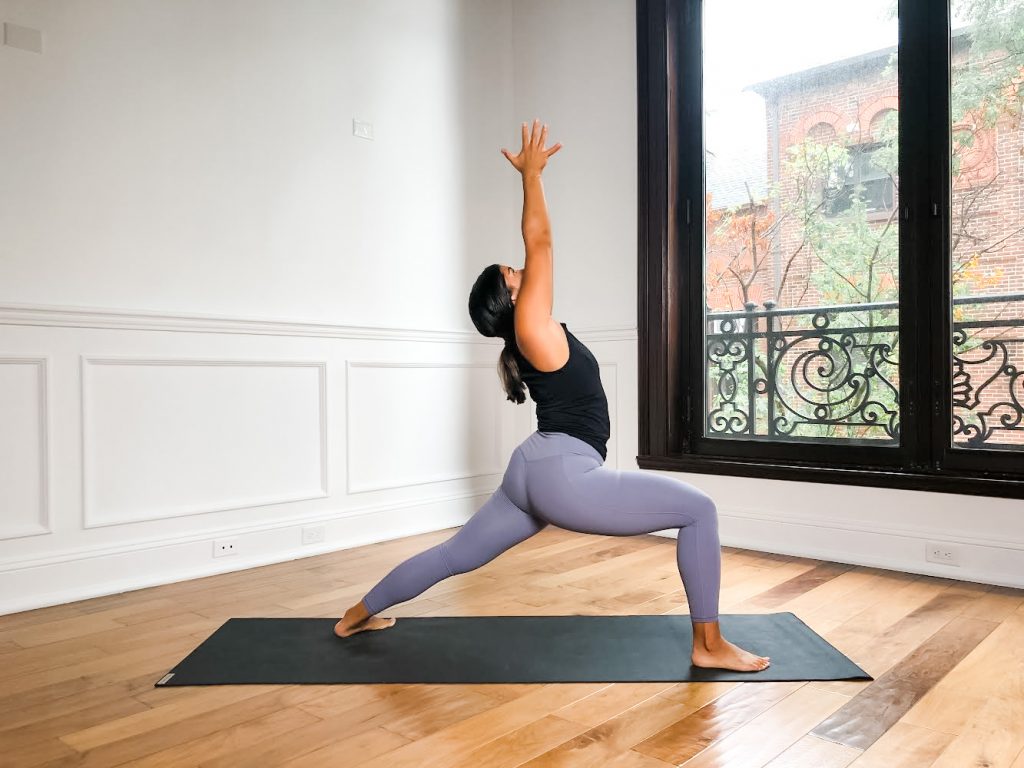
Warrior I is a great prep for headstand because the back leg is very clear and straight, which is something that has been a focus throughout this sequence. The arms are also reaching up so that space in the torso is created. This is good because when in headstand, we are to reach the toes up to the sky to keep the torso long. Lengthening the spine/torso is a bit more accessible with the feet down and arms up, so better to practice here first.
How to:
- From downward dog, step the right foot forward by the right hand.
- Place the back foot to the ground with the heel placed on the floor at an angle. You can place the feet wider than a high lunge stance for better foundation.
- Bend the right leg at 90 degrees and as you press the shin forward, press the left thigh towards the back of the room. While you press the leg back in space, keep the thigh muscles engaged by lifting the kneecap.
- Reach the arms up towards the sky. Bring the palms together and as you lower the hips, reach the arms up and stretch the space between the ribs.
Peak Pose: Supported Headstand (Sirsasana A)
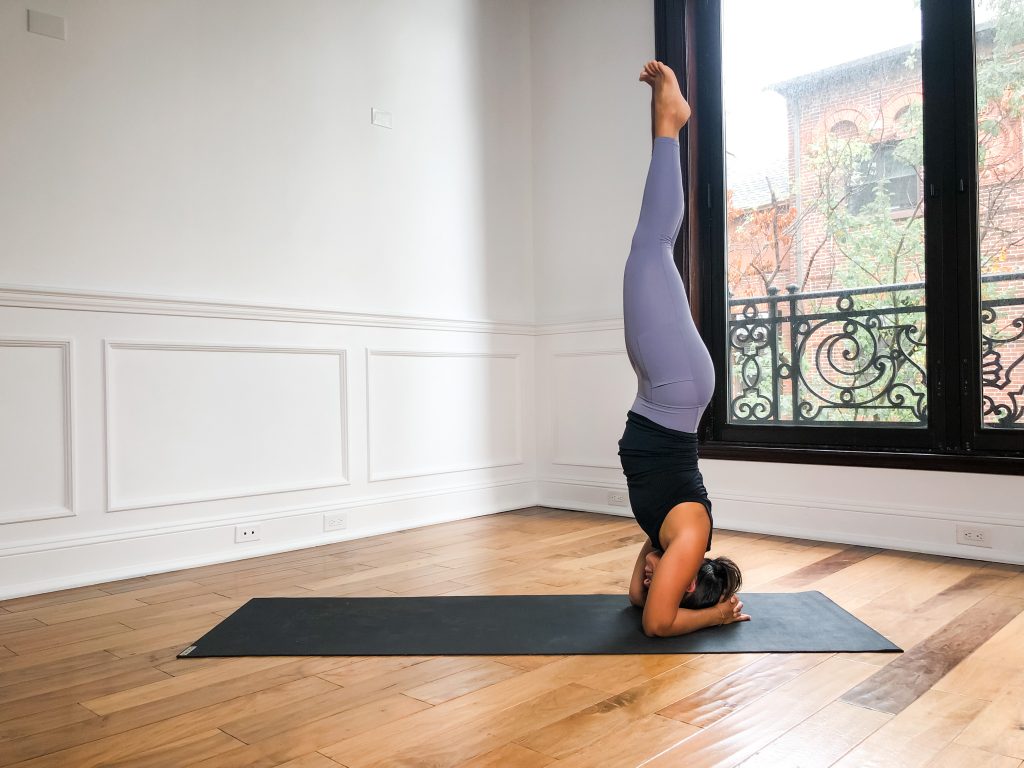
Headstands are great for relieving tension and engaging the core.
How to:
- From a table top position, bring your forearms down to the ground and clasp your hands. You can release the pinkies forward so the bottom one is not getting smushed.
- Place the crown of your head onto the floor with the heels of your hands nestled to the back of the skull. Some people like the palms of the hands flat to the skull, I prefer the palms to be loosely closed with only the heels of the hands connected to the skull.
- Tuck the toes, lift your knees, lift the hips, and straighten the legs. The head will start to take on weight. Press the crown of the head down into the ground. Think about keeping the cervical spine long
- Walk the feet in so the hips are at their highest point and almost over the shoulders.
- Take one leg up towards the sky. Spread the toes, engaged the thigh muscle, and KEEP THE LEG STRAIGHT, ENGAGED, AND CLEAR.
- Use the lifted leg to shift the pelvis over the shoulders and float the other leg towards the sky. Use a wall if you are starting off. Eventually, it should actually feel like the bottom leg is “floating” to meet the top leg.
- Bring the legs together. Spread the toes. Reach the balls of the feet up. Engage the thigh muscles and use the legs to go up.
*Start by using a wall or a partner to practice taking the legs up. If at anytime, you feel the spine (especially the cervical spine) being compressed, come down and rest.