Astavakrasana, which is translated as eight angle pose, is named after Astavakra, a sage that was cursed at birth to be born with 8 bends or angles in his body. Despite his physical disabilities, Astavakra became a great scholar and spiritual teacher. He was appointed the preceptor of King Janaka, who was the father of Sita (the perfect wife). His curse was later lifted, and his body straightened, as his prowess grew after defeating a court scholar in a philosophical debate.
The pose is a complex and challenging arm balance, and as its name suggests, consists of 8 bends in the body – the wrists, elbows, hips, and ankles. As with all arm balances, they require a mix of mental focus, concentration, and coordination. Additionally, Astavakrasana physically requires spinal extension and rotation, scapular abduction, elbow flexion, hip flexion and adduction.
As you can imagine, sequencing for Astavakrasana needs to account for all of the different actions required to work on the pose. This is a sequence that needs to be put together thoughtfully and mindfully to give students the best chance for success.
In this sequence, poses such as Chaturanga Dandasana teaches spinal extension and elbow flexion. Warrior 2, extended side angle, and child’s pose, prepare the body for the deep bend of the knee required to get the leg over the shoulder. Poses like Gomukhasana and Garudasana allow for scapular abduction. Lastly, spinal rotation is accomplished in revolved side angle and Ardha Matsyendrasana. All of these poses together prepare the body for the work necessary to practice this complex and challenging pose.
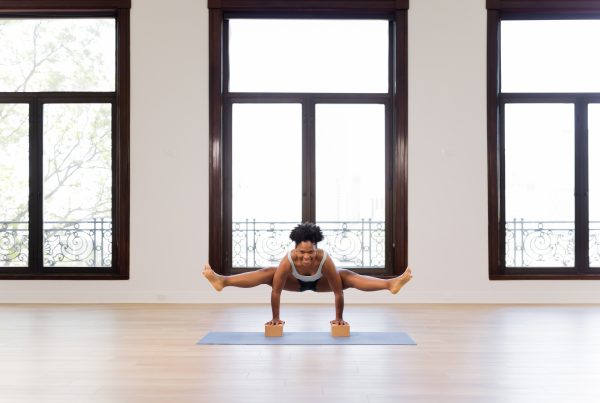
By now, you should be ready to work on Astavakrasana. Remember, especially when working on arm balances as challenging as Astavakrasana, that the essence of yoga is in the journey and the effort, not in the result. Start seated in Dandasana, bend one leg fully and slip it over your shoulder (*pro tip – as long as you get the leg above the elbow you are in good shape). Squeeze that thigh in towards the midline. Cross your opposite ankle over your bent leg. Press your palms down into the earth and lift by straightening your arms. From here, squeeze your thighs together and straighten them around your arm. Bend your elbows straight back and pull your chest forward. Stay for a few breaths. Come down and try the other side.
Since we worked so hard getting to Astavakrasana, it is important to take your time winding down. We start with Bharadvajasana which is an open twist which should feel good at this point. From here we move through bridge pose, shoulderstand, and finally towards final relaxation… Savasana.
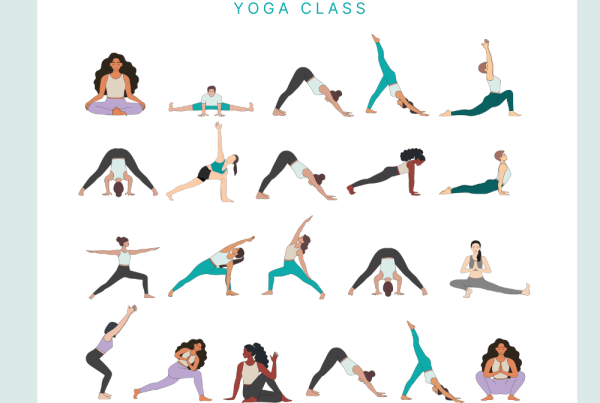
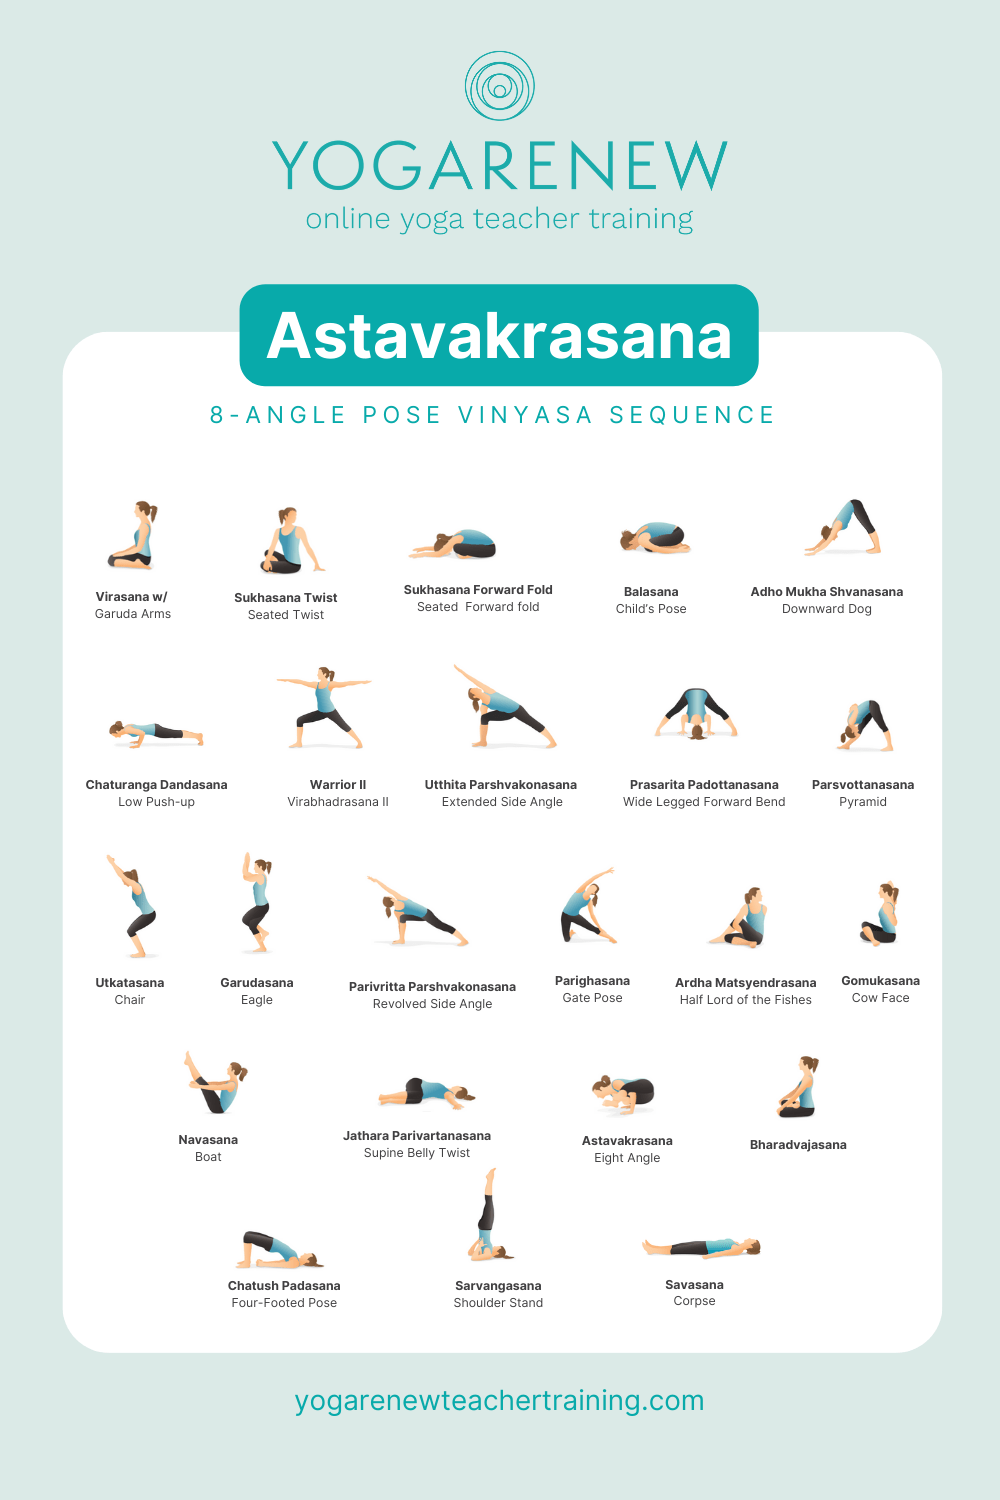
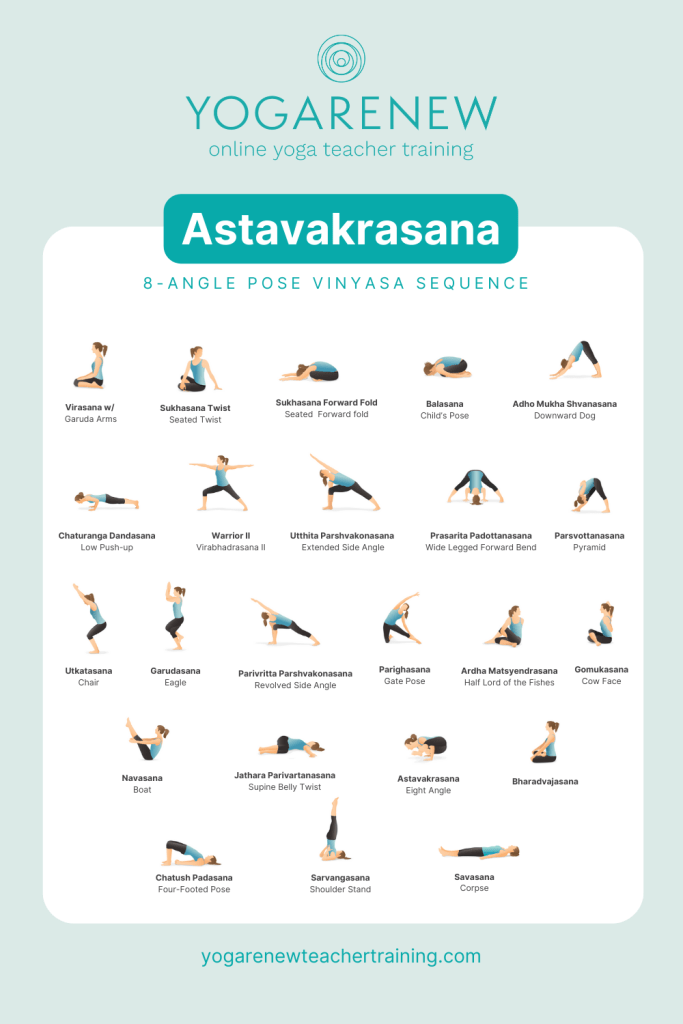
Here’s the full sequence pose by pose (broken out into specific sections based on YogaRenew sequencing):
Puttering/Warm-Up:
- Virasana w/ Garuda Arms
- Sukhasana Twist
- Sukhasana Forward Fold
- Child’s Pose
- Downward Dog
- Chaturanga Dandasana
Standing Poses:
- Warrior 2
- Extended Side Angle
- Prasarita Padottanasana
- Parsvottanasana
- Utkatasana
Balance Pose:
- Eagle Pose
Standing Twist:
- Revolved Side Angle
Seated Poses:
- Gate Pose
- Ardha Matsyendrasana
- Gomukasana
Abdominal Poses:
- Navasana
- Jathara Parivartanasana
Peak Pose: Astavakrasana
Wind Down:
- Bharadvajasana
- Chatush Padasana
- Sarvangasana
Savasana
This is the full, downloadable PDF of the poses used in this class:
If you want more in-depth vinyasa sequences like this along with teaching notes + tips on how to cue them, enter your email below to grab our FREE guide: