There are so many different styles of yoga that ultimately stem from the same place and deliver (generally speaking) very similar benefits. In this article, we will discuss everything there is to know about restorative yoga and what makes the practice so inherently supportive and restful, while still allowing the body to stretch and find different shapes.
The origins of restorative yoga
Restorative yoga was pioneered by one of the most influential yogis in history: B.K.S. Iyengar. As a child, Iyengar faced illness regularly which had a profound impact on the rest of his life. He set out to discover new ways that yoga could heal which lead him to experiment with scraps of wood, ropes or other household objects. Today, we use props like this is nearly all yoga classes.
Judith Lasater studied under Iyengar and was instrumental in bringing Restorative Yoga to the west. During the process we are actively trying to relax the body. Lasater is the one who coined the phrase ‘active relaxation’ to describe what is going on during this practice.
What is restorative yoga?
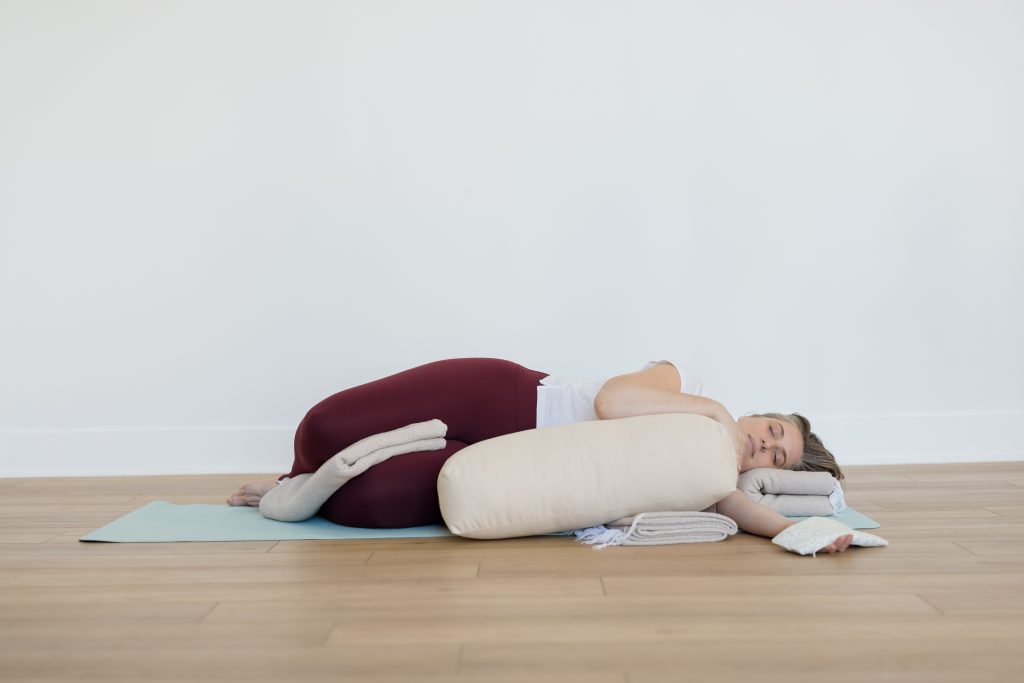
Restorative yoga is a type of yoga where the body is heavily propped up by use of yoga props. Restorative yoga generally tends to require most of the commonly used yoga props, including:
Bolsters
Blocks
Straps
Blankets
Eye pillows
It is a deeply relaxing practice where a fair amount of work is still taking place. Although the body is supported by props, the muscles are learning the imprints from how the props are supporting them, helping the practitioner to find a deep, restful stretch that might otherwise not be obtained. Restorative yoga is just that… restorative. The key to the practice is its ability to activate healing processes within the nervous system through “active restoration.”
It allows the body to find spaces in shapes that are rejuvenating and formative; it is a great addition to a regular vinyasa or hatha practice and can be practiced any time, any place, utilizing substitutions for certain props if they are unavailable. Restorative postures can be practiced with household items such as:
Pillows
Blankets
Rope/rolled up towels/long pieces of fabric to act as a strap
Books
Sheets
Eye masks
Neck pillows
Practitioners and teachers should understand that restorative yoga is a viable yoga practice for most people, as the utilization of props can make it quite accessible. Restorative yoga is also a great alternative to a more vigorous vinyasa class for those wishing to take things slow and steady. It’s a great practice for people of all ages and can be modified to fit specific wants and needs.
Oftentimes, the yoga practice can kickstart certain reactive behaviors in the body, like crying. It’s important to note that yoga is a spiritual practice that focuses on the self and mental wellbeing — that being said, it can bring up intense emotions. Sometimes the practice can bring about feelings of clarity, joy, happiness, restfulness, and calmness. But the practice can also bring up feelings of sadness, or profound happiness through tears of joy, and even surprising emotions of intense gratitude or release that also sometimes are expressed through crying.
What are the disadvantages of restorative yoga?
There aren’t a great deal of disadvantages to any yoga practice, lineage, or genre of yoga. There are certain factors that should be considered when taking up a yoga practice or even trying restorative yoga for the first time, but there aren’t really any disadvantages from taking or teaching a restorative yoga class.
Most people came to relax, so really allow yourself to relax
It’s usually a quiet, cozy environment
The teacher will be clear but offer a lot of modifications so you can tailor the practice to you
There will be a ton of prop usage
The poses will be held anywhere from 2-7 minutes long; any poses with two sides will need time for both sides
Some restorative yoga classes are paired with other healing modalities like reiki or acupuncture (you can politely decline if this is the case and you’re not into it – the teacher will accommodate you)
Here are some things to be mindful of when teaching a restorative yoga class:
Keep a steady pace – since the class moves a bit slower, it’s important to be intentional of how you’re having students utilize their time
Keep extra props handy – some students may need extra support
Try to keep your voice at an audible yet calming level
Check in with your students – if you see someone struggling or uncomfortable, ask them if they need help
Allow them the freedom to explore the posture – meaning, leave time to linger without saying anything (some of the deepest work is done in silence)
Give a full Savasana – even though the class is restful, they should still feel there is a foundational yoga asana proponent and Savasana is where the effects of class start to take place in the body & mind
Who would benefit from restorative yoga?
There are many benefits from restorative poses, including enhanced overall sleep health, nervous system regulation, mental and emotional clarity, muscle relaxation and support, and it promotes a healthy circulation of breath throughout the body.
Almost anyone could benefit from restorative yoga just by giving it a try. It’s a great practice for seniors and people with injuries (although anyone injured should consult a doctor before attempting any yoga practice). Even kids can practice restorative yoga and benefit from it. Yoga studios benefit greatly from having a monthly, biweekly, or even weekly restorative yoga class, as it can be an essential way to decompress after a long week at work or after practicing more rigorous yoga asanas or other fitness activities.
As mentioned earlier, Iyengar developed restorative yoga as a practice for healing. Its slow, relaxing pace and gentle postures provide a signal for our body to activate our parasympathetic nervous system. Aside from that, the purpose of restorative yoga is the same as any yoga practice… to get you to be fully present. A third function is to have the props create an imprint on your body in certain postures so that your muscles can get used to being in those positions for long periods of time. This creates muscle memory that will facilitate the body getting into the poses in the future, whenever they are practiced.
Restorative Yoga Practices Near Me
Many yoga studios offer a restorative practice as a longer, workshop-style class if it’s not already a regular class on the schedule. Reason being, restorative classes tend to be a bit slower-paced and because the poses are held for longer and use so many props, there’s a significant amount of time spent setting up the space and moving the props between postures. Typically, a restorative yoga class will be anywhere from 75-120 minutes. The amount of time in each pose will differ based on the teacher. If you’re looking for an exact description of what class will be like, search, “restorative yoga near me” and check a couple listings on Google Maps to find a studio schedule in your area. Usually studios will list a description next to or underneath the class where you can find the instructor’s name, the duration of the class/workshop, and briefly what to expect.
Restorative Yoga Teacher Training
YogaRenew has an online restorative yoga teacher training that is Yoga Alliance certified. If you’ve been considering teaching restorative yoga or want to expand your offerings as a current vinyasa teacher, then this course is for you! You are able to sign up any time and access it from any device. All materials are able to be printed and downloaded so you can access them at your leisure. Enroll today and start learning everything there is to know about restorative yoga.
Gain access to unlimited yoga classes, workshops, and live-streamed events through the YogaRenew app.
Julie Pasqual is one of the world’s most captivating storytellers. We sat down with her in honor of International Women’s Month to shed light on three goddesses who share the sacred meaning of one. In this workshop, Julie describes at length what the symbolism behind these goddesses are, how they came to be, and how they are celebrated. This blog will provide a brief overview of the goddesses discussed in the workshop and include the introduction video.
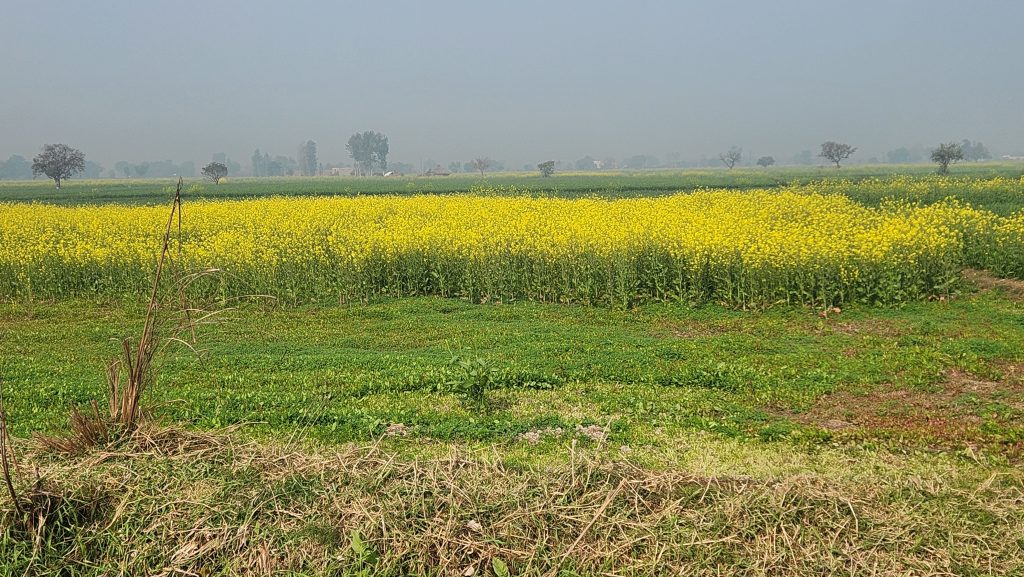
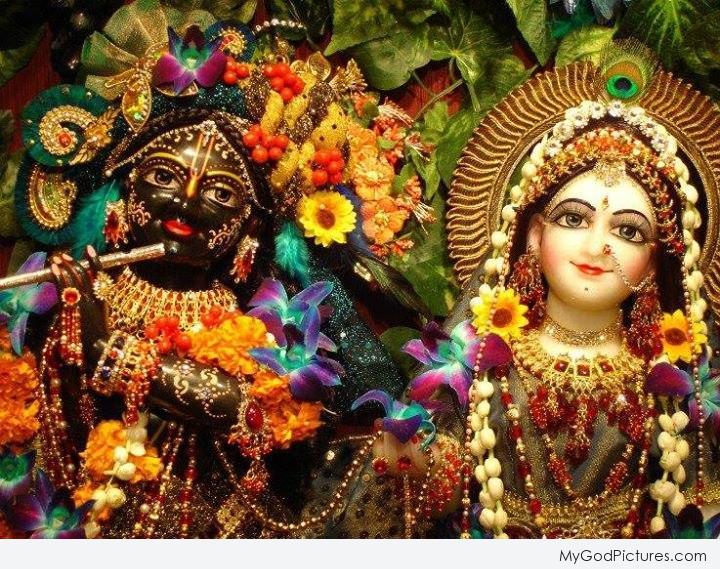
Radha, a Hindu goddess, is known as the very embodiment of love. Mostly found right beside Krishna, Radha is said to be his internal energy and purest representation of the energy of love. It is said throughout the ancient texts that Krishna’s pleasure is her. Radha is the pleasure of true love; but the embodiment of love, not a romantic love like we are mostly used to seeing in texts. Born to a family that really wanted children, she was a child of the divine. Her family wanted a child so badly that they prayed and prayed and prayed until one day, with beautiful lotus eyes and golden skin, they found Radha. In India, there are fields of mustard seed flowers, all golden yellow. This is said to be the beauty of Radha Rani. Radha has many, many names also and can be referred to by any of them — the important piece is that she is recognized as the divine, or Sri Radha.
The mustard seed fields in India that are believed to be the representation of the Hindu goddess Radha (the goddess of love).
Why do we learn about the goddesses?
As we celebrate meaningful months like Black History Month, International Women’s Month, International Yoga Day/Month, etc., we often call to the forefront the very things that help shape these months. For International Women’s Month, we are encouraged to look throughout time to explore all figures that identify as a woman in hopes of bringing forth the joy, celebration, and education that lives behind them.
Deity Radha and Krsna
The goddess Radha is not just a prominent figure in the tale of Krishna, the deity from The Bhagavad Gita (an essential scripture in the yogic texts), but also the true embodiment of love and how women are often portrayed as love, intuition, and sacredness throughout life, even present day. Lastly, there is never any jealousy with Radha, she encourages people to come forth to divinity, humility, and selflessness. By studying the goddesses, we can learn essential information on how to care for one another, how to show up in community, and how to stay true to the calling of devotion and love.
Hindu goddesses and yoga philosophy
By learning of Radha’s tale, we learn that true beauty comes from within. Radha was an expert at all of her duties: singing, joking, laughing, dancing, because all of her activities were done purely out of love and all of what she does pleases Krishna (pleases the divine).
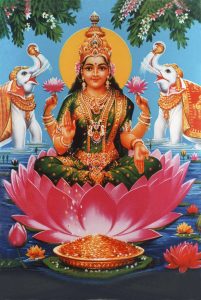
Painting of Goddess Laxmi
Julie mentions in the video above a quote from her teacher, “To love is to please and to please is to serve.” This can directly apply to the yoga practice. By being devoted to our practice and consistently showing up to it (in whatever form you practice – yoga asana, devotional yoga, karmic yoga, etc.), we are devoting ourselves to an act of purity, an act of love.
Julie also mentions the Quakers saying, “When you pray, move your feet,” meaning, when you love, you bring about action, you offer it. This sentiment is often applied to the yoga practice. It is one seen as a wholesome effort of devotion and action. Following the moral guidelines (yama and niyama), we can learn to show up in a pure way that echoes beyond just yoga and ripples out into our everyday lives. It is in these ancient tales and stories of the goddesses that we learn what true devotion really is and why we do it.
Famous characteristics of Radha:
She is considered the most famous of the Hindu goddesses
Affectionate to elderly people
Always makes herself subordinate to her friends (always letting them go first; putting them ahead of herself)
She always has Krishna under her control by pure love
Learn more about yoga philosophy
We’ve just published an entire database of yoga philosophy inspired classes and courses inside the YogaRenew app. Download it today or check out our online yoga teacher training courses to enroll in a course with Julie and explore ancient texts like The Bhagavad Gita and more! These teachings can be applied to your yoga classes as a teacher or for your own personal practice. Thanks for staying connected with us. We’re so happy you’re here!
Every year on March 8th, we celebrate International Women’s Day—a time to honor the progress, strength, and limitless potential of women worldwide.
This day is also a beautiful opportunity for each of us to reflect on what female empowerment means to us as individuals and how we celebrate that as part of a whole.
My definition of “female empowerment” has evolved over the years– and I think a lot of that has to do with how I view myself as an entrepreneur. Being a female business owner is a big part of my identity– and as my approach to business has evolved over the years, so has my relationship to being a woman in business.
My Journey as a Female Entrepreneur
My days at YogaRenew spent researching and engaging with the community!
When I first stepped into the world of entrepreneurship, I carried equal parts excitement and fear. The narrative I had absorbed for years told me that business success required competition, unyielding drive, and sacrifice. It required that I “rise and grind”, “work hard, play hard” and any other taglines that supported the hustle-culture mentality that was and is present in the world of business ownership.
It took time, unlearning, and deep self-trust to realize that there is another way—a way that is heart-centered, sustainable, and deeply fulfilling. And, maybe most importantly, a way that also allows me to be a present mama to my two young children.
Women have historically been taught to shrink, to play small, to seek permission. We’ve been told that we “can’t have it all” but that we “should do it all”.
But I believe that true leadership comes from rooting into our power, from owning our strengths unapologetically, and from supporting one another in ways that create lasting change.
The Unique Strength of Female Entrepreneurs
Women bring something extraordinary to the business world. We are intuitive, compassionate, and collaborative. We see beyond transactions—we build relationships, communities, and movements. Which is truly the essence of the work we do as yoga teachers + leaders. Making a living off of sharing this practice has to be rooted in more than dollar signs, because it requires us to move from our heart first.
And yet, despite all the progress that has been made, challenges persist.
We still face pay gaps, limited access to funding, and the expectation that we balance it all perfectly. But what gives me hope is seeing the incredible shift happening. More women are stepping into leadership, more women are claiming their worth, and more women are choosing to build businesses that reflect their values rather than traditional models of success.
Leading from a Place of Abundance
One of my core beliefs—one that I infuse into every business venture I’m a part of—is that business should feel aligned. That financial success and fulfillment are not mutually exclusive. That when women make more money, they have more power to create positive change, both in their own lives and in the world around them.
There is no one-size-fits-all approach to success, and the beauty of female entrepreneurs is that we are redefining what it looks like every single day. We are choosing to lead with intuition, to market with authenticity, and to operate with deep integrity. We are choosing collaboration over competition, flow over force, and faith over fear.
We’re deciding that “full-time” work can be less than 40-hours per week so we can be there to pick up our kids from school. We’re deciding that it’s ok to say “no” to things that may offer a nice paycheck because we’d rather choose something that feels good so we can create space for something even bigger to come our way.
We’re believing that we can do things differently even if “that’s not how people do it”– because maybe it hasn’t been the way it’s been done before, but if it’s up to us– it’s how things are going to be done going forward. And I for one am no longer interested in fitting into what’s been done in the past. I’m much more focused on how I can shape the future– for my life and, most importantly, for my daughter.
A Constant Source of Inspiration
So many women have paved the way for the opportunities we have today. From trailblazers in entrepreneurship to mentors who have shown me what’s possible, I am endlessly inspired by the women who refuse to accept limitations.
Women like Sara Blakely, who built Spanx from the ground up with a dream of helping women to feel more confident, proving that you don’t need outside funding or approval to create a wildly successful business. Women like Brené Brown, who champion vulnerability and remind us that true leadership is about courage, not perfection. Women like the countless yoga teachers, wellness entrepreneurs, and creatives who make up the YogaRenew team, who are showing up, serving their communities, and doing work that truly matters.
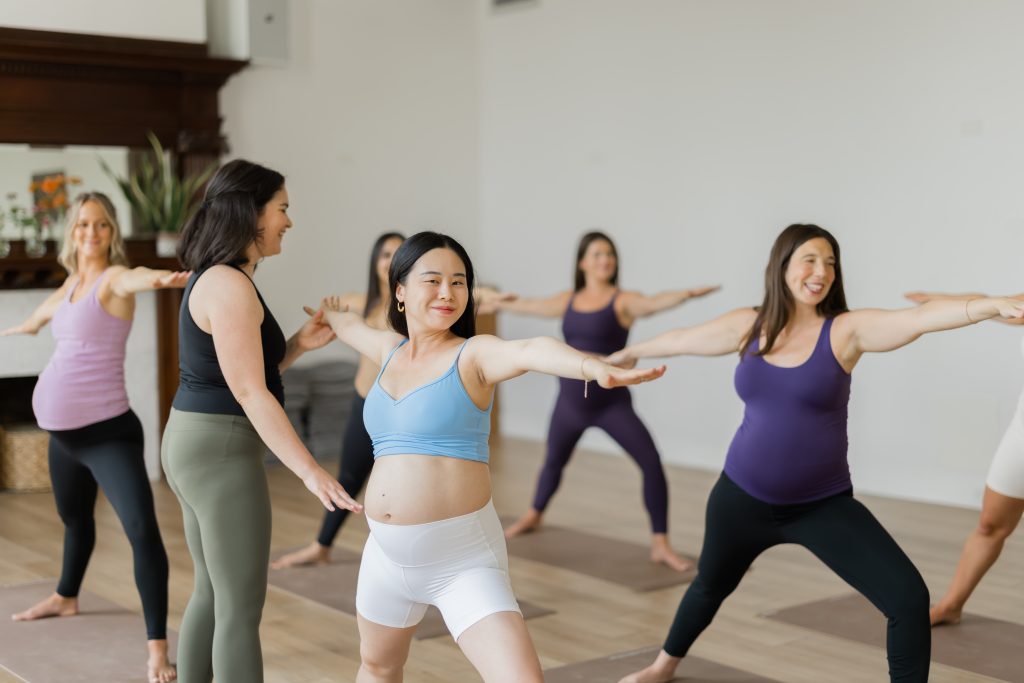
A woman-led prenatal yoga class with YogaRenew’s Prenatal expert, and my fellow boss lady friend, Mélie Purdon
How We Can Support Women in Business
This International Women’s Day, I invite you to take action—not just to celebrate women, but to support them in real, tangible ways. Here’s how:
Amplify Women’s Voices: Share and support the work of women-owned businesses, authors, and leaders in your industry.
Invest in Women: Whether it’s purchasing from women-led brands, hiring female coaches and mentors, or funding women entrepreneurs, every dollar is a vote for the kind of world we want to create.
Stand Up for Women: Speak up for your colleague who’s afraid of getting chastised for staying home when her baby is sick. Give a shout out to your incredible coworker in front of the leadership team for the amazing work she’s done. Make sure the women around you are heard and seen– we’re stronger when we do it together.
Mentor and Uplift: If you’re further along in your journey, extend a hand to those just starting out. The path is easier when we walk beside each other.
Embody Confidence and Abundance: As women, we set the tone for the next generation. When we show up fully, claim our worth, and pursue our dreams, we create permission for others to do the same.
A Future Where Women Thrive
I believe in a future where women don’t have to choose between success and joy. Where business is built on integrity, impact, and financial empowerment. Where we rise together—not despite our femininity, but because of it.
So today, I celebrate you—the woman reading this who is chasing her dreams, building something meaningful, and rewriting the rules. Your voice matters. Your work matters. And the world is better because you are in it.
Happy International Women’s Day. Let’s keep rising—together. I love you.
Happy Black History Month! This month sparks much conversation, some filled with excitement and celebration, others met with resistance and ridicule. When I think about Black History Month, I always go right back to middle and high school. Every February, my school would put up posters in the hallways featuring Langston Hughes, Frederick Douglass, Maya Angelou, and other influential Black figures. I recognized their names and faces, but I didn’t know their stories, their lives, their work, or their contributions to the world. Growing up, Black History felt like names and posters—but the depth of their achievements, the celebration of their art, inventions, literature, and stories of resistance were missing. The education was missing.
Years later, I came across a photo of Josephine Baker. She was striking a pose, one leg turned out, one hand on her hip, the other raised above her head. It immediately reminded me of Tree Pose. Inspired, I placed her photo side by side with one of myself in the same yoga posture. That single moment sparked something greater. It became a way to honor those who came before me, those who paved the way for the freedom and opportunities I enjoy today. That one image led to a larger project that continues to evolve, not only through photography but through storytelling.
The faces I once saw only on posters became people I truly knew. Their stories amazed me, inspired me, and gave me the courage to step out on faith as I pursue my own dreams and goals. Today, I’m excited to share images from my Black History & Yoga series, highlighting leaders in Black history, some well-known and others whose stories deserve more recognition. Through their journeys, we gain a deeper understanding of resilience and triumph.
And through yoga, we can embody those same qualities, strength, determination, and perseverance.
Black History is one part of our collective history. When we embrace all of history and celebrate the contributions of those who came before us, knowledge becomes power.
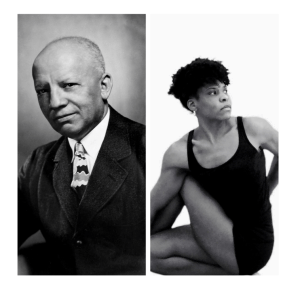
Celebrate Through Yoga: Ardha Matsyendrasana I (Half Lord of the Fishes Pose)
Dr. Carter G. Woodson devoted his life to education, not just as a means of sharing knowledge, but as a tool for empowerment. While attending university, a professor told him that Black people “had no history.” Woodson’s response was firm and clear: “No people lack history.” He recognized the deep connection between the exclusion of Black historical narratives and the racism and oppression Black people faced. He also understood how this absence in education could instill a sense of inferiority among Black people.
Determined to change this, Woodson made it his life’s work to illuminate the contributions of Black people throughout history, not just for the benefit of Black communities, but for the enrichment of all people. In 1926, he introduced Negro History Week, choosing February to honor the birthdays of Abraham Lincoln and Frederick Douglass, two pivotal figures in American history. Fifty years later, this week expanded into Black History Month, officially recognized by President Gerald Ford.
But for Woodson, Black history was never meant to be a separate category. He believed history should reflect the full story of humanity, stating:
“What we need is not a history of selected races or nations, but the history of the world, void of national bias, race hate, and religious prejudice.”
Twists help us wring out tension and create space for renewal. This pose, named after the sage Matsyendra, reminds us of Woodson’s impact, turning the tide of history, shifting perspectives, and bringing forth greater clarity and awareness. Just as we turn in this pose, we, too, can turn knowledge into action.
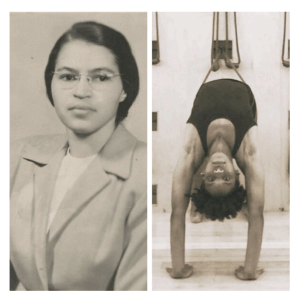
Celebrate Through Yoga: Urdhva Dhanurasana (Upward Bow Pose)
Most of us know Rosa Parks as the woman who refused to give up her seat on a segregated bus, but the real story is even more powerful. On that day in Montgomery, Alabama, Parks took her seat in the first row of the “colored section,” exactly where she was permitted to sit under segregation laws. When the white section filled up, the driver demanded that she and three other Black passengers move. Three complied. Parks did not. Instead of immediately refusing, she quietly slid from the aisle seat to the window seat, making room, but this still wasn’t enough. When ordered again to stand, she firmly said, “No.”
I had always thought she was sitting in the “whites-only” section. I had always believed she simply did not get up. Learning the truth made me realize something deeper, sometimes, we can be exactly where we’re supposed to be, doing exactly what is right, and still face criticism, judgement, or opposition. But that doesn’t mean we should back down. Parks’ quiet defiance teaches us that standing firm in our truth, even when others try to push us aside, can create lasting change.
Like Rosa Parks’ act of courage, this heart-opening backbend requires both preparation and determination. It can feel challenging, even impossible at times. But the shape of the pose, a bow, reminds us of the strength found in persistence. When we step into our power, we bend but do not break, creating space for transformation.
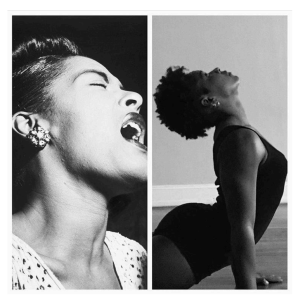
Celebrate Through Yoga: Urdhva Mukha Svanasana (Upward-Facing Dog)
In Lady Sings the Blues, Billie Holiday wrote:
“I’ve been told that nobody sings the word ‘hunger’ like I do. Or the word ‘love.” Maybe I remember what those words are all about. Maybe I’m proud enough to want to remember Baltimore and Welfare Island, the Catholic institution and the Jefferson Market Court, the sheriff in front of our place in Harlem and the towns from coast to coast where I got my lumps and my scars, Philly and Alderson, Hollywood and San Francisco— every damn bit of it.”
Holiday’s voice carried the weight of her experiences poverty, racism, and personal struggle. She didn’t run from her past; she embraced it. She understood that the hard times, the scars, and the lessons shaped her, and through her music, she turned pain into art.
Her story reminds us that where we come from matters. Even the most difficult parts of our past can become a source of strength, guiding us toward resilience, empathy, and growth. The next time you listen to Billie Holiday, pay attention, not just to the words, but to the emotion behind them. What memories rise within you? How does her voice make you feel? Perhaps she teaches us that no matter how far we’ve come, we should never forget what shaped us.
B.K.S. Iyengar once said that backbends are challenging because we cannot see the back body—we can only feel it. Like Holiday’s journey, this pose invites us to look back, not to dwell, but to acknowledge our past and use it as fuel to move forward.
Celebrate Through Yoga: Bharadvajasana (Seated Twist with Chair Support)
Arturo Alfonso Schomburg was once told by a teacher that Black people had no history, no culture, no accomplishments. Instead of accepting this falsehood, he dedicated his life to proving otherwise. As a historian, writer, and archivist, he built an immense collection of books, manuscripts, and art documenting Black achievements around the world. By 1925, his collection had grown to over 10,000 items, and in 1926, the New York Public Library purchased it, making Schomburg the head curator. Today, the Schomburg Center for Research in Black Culture holds over 10 million items, preserving the legacy of Black history for generations to come.
It is often said, “If Carter G. Woodson was the father of Black history, then Arturo Schomburg was its curator and guardian.” His work reminds us that history is not just a collection of facts, it is alive in the stories we pass down. And those stories, no matter how small they seem, can spark something profound in others.
So I encourage you, don’t stop here. Ask your parents, grandparents, aunts, uncles, or friends about their history. What did their families do? Where did they come from? What shaped their lives? You may be surprised by how much it inspires you.
Like Schomburg’s mission to uncover hidden history, twists help us turn around, shift our perspectives, and release what no longer serves us. This pose, done with the support of a chair, reminds us that transformation isn’t something we do alone, we have support, whether in history, in community, or in practice.
Celebrate Black History Through Yoga
The leaders we celebrate here have shaped the world in ways that reach far beyond a single month or community. Honoring them is not just about looking back; it is about recognizing the threads that connect us all.
When we listen to our parents’ stories or trace the journeys of our grandparents and great-grandparents, whether they came from Africa, Europe, Asia, South America, or beyond, we are uncovering more than names and dates. We are discovering the roots of our own existence, woven into the vast, shared history of humanity. By reflecting on their legacies, we find inspiration to contribute to the world they helped shape, to push forward, to uplift others, and to create a future where generations after us can continue this ever-evolving story.
Practice with Deidra Demens at YogaRenew
Join Deidra each month for Foundations+, a class designed to break down intermediate and advanced poses and practices. This class takes place one Friday a month at YogaRenew. The next session, focusing on Backbends, will be held Friday, February 21st, from 6:00–8:00 PM ET (In Person).
You can also practice with Deidra weekly, both online (on the YogaRenew app) and in person, on Wednesdays and Fridays at 10:00 AM ET.
Financial freedom seems to be at the top of the list of everyone’s manifestations lately… but where does full time yoga teacher fall in that? As a professional fitness instructor and full-time yoga teacher, I have learned what it takes to make the money you seek doing what you love.
I have also spoken with many people who teach full time, who teach part-time, and also those who have dreams of making teaching a full-time career. If you’ve worked your way to this blog post, it’s possible that you’re thinking of making the switch from whatever career you’re in now to being a full-time yoga teacher.
A yoga teacher’s salary can vary quite a lot depending on what they’re teaching, where they’re teaching, experience level, compensation structure and other factors which we’ll get in to below.
Let’s dive in to a little bit of the specifics when it comes to yoga teachers and what they make… Scroll down to read through our blog, or check out our video below:
Is it possible to support yourself as a yoga instructor when you’re just starting out?
Finances are usually one of the first questions to come up when thinking about turning your yoga teaching into a full-time career. I will say that yes, it is possible to support yourself as an instructor in the first stages IF you truly want to. I will also say that the road to making this your full-time career is not a linear, concrete path. You will most likely have to forge your own path, seek out and/or create opportunities, and allow yourself to step outside of your comfort zone to grow your career. I will talk more about this later, but you really have to trust yourself and fully believe that your dream career is possible.
How much do yoga teachers make?
There are a variety of factors to consider when sharing how much money yoga teachers make. A yoga teacher’s salary range can vary wildly based on where you live, what kind of environment you’re teaching in, your experience level, what type of business you’re engaged in, or how frequently you are teaching. Per class it’s typical for teachers to make somewhere between $30-$85 but it could be less or it could be drastically higher. In a corporate setting, yoga teachers can earn $200-$400/hour bringing classes into offices! Below we’ll go into more depth on these statistics, look at different compensation structures, places to teach, and other options for yoga teachers to make money doing what they love.
Classes are likely to be your most consistent form of income, as in, you’ll consistently get paid for the weekly classes you teach. Workshops, yoga retreats, and other similar one-off events will yield a higher profit but generally speaking they are not as consistent as weekly classes. The amount of classes you teach vary from person to person, but regardless if you’re looking to make teaching yoga your full-time career you will have to create other forms of income outside of classes.
What is a yoga teacher’s salary on average?
We can get some more specific information looking at the data available online. According to ZipRecruiter, the national average to get paid as a yoga instructor is $31 per hour. On Glassdoor, the national average to get paid as a yoga instructor is $55,076 per year.
Indeed has a regional breakdown of yoga teacher hourly rates for 2025:
New York, NY: $46 per hour
Brooklyn, NY: $44 per hour
Denver, CO: $40 per hour
Miami Beach, FL: $39 per hour
Austin, TX: $39 per hour
San Diego, CA: $37 per hour
Chicago, IL: $37 per hour
Indianapolis, IN: $36 per hour
There are ranges below these limits and above these limits for which a yoga instructor can get paid. You should familiarize yourself with what the studios pay in your area. A great way to get in the door is by subbing classes. By subbing classes you’ll be introduced to the studio’s payment method which can give you a better understanding of what you could make as a yoga instructor in your area. To better understand these rates and how you can earn more as a yoga teacher, lets look at how studios compensate their instructors.
*Again this varies by region, country, area, etc. These are estimated figures based on geographical data.
How do studios typically pay their yoga instructors?
There are three main ways that studios pay their instructors, here are a few to get familiar with:
Flat-fee
Flat-fee + “bonus per head”
Pay based on “per head” attendance
Space rental
What’s the flat fee I can expect for a yoga class?
A flat fee means that regardless of how many students are in your class, you’ll get paid the same amount every time. If you’re getting paid a flat fee, it’s likely that you’ll get paid somewhere between $30-$70 per class. This depends on where you’re teaching. Studios with less overall membership counts and member visits could mean that you’re getting paid less than a studio with a higher overhead count and more member visits. Another factor is the region where you’re teaching. A studio in a rural area with less member visits and potentially a lower cost of living would mean your pay is less than a studio in an urban area with higher member visits and higher cost of living. The pro for this payment method is that you know what you’re making every time and it’s guaranteed regardless of how many people take your class or who is taking your class. It should be noted that some studios will pay you for your time even if no one shows up, some studios will not. The con for this payment method is that there’s a limit to how much you can make. You could be a talented teacher with a waitlist of students who want to take your class, but you won’t be getting paid for that.
What does it mean to get paid a flat fee with a “bonus per head”?
When getting paid a flat fee with a bonus per head, you’ll receive a flat fee for a particular range of students plus a bonus per head beyond what warrants a flat fee rate. This can vary widely from studio to studio, but you can expect your flat fee to be about $30-$50 with the minimum number of students to guarantee a flat fee being 0-12 students. Some studios will pay you the flat fee even if 0 students show up because you dedicated your time to teaching the class. Other studios will require at least 1 student to show up to guarantee a flat fee. The typical bonus per head is $1-$4. So given the numbers used here, if a studio’s capacity is 30 people and the maximum number of students show up…you would get paid $30-$50 for 12 people showing up, and then $1-$4 for the remaining 18 students per head. The pro to this type of payment method is that you can make a lot of money depending on class size. It can be very motivating to market your classes and get students in the door. The con to this type of payment method is that it can make estimating your profit from the studio a little difficult. If you’re unsure how many students will show up every class, it’s hard to know exactly how much money you’ll bring in. This is also excluding staff members, other teachers, guests, or free trial members who typically do not bring in money for the studio therefore people who fall into these categories will not count as a head but they will take a spot in your class.
What does it mean to get paid based on “per head” attendance?
This means you will get paid based on per head attendance means you get paid strictly on the number of paying members who attend your class. The typical range per head is $1-$4, so if a studio’s capacity is 30 students and you have max attendance you can expect to make somewhere between $30-$120 per class. Again, this is not considering the fact that staff members, other teachers, guests, or free trial members might be taking your class in which scenario it would be unlikely for you to get paid for those people even though they’ll be taking a spot.
What does it mean to rent space?
Sometimes, a studio will rent their space to the teacher and allow them to book their own students. In this scenario, the onus is on the instructor to get enough students into class to earn money – however their earning potential has a little more upside if the rental costs are affordable. In some instances, new teachers might opt to rent space in a gym or other location before opening their own studio to start developing a following. This allows the teacher to operate without the long term commitment of a lease, and they’re able to take advantage of the studio or gym’s infrastructure as well.
What are additional ways to make money as a yoga instructor?
As noted above, the following factors can affect your pay aside from the payment method itself: the location of where you live and work (rural vs. suburban vs. urban), the capacity of the studio that you teach at, and your experience level. This is only considering how much you get paid per class. There are other means to consider to make money as a yoga instructor…
Private clients, workshops, retreats, writing, managerial work, or other administrative work are ways to supplement your earnings from classes as a yoga instructor. In fact, if you’re seeking to make a career out of your yoga teaching, I would say these other forms of income are not just recommended but are necessary. Reason being, if you’re running around trying to make ends meet by teaching classes and only teaching classes, there is a high likelihood that you will burn out, which will not serve anyone. These other outlets are also great ways to broaden your skillset and offerings.
Yoga seeks to guide us towards the highest possible version of ourselves which is situated in peacefulness, love, and surrender. If you ask me, peace is hard to attain when we’re teaching 5 classes every single day with no time dedicated towards ourselves or our loved ones. As a yoga instructor, it’s imperative that you tend to your own practice (which is sometimes hard to do) because that’s the only way we can truly teach with genuine intention and we can only do that with time.
More on the hourly rates…
To create a sustainable career, you must increase what you are making per hour of your time. However you do that is up to you but I can share ways to make up to double or even triple what you would make in a single class.
Private clients: Working with private clients is one of the main ways to create steady income at a higher pay scale. A general range for what to charge for a private lesson is $60-$200. How to determine what you charge requires you evaluate a few factors like your location, availability, target market, etc. Teachers also sometimes develop their own online yoga classes to offer without the need to rent a studio.
Your experience: Your experience 100% needs to be factored in when you are thinking about what to charge somebody. When you are making a transaction with someone, there is an exchange of currency. In this case you are exchanging yoga services for money, meaning if you are brand new to teaching yoga you cannot be charging the same amount of money as someone who has been teaching for years. While you have a lot to offer, you do not have as much to offer yet as it pertains to teaching yoga. As far as integrity goes, you must be real with yourself and your client about what is fair. As you gain experience, knowledge, and overall depth within the practice you will be able to offer much more and can ask for top dollar.
Location: Are you traveling to your client or is your client traveling to you? You have to consider this when thinking about price. In terms of not self-abandoning, you cannot charge the same amount for someone who is within your neighborhood vs. someone who lives an hour away. If you’re traveling a farther distance which boils down to more of your time, you should factor that into what you will charge. If your client is coming to your home, you should also factor that into what you will charge. Like I said before, you have to consider all of the exchanges which are occurring when you make a transaction with someone and there are other currencies outside of money.
Skillset/Offerings: Lastly, you must factor in what is included in the session you are offering? Is it only asana? Or are you bringing sound bowls to incorporate sound healing? Are you reiki certified and will you be offering energy work in addition to asana? Are you a physical therapist and will you be offering manual work for an injury? What’s in your overall package which you will be offering to your clients and what does your client want? This will change what you are charging someone. What you are including in your package could offset an initial reduction in price due to your experience?
Yoga Workshops, Retreats, and Trainings
Workshops, retreats, and trainings can bring in a lot of income. From a single workshop you can expect to make anywhere from $200-$800 depending on how many people attend your workshop. From a single retreat or training, you could make anywhere from $500-$5,000 or more depending on the capacity of your retreat and how many people attend. It’s even hard to put a range on either of these things because it is so dependent on the workshop, retreat, or training itself. But essentially, you can make a lot from these types of events. You can charge a higher amount because of all the planning, prep-work, and actual work that it takes to execute a workshop, retreat, or training. Charging for these types of events can come down to the studio, but you should always be thinking about what your ideal and fair number would be for what you would like to profit in exchange for your energy, time, and resources. Both your clients and you should feel honored and aligned in the exchange that is occurring. If you’re charging top dollar, you must be putting in top dollar work to remain in integrity. You can consider the same aspects here as you would for a private client when thinking about what to charge people.
If you’re interested in learning how to plan, lead, promote and run a yoga retreat, check out this course on How to Lead a Yoga Retreat.
Writing, Managerial Work, and/or Administrative Work
According to ZipRecruiter, a yoga writer can make an average annual salary of $80,647. This also depends on what publication or entity you would be writing for, if you’re in a full-time position or a freelancing position and the area you’re writing for/in.
Upwork and Fiverr are two websites where freelance writers can find work. On Fiverr, writers who specialize in yoga or wellness can earn between $30 and $200 for each article depending on how long it is, and what type of research goes into it. Other sources cite that studio owners can make about $86,000 a year which means that a manager (not an owner) and anyone doing administrative work will make less than that. How much less is hard to say because every studio is different and what someone profits is dependent on what the revenue of the studio is.
Your mindset must support your dream career…
As I mentioned at the beginning of this article, you must believe that your dream career for teaching yoga is possible. You must believe it in every cell of your being because that is what will help you create and attract opportunities and sustainable income. While teaching yoga full-time is becoming more popular, there’s still no carved out path and no guaranteed income amount as you might find within other fields. This means there are unknowns and that is just a fact. In getting ready to transition, it’s important to remain dedicated to your overall purpose and calling. This will help you navigate your newfound path which requires both taking action and surrendering/receiving. Do the work, stay in alignment, and trust wholeheartedly that you can do this and the universe is supporting you.
Oftentimes when I hear people say they want to become a yoga teacher, it is rarely because of the pay. Yet, countless people have made a transition into teaching yoga full-time…and people continue to do so — how come?
At this point in your life, you may be thinking about making the transition and becoming solely a yoga teacher full time. With the pandemic, inflation, rising healthcare costs, and other factors, you may be considering the risks and rewards in doing so. You want to know: How much do yoga teachers actually make?
Before I go any further, I do want to say that it is possible to make teaching yoga your full-time gig. However, you must actually believe that it is possible. It doesn’t matter what I say, or what anyone else says.
You have to believe that you can and you will make this your full-time career.
I say this because you will most likely not create a livable salary (while staying sane) by only teaching weekly yoga classes. You will need opportunities and ideas that are outside of this construct and you may have to take some risks and/or try new things.
The base pay for teaching classes at a studio
The pay for weekly yoga classes varies depending on the studio you are teaching at (size, location, popularity, amount of classes, etc.) and your experience. However, in NYC, pay can generally range from $30-$80 per class. Based on my experience, you’re looking at an average of $40 per class.
Womp womp.
This is not to discourage you whatsoever! In fact, you can use this information to create the life of your dreams and in a very sustainable manner — financially, energetically, and emotionally.
Find what you want to focus on
Ask yourself some questions so you can narrow your focus about what you’re looking for. Instead of just “yoga teacher,” think about something with more purpose and specificity (after all, you want to live the life you REALLY WANT, right?)
Are you looking to work for yourself or are you looking to work for someone else (or another entity)?
What demographic are you interested in working with?
What is it about the yoga practice that you feel most inclined to share?
What is in true ALIGNMENT with YOU? (Yes, this requires some deep work but this is how you’ll attract the opportunities which will lead to your version of your rockstar yoga teacher life.)
Diversify your yoga business
Consider other skills or interests that you’d like to offer for work such as content creation, SEO optimization, administrative work, event planning, studio operations/management, etc.
Think about what skills you currently possess and/or what you enjoy.
Assess how you can add value either to your own brand or to an outside brand by using those skills or interests.
*Fun Note: I started writing blogs for YogaRenew because I enjoy writing, but never had a professional opportunity to practice it. I also wanted to do something else within yoga education that didn’t involve standing in front of a class.
Inform your professional circle
Let others know that you are interested in making a career change and/or if you’re interested in taking on more work.
Word of mouth can attract potential clients, employers, and network connections.
By sharing that you’re interested in making a career change, someone may present an opportunity to you that you hadn’t thought of or someone may love an idea that you have.
Specialize in a specific area of yoga
Create a niche for yourself and participate in specialty trainings and certifications such as prenatal yoga, yin yoga, restorative yoga, anatomy, etc.
Having a specialty separates you from a sea of yoga instructors. You become a point person for specific topics for your students and other teachers.
You become an expert in something, which can lead to increased class numbers and opportunities to lead a training or workshop.
Expand your offerings
Look into coaching, mentorship or further resources specifically geared towards increasing your capabilities as a teacher and/or business person.
Coaching allows you to see where your strengths are and where you can grow.
You can connect with like-minded individuals interested in living their best life.
You can receive support in carving out your personal mission, which will inevitably create the opportunities necessary to achieve it.
Some people have already figured it out, so why not learn from them?
How much yoga teachers make depends on multiple things
Creating your dream career as a yoga instructor is 100% possible, but as you can hopefully see it takes effort. This means that you have to remain steadfast in your practice and in your dreams. You have to stay connected with yourself at all times as this will not only bring in new opportunities, but will help you navigate those opportunities with alignment and integrity. The more you truly believe and trust in yourself to make your dreams happen, the more the universe will catch on and conspire to help you out to fulfill all your dreams on a yoga instructor salary.
Post updated: March 2026
Don't miss a beat! Sign up for our weekly newsletter.
An arm balance in yoga is considered any pose where the foundation is your arms. There are several different types of arm balances within that realm. This article will break down all the different types of arm balances in yoga in a simple fashion. Some you might already be familiar with and some might have you looking at arm balances from a whole new perspective!
Prep Poses for Arm Balances
1. Downward Facing Dog
Getting comfortable on your hands and feet is the perfect way to create a strong foundation for your yoga practice. Emphasizing downward facing dog before an arm balance helps prep the body to build strength in the arms, needed in all arm balance poses.
2. Plank Pose & Chaturanga
Plank and chaturanga dandasana also help build strength in the arms and the familiarity of utilizing the hands as the foundation.
3. Vasisthasana (Side Plank)
Leaning onto one side for side plank, or Vasisthasana is another great way to build arm strength and stability that will be essential in learning any arm balance.
“Flying” Arm Balances
There are several yoga asanas that are named after creatures that fly, and for good reason. The postures can resemble a bird (or bug) about to take flight, or even just a creature that has wings and can spread out. Here are some of the arm balance yoga poses whose Sanskrit names are flying creatures and require you to lift off of the ground.
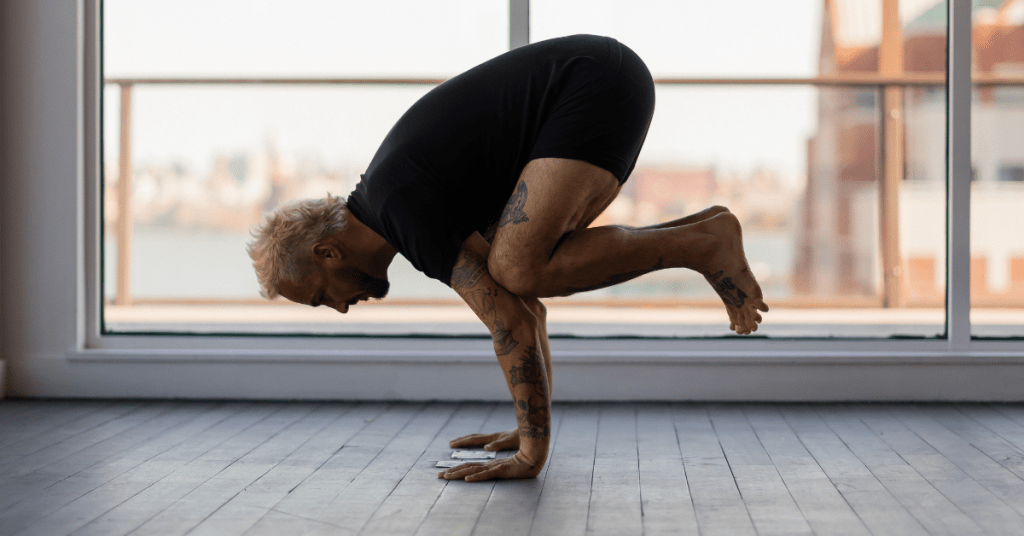
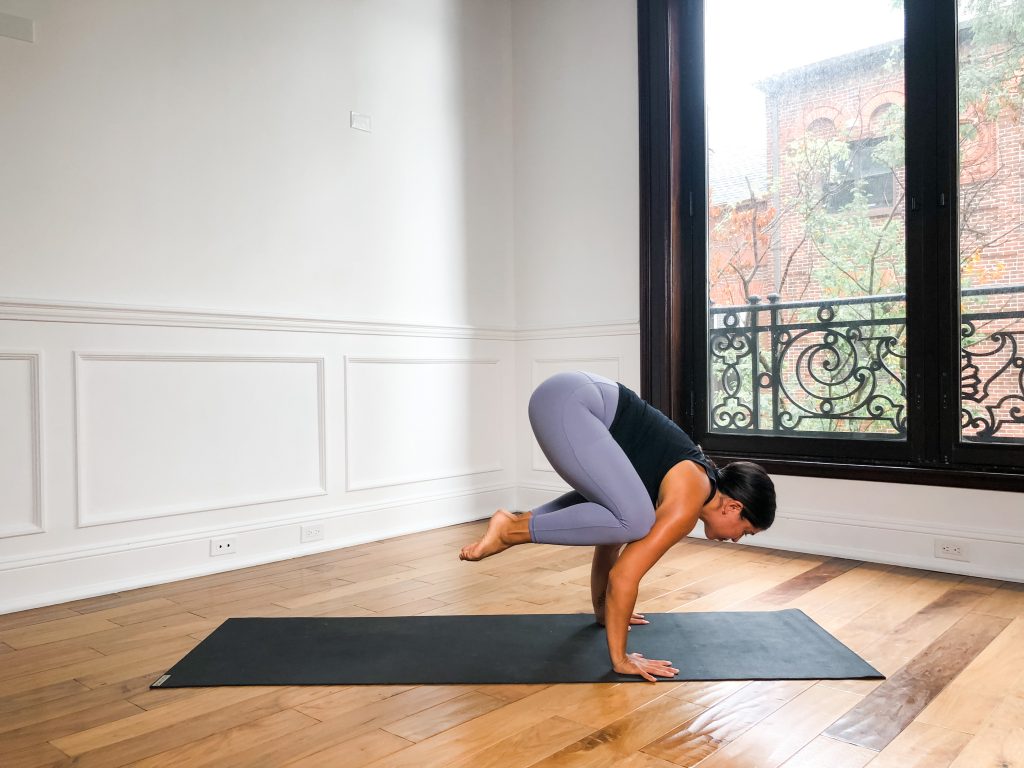
1. Crow or Crane Pose (Bakasana)
Crow pose is done by rounding your upper back and gently balancing your knees up on your forearms. The foundation of this pose is both of your palms and your arms, as you learn to “become light” and support yourself off the ground.
Crow Pose
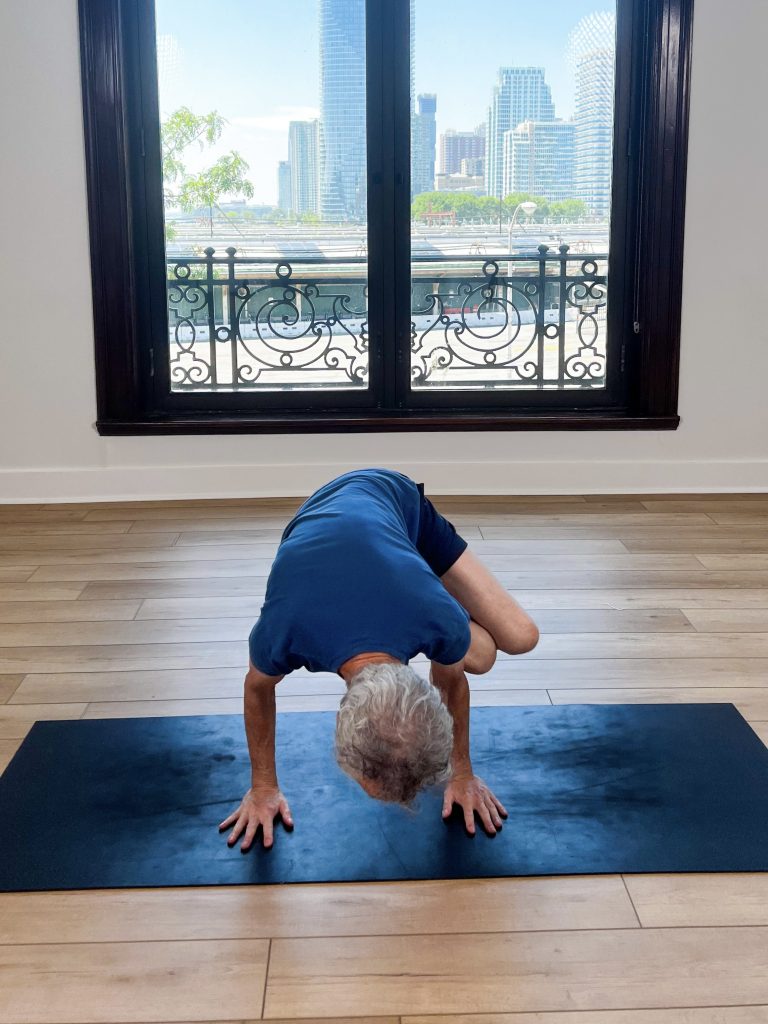
2. Side Crow (Parsva Bakasana)
Side crow is similar to crow but your trunk is rotated. You are still supporting yourself with your arms and hands, gripping the mat and letting your upper back round tucking your knees on your upper arm, but instead your knees stacked on top of one another and torso is turned.
Side Crow
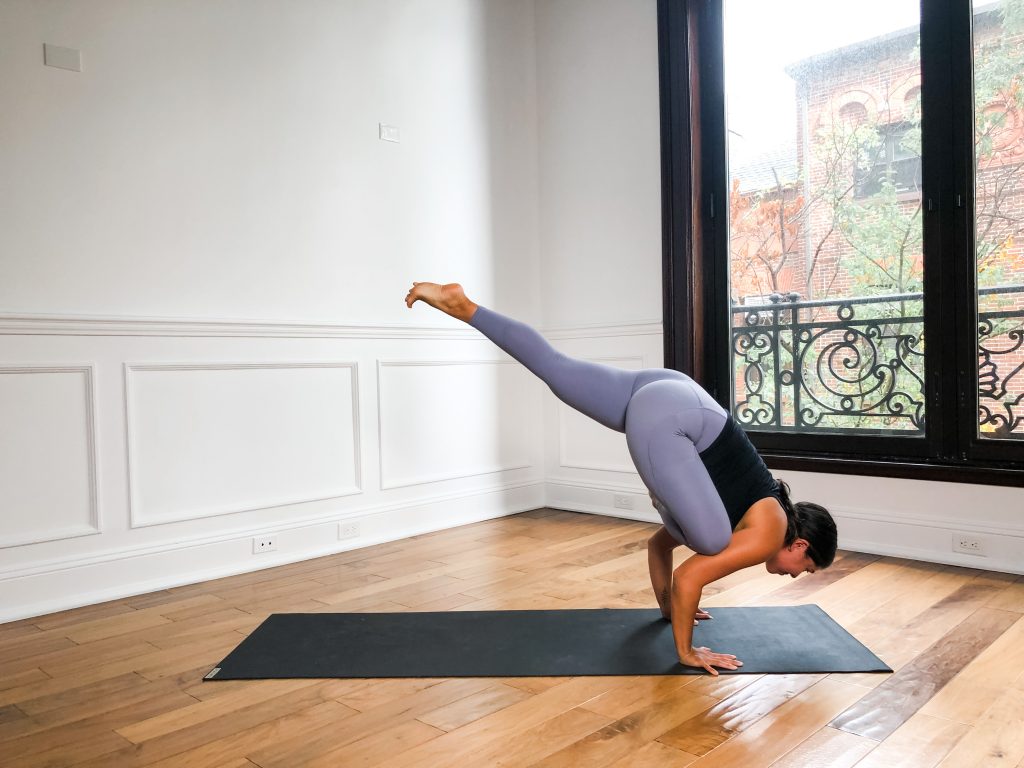
3. Flying Pigeon (Eka Pada Galavasana)
Flying pigeon is a pose that is supported by your arms with one leg straightened out back behind you while the other leg is bent and supported by your upper arm.
Flying Pigeon
4. Firefly Pose (Tittibhasana)
Firefly pose is having both your arms inside your legs (either on blocks or on the ground), your seat setting down towards the mat as you extend & straighten through your legs, which are outstretched in front of you, outside your arms. Tittibhasana is a bug that resembles that of a firefly here in the West.
Firefly Pose
Advanced Arm Balances
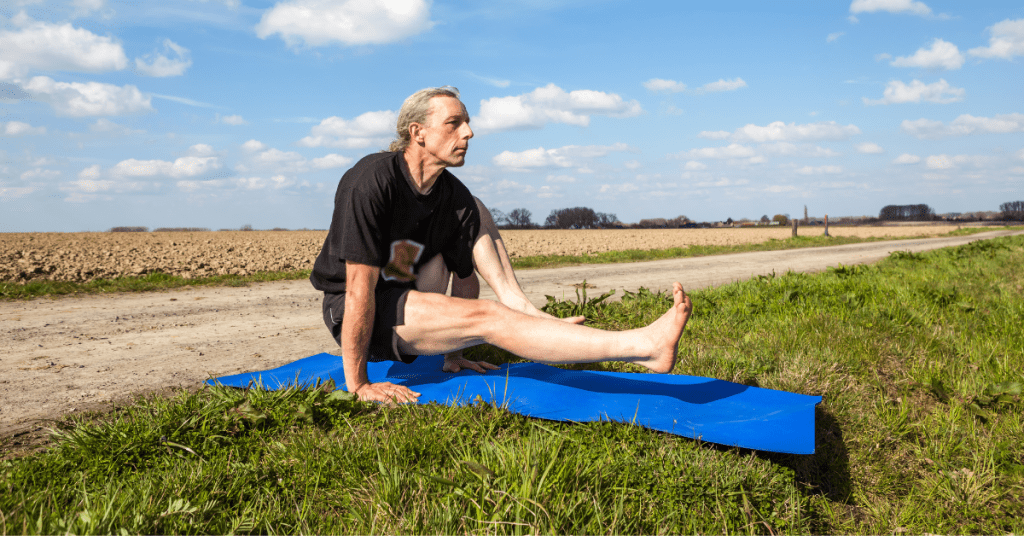
1. Elephant Trunk Pose (Eka Hasta Bhujasana)
Elephant trunk pose is a pose in which one leg is supported up and over an arm, while the other leg is outstretched straight in front of the body.
Elephant Trunk Pose
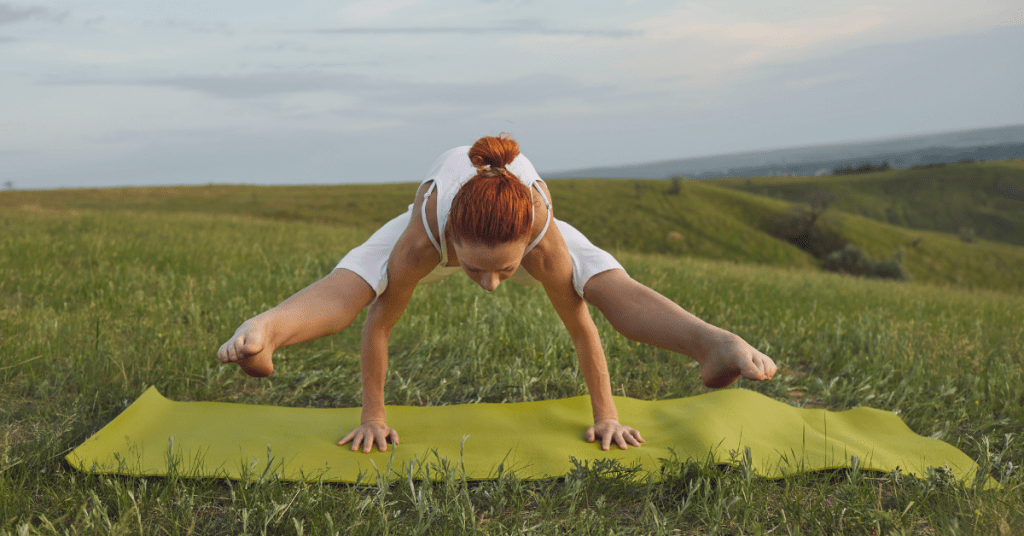
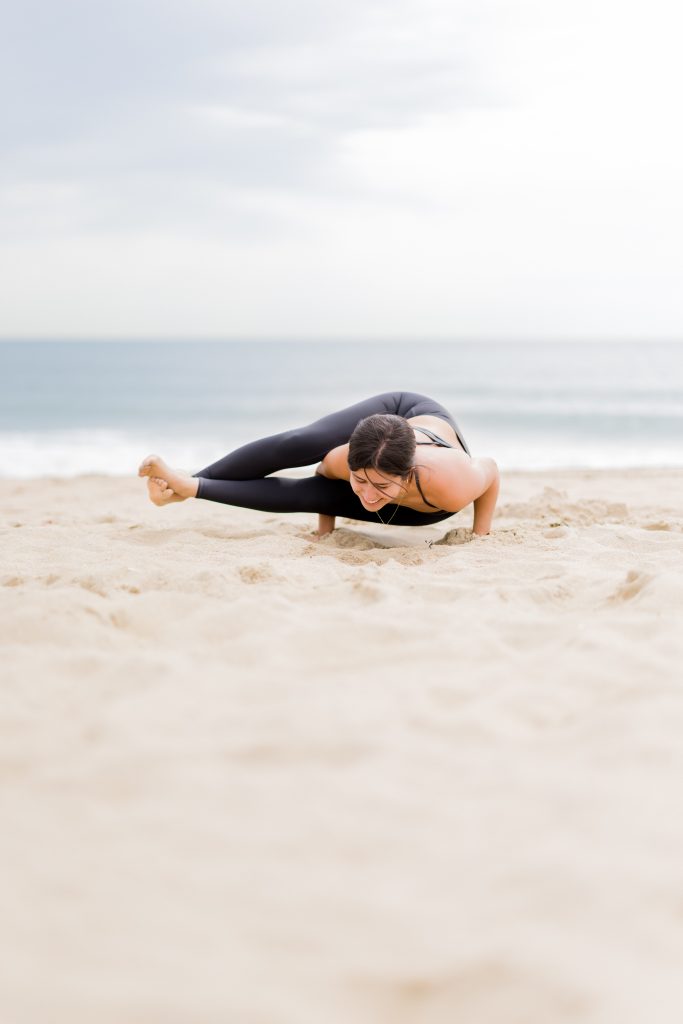
2. Eight Angle Pose (Astavakrasana)
Eight angle pose, or Astavakrasana, is when the arms are used to support the legs hooking around one another with the body being supported almost entirely by the arms.
Eight Angle Pose
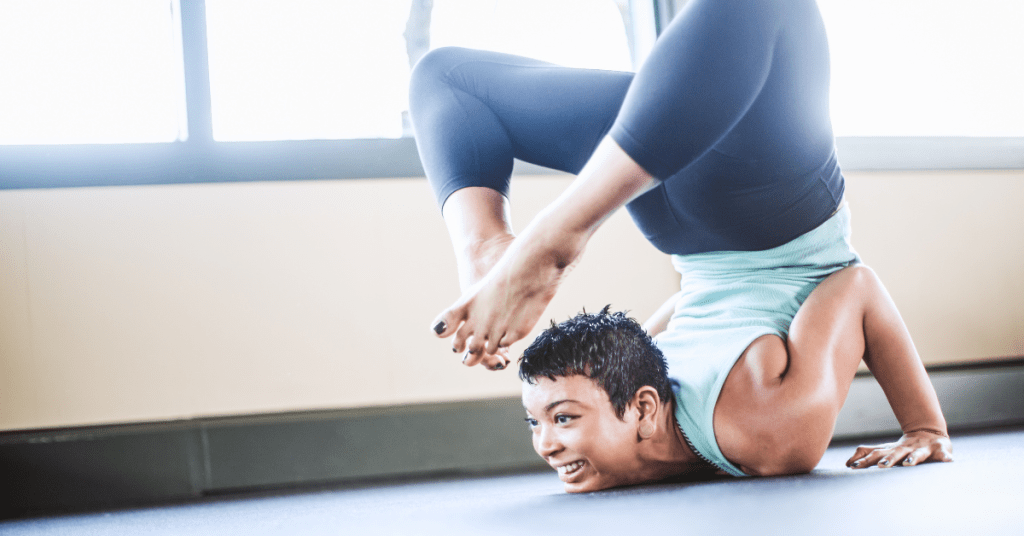
3. Scorpion Pose
Scorpion is where the forearms are on the ground and the legs come up over the head and bend towards the crown of the head. This pose requires a bit of backbending capability and a pretty flexible spine. The combination of strength and flexibility needed for this pose makes it fall towards the more challenging end of the spectrum for arm balances.
Scorpion Pose
Arm Balances & Yoga Asana Practice
Arm balances help you build strength and stability in your yoga practice and are great poses to regularly practice. Their many qualities allow them to be their own category in the yoga asana practice, with dedicated preparatory poses that help strengthen parts of the body needed to balance on your arms.
For yoga teachers, when teaching arm balance poses to a class, be mindful that every body is built differently and certain poses will require different ways to approach the pose. While the yoga practice reminds highly individualized, there are common yoga asana postures that are widely accepted as providing roughly the same benefits when practiced consistently.
We hope that this article was able to shed more light on the topic of arm balances. If you are still curious and want to learn more, we’ve crafted an entire Arm Balance Workshop inside the YogaRenew app with expert yoga teacher Mélie Purdon to help you craft your mastery of arm balance poses with a deep understanding.
Want to learn arm balances?
Check out Learn to Fly: Arm Balance Workshop in the YogaRenew app. Download it today!
10 minute morning yoga flows don’t have to be elaborate. Most of the time, you can get a sufficient practice in by just moving through sun salutations (a or b). Here at YogaRenew, most of our classes are taught with Surya Namaskar A (Sun Salutation A sequence) and the purpose is literally to “greet the sun” as you first rise in the morning.
However, if you’re looking for more of a flow style class — we’ve got you covered!
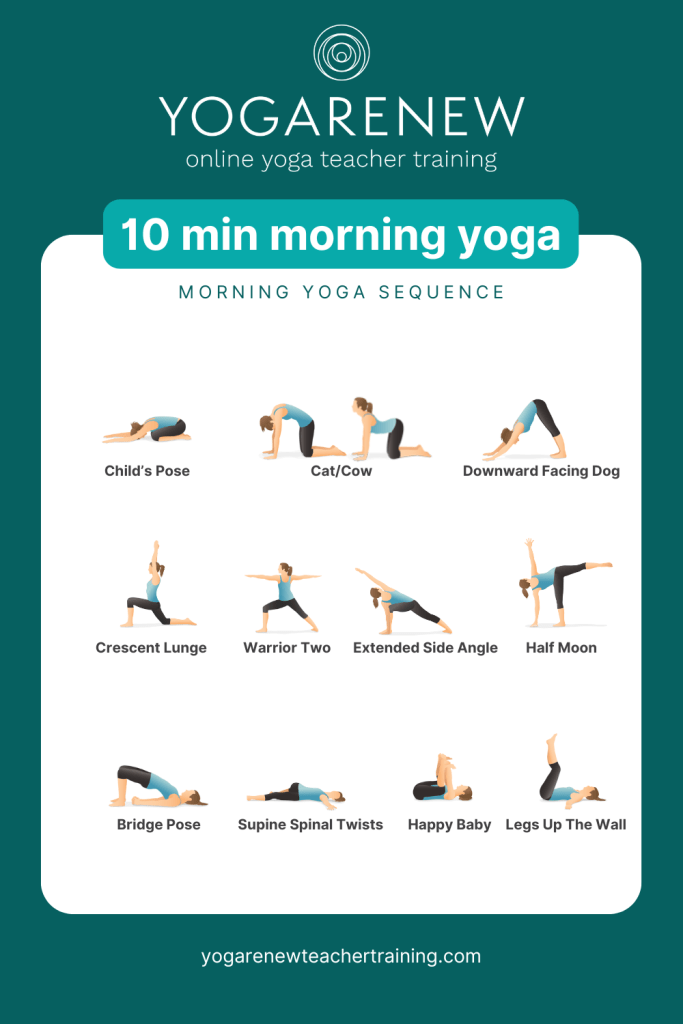
Here’s a quick and easy 10 minute morning yoga sequence that includes a downloadable PDF graphic that you can store for whenever you’d like to practice. Be sure to grab your mat and any props you may need — we recommend 2 yoga blocks and a blanket!
Morning Yoga Sequence:
Puttering:
Start in a comfortable seated position (you can prop yourself up on your blanket if you have one) and take a few arriving breaths
Make your way forward onto hands and knees
Widen your knees the width of your mat, let your big toes touch, come to sit back into child’s pose
Lift your head & come back to table top position
Move through a couple rounds of cat/cow, syncing your breath with your movement
Find downward facing dog
Lift your right leg & step it through your hands
Crescent lunge
Step back for downward facing dog
Inhale, come forward to plank, lower yourself all the way down to your mat as you exhale
Inhale to peel your chest off the mat for cobra pose
Downward facing dog
Repeat on the other side
Standing + Balancing:
From downward facing dog, lift your right leg & step it between your hands for warrior two
Bring your front arm forward and bend at your elbow to rest your forearm on your front thigh & reach your left arm up overhead alongside your left ear for extended side angle
Look back at your front foot, grab your block and place it in front of your right toes
Bring your left hand to your hip & step your back foot in 2 footprints
Start to bend your right knee, lean forward, standing into your front (right leg) and come forward with your right palm on the block for half moon pose
Step back to a low lunge
Downward facing dog, plank, cobra
Downward facing dog
Repeat on the other side (lifting your left leg & stepping between your hands)
Wind down:
Lie down on your back, bend your knees and plant the soles of your feet on the mat
Walk your heels in towards your seat
Lengthen your arms down by your side & proceed to lift your pelvis off of the mat for bridge pose
Lean onto your right shoulder to tuck your left shoulder under, then lean onto your left shoulder to tuck your right shoulder under
Your hands can find an interlace underneath you
Keep pressing your feet down and lifting your hips
Unclasp your hands & lower back down to your mat
Repeat 2 or 3 times
Press down through your feet to lift your hips up and send them over to the left, letting your knees fall over to the right for a supine spinal twist
You can cactus your arms and let your gaze fall over your left shoulder
Repeat on the other side
Happy baby
Savasana:
For this sequence, we’ll take savasana in Viparita Karani, or legs up the wall
Grab your blanket and fold in half twice so you have an oblong, folded blanket
Place the blanket at the base of the wall
Come to sit with either hip up against the wall
Swing your legs up the wall (like a clock hand) until they are at a desired position
T out your arms, close your eyes, and let your mind quiet
Quick & Easy Morning Yoga Flows
If you enjoyed this 10 minute morning yoga class, you’ll love our Morning Yoga Series on the YogaRenew app. We’ve created a bunch of classes that are morning-friendly and the perfect way to start any day refreshed & revitalized.
Trying to develop a routine and stick to a set of wellness practices can be cumbersome. However, when you find things that truly align with your body and the way you like to move, it can be a fun way to connect with your body.
As we bring attention to body awareness, the intention is to honor our bodies for all they do for us. They keep us in motion and in rest, which is equally as important. This newsletter invites you to find the ways in which you like to get in tune with your body and nourish those actions until they become a regular part of your routine. ✨
Here are some ways to establish and nurture body awareness through the lens of the yoga practice.
Yoga for Beginners
Establishing a foundational, basic yoga practice can do wonders for both your mental and physical health. Yoga provides a great deal of awareness to the body and parts of the body that may not get proper attention on a daily basis.
Yoga can also help you understand the body on a deeper level. Starting out with the foundational poses may bring a greater sense of awareness on how you can move in and understand your body.
Another way to build a strong relationship with your body can be stretching in the morning.
Each morning when you wake up, try to move your body around until you find ways that feel good to you. You can start with a seated meditation, or get right into it. Either way, the freedom of movement and expression in your body will start to connect your brain waves to a new found appreciation.
Morning stretch ideas:
Stand up and lean to either side with your arm stretched up overhead
Take a giant forward fold as you let your head and neck dangle over your legs
Sit on the floor and reach your arms up and overhead and lean to either side
Start in child’s pose and lean back and forth until you find a nice flow of movement
Start seated on the floor and send one leg at a time out long and lean over towards it
Try cat/cow (starting on all fours with your wrists underneath your shoulders and knees underneath your hips – inhaling dropping your belly looking up, exhaling rounding your spine pressing through your palms)
Try a Group Fitness Class
There are tons of methods of group fitness offered now with a plethora of movements and combinations of movements. Once you decide on what level of intensity you want, you can narrow down the list of places near you that offer that range of movement. Sometimes attending a group class awakens something in us that allows us to appreciate how we can move our body. Even if you have certain specifications and special needs of assistance or range of motion, the offerings seem to be getting more and more inclusive, where there tends to be options for just about everyone. If you’re looking for a specific aided class or private instruction, you can certainly search for it and hopefully there’s a class that’s just right for you — and maybe you even make some friends out of it!
Try Free Videos on YouTube
We of course started our own YouTube channel to facilitate and circulate the practice of yoga… but YouTube is home to thousands upon thousands of different types of “at-home workouts” and movement practices. A simple search should bring you to areas of moving your body that might spark some joy in how you like to get moving.
Since we highlighted beginner yoga above, here are some beginner-friendly yoga videos on our YouTube — enjoy!
In the ever-changing landscape of the digital world, it can be hard to find yoga classes online that you enjoy and that elevate your practice. If you’ve ever taken class with us, or have joined one of our trainings, you’ll notice YogaRenew has a specific style of sequencing designed to keep students invigorated, inspired and help give them an idea of what to expect in each class — starting with puttering, working towards a peak pose, having a full wind down section and of course, a blissful savasana.
Below you’ll find an incredible selection of online yoga classes you can practice for free, whenever your schedule allows. You can even browse different categories if there’s a specific style of yoga you’re looking for. Aside from our list of the best free yoga classes on YouTube, we’ve developed an app where you can stream high-quality yoga classes with incredible soundtracks for free with our instructors.
With the YogaRenew app, you can access over 200 FREE yoga classes & pose tutorials. And its Ad-free. Download the YogaRenew app below and check out all of our free classes, or head further down to check out our list of the best free yoga classes on YouTube!
Access Hundreds of Free Online Yoga Classes
Whether you’re a beginner or advanced yogi, the YogaRenew app has hundreds of free classes & tutorials from yoga’s best instructors. Explore classes with incredible soundtracks based on your experience level, goal, intensity level or duration. Save your favorites or watch offline with a free account. Or subscribe and gain access to over 1,000 on-demand classes, courses, workshops, live classes, exclusive events and more.
The Best Free Yoga Classes on YouTube
Scroll down to browse our list of the top free yoga & meditation classes available on YouTube. We’ve conveniently sorted them by style or format so if you’re unsure which style suits you best, take a moment to check out our article on the different types of yoga. If you’re looking to practice with an app, you can check out our list of the best free yoga apps.
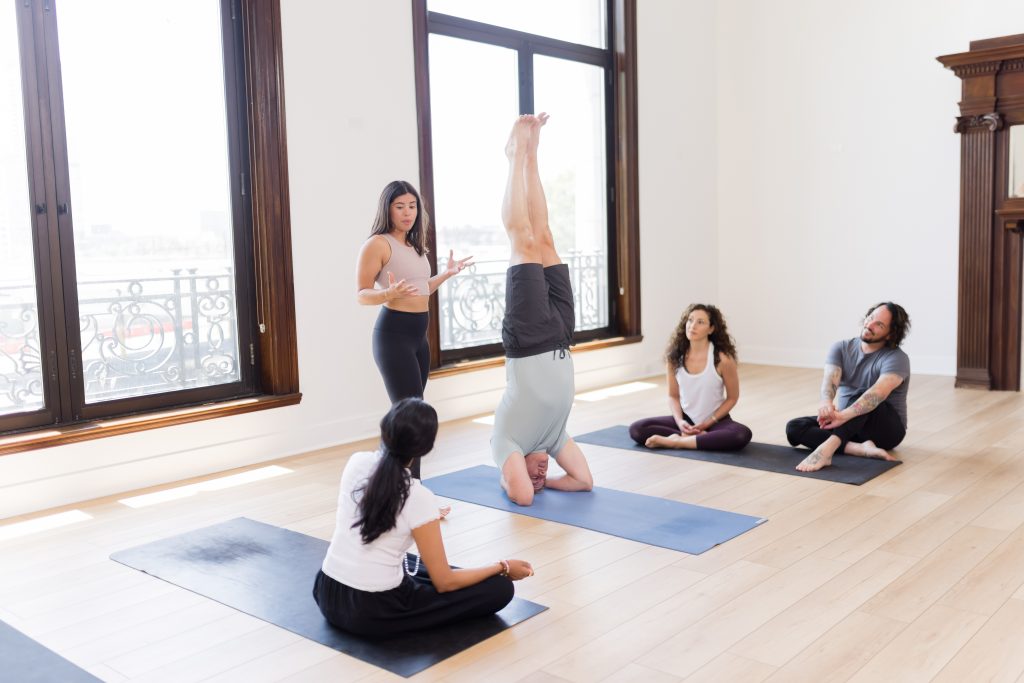
In this video, Patrick explains how props can be an essential tool in the yoga practice. Our channel offers insights as well as tips and tricks of becoming a great teacher but also expanding as a practitioner. This information can be greatly helpful before stepping on your mat.
Best Free Vinyasa Yoga Classes Online
Perhaps the most popular style of yoga in modern times, Vinyasa is characterized by energetic flows and dynamic body movements. Each movement in a Vinyasa Yoga is linked to the breath, providing a more cardio-centric experience. Check our list of the best free vinyasa yoga classes on YouTube below.
60 Minute Vinyasa Flow | Free Online Yoga Class Instructor: Patrick Franco Length: 60 Minutes Style: Vinyasa Yoga
Fresh Air Flow in Hawaii | No Props Needed Instructor: Desiree Fiorentino Length: 30 Minutes Style: Vinyasa Yoga
Live Music Vinyasa Flow Instructor: Patrick Franco Length: 30 Mins Style: Vinyasa Yoga
Yoga for Your Core Instructor: Desiree Fiorentino Length: 15 Mins Style: Vinyasa Yoga
Best Free Online Meditation
Meditation comes in many different formats, each with their own intended results. Whether you’re looking to drift off to sleep or wrap yourself into a warm sound bath – we have you covered. Find our list of the best free meditation classes available on YouTube below.
5 Minute Body Scan Meditation | YogaRenew Instructor: Lindsay Monal Length: 5 Minutes Style: Body Scan Meditation
Meditation For Sleep | YogaRenew Instructor: Joe Miller Length: 14 Minutes Style: Meditation
Restorative yoga classes are typically prop-heavy, slow paced classes designed to help the body recover, replenish and recuperate. Find our list of the best online Restorative Yoga classes on YouTube below.
Restorative Yoga | Restorative Energy Practice Instructor: Joanne Silver Length: 30 Mins Style: Restorative Yoga
Restorative Yoga | Yoga For Anxiety Instructor: Keely Garfield Length: 15 Mins Style: Restorative Yoga
Best Free Yin Yoga Classes Online
Yin Yoga classes are slow-paced, relaxing classes designed to target deeper connective tissue. Find our list of the best Yin Yoga classes on YouTube below.
Morning Yin Yoga Class Instructor: Kate Lombardo Length: 35 Minutes Style: Yin Yoga
Balancing Yin Yoga for Ultimate Relaxation | Free Online Yoga Class Instructor: Lindsay Monal Length: 70 Minutes Style: Yin Yoga
Best Free Hatha Yoga Classes Online
Hatha yoga is meant to encompass all physical postures within traditional yoga, however modern definitions often characterize this practice as a slower paced class with emphasis on posture and breath.
Yoga for a Strong & Flexible Spine Instructor: Joe Miller Length: 30 Mins Style: Hatha
Teach a Hatha Style Class to Virasana (Hero Pose) Instructor: Deidra Demens Length: 60 Mins Style: Hatha
Best Free Prenatal Yoga Classes Online
Prenatal Yoga classes are designed to help aid in the body’s transformation through pregnancy, delivery and postnatal. Their structure is designed to accommodate and supplement the pregnant body at each stage of pregnancy. Find our list of the best Prenatal Yoga classes available on YouTube below.
Prenatal Yoga for Acid Reflux Instructor: Melie Purdon Length: 15 Mins Style: Prenatal Yoga
Prenatal Yoga for Labor Instructor: Melie Purdon Length: 16 Mins Style: Prenatal Yoga
Best Free Gentle Yoga Classes Online
As the name suggests, gentle yoga classes take a more gentle approach to the practice. Find our list of the best gentle yoga classes on YouTube below.
Yoga for When You Don’t Feel Like Doing Yoga Instructor: Lindsey Rozmes Length: 20 Minutes Style: Gentle Yoga
YogaRenew is now an approved provider for NASM and AFAA! We know that a lot of you have been asking for this. Graduates of YogaRenew’s 200 HR Yoga Teacher Training will be able to register their certificate with NASM or AFAA moving forward.
More information about NASM, AFAA, our yoga teacher training course, and how to register credit for your course follows below!
The National Academy of Sports Medicine (NASM) provides certification and courses to over 1.5 million fitness and wellness professionals with over 12,000 gym and health club partnerships. NASM provides certifications for personal trainers, group fitness instructors, wellness coaches and nutrition coaches.
The Athletics and Fitness Association of America (AFAA) has provided certifications for group and personal trainers for over 40 years. Their certifications include group fitness, indoor cycling and personal trainer certifications.
AFAA is the sister company of NASM with both companies falling under the umbrella of Ascend Learning.
This comprehensive yoga teacher training provides a strong immersion into the business and practice of yoga through detailed videos, readings, workbooks and lectures.
The course is entirely online and self-paced, however students looking to get live support are also able to pick from 30 live calls held each week from experts in areas like anatomy, philosophy, business, class structure, sequencing, etc.
Students gain access to over 100 hours of supplemental video content they can browse in addition to their core training. We’ve also added extensive material including eBooks, templates, class sequences, and other resources instructors can use for their classes and business.
In addition to our support through live calls and email, students also gain access to our incredible & active community with students from over 170 countries.
Lifetime access is provided for the course and all of its resources (including the live calls!)
Graduates of our 200 hour course are able to register with Yoga Alliance as a RYT-200 as well.
AFAA or NASM Credit For YogaRenew’s 200 HR Course
NASM and AFAA students will submit their recertification differently. NASM trainers will login to their online NASM recertification portal at nasm.org and add the course and certificate from there.
AFAA trainers will email their AFAA renewal application to recerts@ascendlearning.com.
Our provider number is the same for both NASM and AFAA:
American Council on Exercise (ACE) 200 Hour Yoga Teacher Training
In addition to NASM and AFAA, ACE offers YogaRenew’s 200 hour yoga teacher training in a joint partnership. ACE has been a leader in the fitness certification space for a long time, and we’re thrilled about the ongoing connection between their community and our training program. See ACE’s press release on our joint partnership for more information.