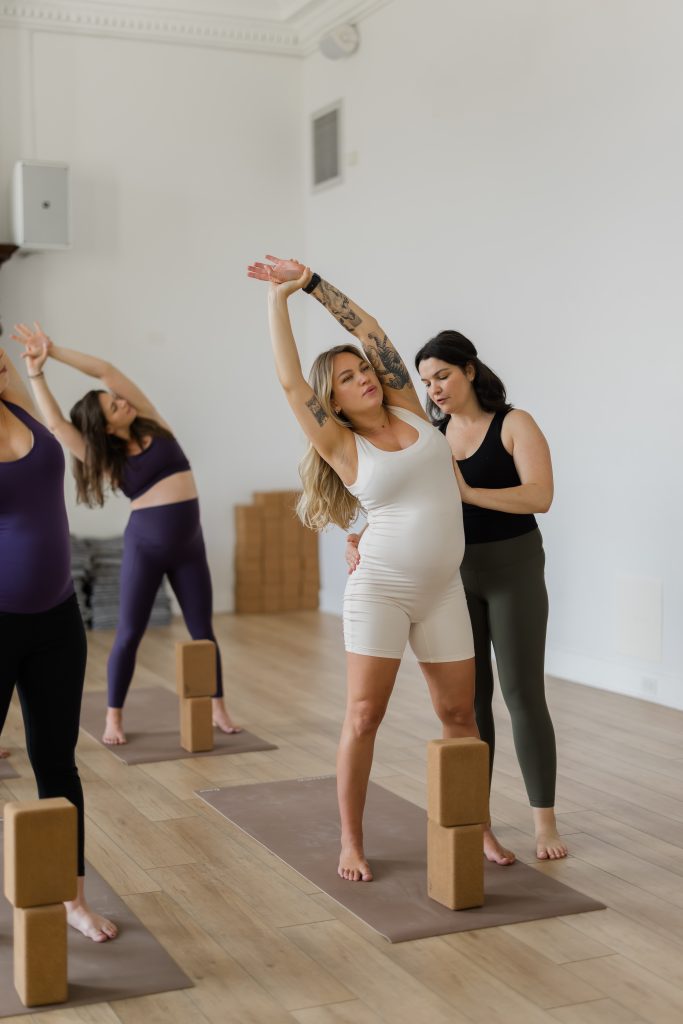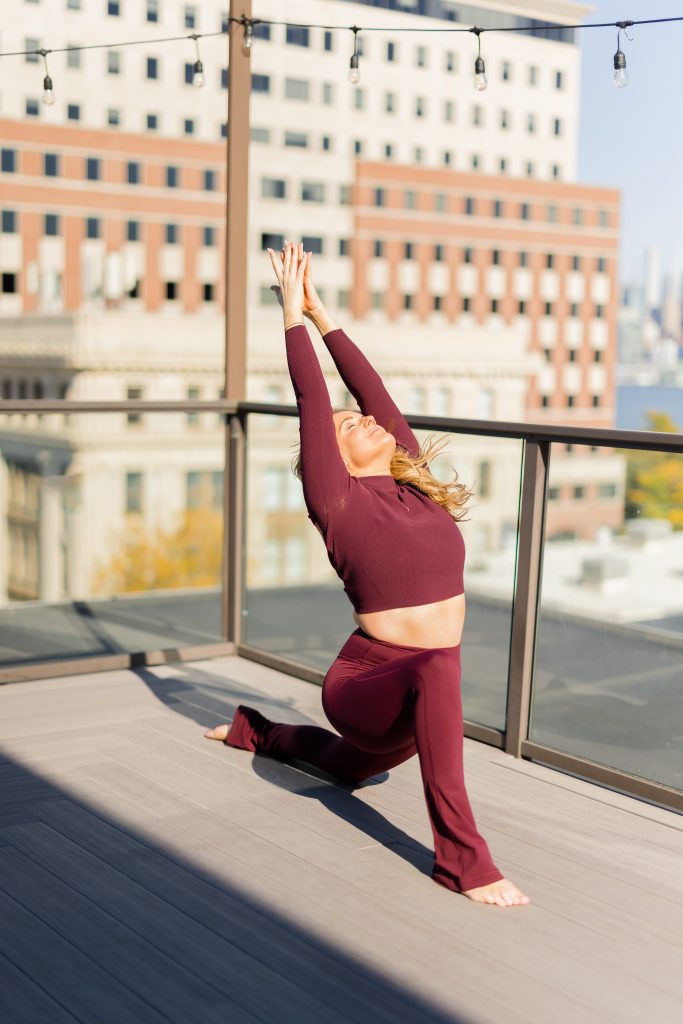
A dark-haired, young female yoga student giving a hands-on assist to the senior yoga teacher, tattooed male, Ronen Kauffman

Ashtanga vs. Vinyasa Yoga

By Yoga Asana

All around the world, millions of people have embraced yoga as a path to physical, mental, and spiritual well-being. Two popular and influential yoga styles that have gained attention in recent decades are Vinyasa Yoga and Ashtanga Yoga.
Let’s take a deep dive into the origins, history, and philosophies of these two styles, explore how they found their way to the West, highlight key teachers, and clarify the comparison between Ashtanga Yoga’s asana practice and the comprehensive eight-limbed path of yoga outlined in The Yoga Sutras of Patanjali.

Origins and History

Vinyasa Yoga, often described as a flowing and dynamic style of yoga that syncs the breath to the movement, has roots in the ancient practice of Hatha Yoga, which originated in India thousands of years ago. However, the Vinyasa Yoga that we practice today has been shaped by influential figures over time.

One of the most prominent individuals responsible for popularizing Vinyasa Yoga in the West is Sri T. Krishnamacharya. Often referred to as the “father of modern yoga,” Krishnamacharya’s teachings laid the foundation for many contemporary yoga practices. His innovative approach to adapting traditional yoga practices to suit the modern world greatly influenced several Western yoga instructors, including B.K.S. Iyengar and Pattabhi Jois.

Ashtanga Yoga has a more structured and recent history. It was systematized by K. Pattabhi Jois in the early 20th century. Jois, a student of Krishnamacharya, developed the Ashtanga Yoga system based on the ancient text known as the Yoga Korunta. This style of yoga places a strong emphasis on the synchronization of breath and movement, as well as a specific sequence of postures, making it a disciplined and demanding practice.

The Class Structures

The main difference between Ashtanga and Vinyasa Yoga lies in their structure and approach to practice:

Ashtanga Yoga

Structured Sequence: Ashtanga Yoga follows a specific and unchanging sequence of postures in each class. There are different series (Primary, Intermediate, etc.), and practitioners progress through these series as they advance in their practice. The sequence is set and typically does not deviate from the set sequence.

Set Breath and Movement: In Ashtanga, there is a strong emphasis on synchronizing each movement with a specific breath count. This synchronized breath and movement creates a meditative flow and consistency in the practice.

Physical Intensity: Ashtanga Yoga is known for its physical intensity and challenging poses. It requires strength, flexibility, and stamina to progress through the series.

Traditional and Structured: Ashtanga Yoga is deeply rooted in tradition and maintains a structured and disciplined approach to practice. The emphasis is on consistency and sticking to the traditional system.

Self-Practice: In traditional Ashtanga, students often practice in a Mysore-style setting, where they perform the sequence at their own pace, and the teacher provides individual guidance and adjustments.

Vinyasa Yoga

Varied and Creative Sequences: Vinyasa Yoga is more flexible in terms of sequencing. While there are common elements like sun salutations, the specific poses and their order can vary from class to class and teacher to teacher. Vinyasa classes often allow for creative and diverse sequences and classes often build to a peak pose, or a focus.

Breath and Movement: Like Ashtanga, Vinyasa Yoga also emphasizes the synchronization of breath and movement, but the exact breath count may not be as rigidly defined as in Ashtanga. There is room for variation and adaptation.

Customization: Vinyasa classes are often tailored to the needs and levels of the students. Teachers may offer modifications and variations to suit different practitioners, making it more accessible for beginners and adaptable for experienced yogis.

Creative Expression: Vinyasa Yoga encourages creativity in sequencing and teaching. Teachers may incorporate various styles and influences into their classes, resulting in a more diverse and ever-evolving practice.

Group Classes: Vinyasa classes are typically held in group sessions, where the teacher guides students through the practice with verbal cues and demonstrations. It’s a shared experience in a class setting.

The main difference between the physical Ashtanga and Vinyasa Yoga practices may be the structured and sequence of poses in Ashtanga, versus the more varied and adaptable sequencing of Vinyasa. Ashtanga is known for its strict connection to tradition and physical intensity, while Vinyasa offers greater flexibility, creative expression, and a broader range of modifications to accommodate different people. Both styles have their unique appeal, and the choice between them usually depends on a person’s personal preferences and goals in their own yoga practice.

Clarification of The Eight-Limbed Path

When you’re learning new Sanskrit words, it can sometimes be confusing! The physical Ashtanga Yoga practice is different from the Eight Limbed Path outlined in The Yoga Sutras of Patanjali. The Yoga Sutras of Patanjali are like a special guidebook for people who practice yoga. It provides a guide towards wisdom that may help people connect more deeply to their minds and bodies. “Ashta” means “eight” and “anga” means “limb” or “path.”
Ashtanga Yoga philosophy revolves around the eight limbs (ashtanga), each serving as a step toward self-realization. These limbs encompass ethical principles (yamas and niyamas), physical postures (asana), breath control (pranayama), sense withdrawal (pratyahara), concentration (dharana), meditation (dhyana), and ultimate enlightenment (samadhi).
The philosophy emphasizes that the true practice of yoga occurs within, transcending the physical realm. It guides individuals toward ethical living, mastery of the mind, and a deep connection with the self. Ashtanga Yoga philosophy, in alignment with broader yogic principles, seeks to liberate individuals from the cycle of suffering and attachment. It aims to awaken a profound sense of inner peace and contentment.

Ashtanga Yoga: Physical Asana Classes

When you step into the physical Ashtanga Yoga asana class, you enter a realm primarily focused on the third limb of the eightfold path – asana. An Ashtanga Yoga class that you might take at a studio will be focused on the physical practice and won’t necessarily involve the teacher guiding you through a class on philosophy. You will move your body!

Philosophy and Vinyasa and Ashtanga Yoga Asana Classes

It’s crucial to recognize that the physical practice of both styles of yoga can serve as a bridge to deeper philosophical understanding. The disciplined and structured nature of the asana classes can bring about qualities such as patience, discipline, and self-awareness, which are integral to the entire journey of yoga!

For many yoga practitioners, the physical practice provides a tangible entry point into the broader world of yoga philosophy. As you deepen your asana practice, you may become curious about the ethical principles (yamas and niyamas), dive into meditation and pranayama, and ultimately seek out a more profound connection with your inner self.

It’s All Yoga!

Vinyasa Yoga, with its fluid and creative sequences, can feel like a dance. It’s a practice that celebrates diversity and adaptability. Here, the asanas, or yoga postures, are like pieces of a puzzle, and each class may put those pieces together differently. This variety keeps the practice fresh and exciting, allowing practitioners to explore new movements and challenges regularly.
Ashtanga Yoga, on the other hand, offers a structured and traditional approach. The sequence of postures is fixed, providing a consistent framework that practitioners follow as they advance through the series. This structure fosters discipline and dedication, as it requires commitment to mastering each pose before progressing to the next.

Despite their differences, both Vinyasa and Ashtanga Yoga share a common goal – to unite body, mind, and spirit. They offer pathways to physical well-being, mental clarity, and self-discovery. Both practices emphasize the importance of breath, mindfulness, and the mind-body connection. Both styles can lead to a deeper understanding of yoga’s philosophical principles. Whether you’re flowing through Vinyasa sequences or navigating the structured series of Ashtanga, you have the opportunity to explore the deeper philosophy that runs through both styles.

The choice between Vinyasa and Ashtanga Yoga comes down to personal preference and goals. Vinyasa offers creativity and adaptability, making it accessible to a wide range of practitioners. It’s an ideal choice for those who enjoy diversity and spontaneity in their practice.

Ashtanga Yoga, with its structured and disciplined approach, appeals to individuals seeking a clear path to progress and physical challenge. It’s a practice that rewards dedication and persistence with a profound sense of accomplishment.

No matter which path you choose, remember that both Vinyasa and Ashtanga Yoga are tools for self-discovery and growth. Whichever practice you step onto, it’s the journey that matters most. So, whether you’re gracefully flowing through Vinyasa sequences or diligently progressing through the Ashtanga series, know that both paths lead to the same destination – a deeper connection with yourself and the world around you. Yoga, in all its forms, offers a gift of transformation, and the choice of style is your unique expression of that journey.

Join our mailing list for incredible weekly content!

Revolved Headstand yoga sequence PDF including all the prep poses leading toward Revolved Headstand

Yoga Sequence to Parsva Sirsasana (Revolved Headstand)

By Yoga Asana, Yoga Teachers

Working on headstand, or Sirsasana in Sanskrit, is something many yoga students in asana classes love to do…

I remember when I first started doing yoga, I would look at the people effortlessly going into headstand in the middle of the room and think, “maybe one day!”

In a Level 2 class, you may end up with many students who have a strong headstand practice and even though it’s always a fun pose to work on, sometimes it’s nice to offer a headstand variation so those students have a new place to work within the pose.

Enter Parsva Sirsasana (Revolved Headstand)!

This pose takes Sirsasana and adds a twist of the trunk, which brings in extra challenge both physically and mentally as well.

The great thing is you can build a sequence around this Sirsasana variation but also give your students the option to work on regular Sirsasana A or even headstand prep – making it great for an open-level class where you know some more advanced practitioners may show up.

The key with building this sequence is focusing on poses that stabilize and strengthen the shoulder girdle and muscles of the upper back while also incorporating twisting elements to help students find the turn of the trunk while upside down.

Have fun and let me know how it goes!

Puttering/Warm-Up:

  • Child’s pose with blocks (elbows on blocks to open shoulders)
  • Sukasana with side body stretch
  • Anjenayasana
  • Low lunge twist
  • Parsvottanasna with blocks

Sun Salutations: 3-4 Rounds

Standing Poses:

  • Warrior 2
  • Triangle Pose
  • Extended Side Angle (with hand outside of the ankle)
  • Warrior 1
  • Parsvottanasana

Balance Poses: Eagle Pose and/or Standing Split

Twist Pose: Revolved Extended Side Angle

Peak Pose: Parsva Sirsasana (Revolved Headstand)

Wind Down Poses:

  • Pavritta janu sirsasana
  • Paschimottanasana
  • Bridge pose
  • Supine twist

Savasana

If you want more in-depth vinyasa sequences like this along with teaching notes + tips on how to cue them, enter your email below to grab our FREE guide:

Handstand Vinyasa Sequence PDF

Yoga Class Sequence Toward Handstand

By Yoga Asana, Yoga Teachers

One of the greatest gifts of being a yoga teacher is being able to provide an experience that shifts someone’s mindset and mood in a positive way.

I’ve taught classes on some “heavy” days over the years where emotions are high and you can feel that students are craving some type of relief from whatever it is they’re carrying.

My favorite way to do that?

Teach a handstand class.

There’s honestly almost nothing more fun than leading a group of adults through a class that flips them upside down and has them acting like kids again. It’s immediately uplifting to the spirit and it recharges the energy. That’s exactly what a handstand class does.

I definitely recommend practicing this at the wall. And, depending on the level of students you have, leading them through L-shaped handstand using the wall first is a great way to get everyone upside down, while still keeping your class accessible.

The key with this big post is to create a sequence that focuses on a lot of shoulder and side body opening while incorporating core integration and straight leg poses.

I keep a handstand class in my mental back pocket at all times so if I ever need to teach a fun class last minute, I always have one ready.

Have fun and let me know how it goes!

Puttering/Warm-Up:

  • High lunge with hooked thumbs
  • Low Lunge Twist
  • Modified Parsvottanasana (use blocks!)
  • Tadasana with Gomukhasana Arms

Sun Salutations:

  • 3-4 Rounds

Standing Poses:

  • Warrior 2
  • Triangle Pose
  • Extended Side Angle (with hand outside of the ankle)
  • Ardha Chandrasana
  • Warrior 1
  • Parsvotanasana

Balancing Poses:

  • Tree Pose
  • Standing Split

Twist Pose:

  • Revolved Triangle

Peak Pose:

  • Handstand

Wind Down Poses:

  • Wheel
  • Reclined Spinal Twist
  • Happy Baby

Savasana

If you enjoyed this sequence, enter your email below for a FREE starter kit on building vinyasa yoga classes!

Also, be sure to follow us on @yogarenewteachertraining + @kate.lombardo!

Athletic human stretching

3 Strength Yoga Poses

By Yoga

As movement practitioners who lead busy lives, sometimes we are faced with a decision to tend to our Yoga practice or our strength workouts. Now, I am a firm believer in that it’s beneficial to treat each modality as their own, but sometimes it works out to hit two birds with one stone. Certain styles of yoga inherently challenge one’s strength when done with good alignment and attention to form. However, there are particular postures which are especially helpful in maintaining or building strength. When I refer to strength I am mostly referring to muscular endurance strength, as building pure muscle strength or size would require larger external loads after a certain point.

1. Plank (Sanskrit: Phalakasana)

Woman in plank pose

Plank is an excellent strength posture which works the full body. Typically when we refer to plank in Yoga it’s a high plank on the hands, but you can incorporate forearm planks which may be challenging in a different way.

How to:

  • Plank with proper form requires a spreading of the shoulder blades (different from a rounding of the shoulder blades), the front ribs moving towards the spine, the hips more or less in line with the shoulders, and active quads.
  • The heels of the feet should be stacked above the balls of the feet.
  • To make this more of a strength exercise as opposed to a transition pose, extend the hold time of your plank. You can start by getting a baseline for yourself by holding a plank till failure, and then incrementally build upon that time.

2. Side Plank (Sanskrit: Vasisthasana)

Woman in Side Plank

When you’re in side plank, the bottom hip lifts up and strengthens to support the rest of your frame. Like plank, traditional side plank is on the palm (and full vasisthasana has the top leg lifted with the top arm by yogi toe lock). Since we are focusing more on the strength aspect of this posture, I recommend coming down to the forearm to create more stability in the shoulder.

General side plank alignments points are as follows:

  • The shoulders stack one on top of the other with the collarbones broad.
  • Draw the front ribs towards the spine and the sacrum towards the pubis.
  • The thighs are firm and the feet are stacked with toes spread.

Holding side plank will absolutely challenge your strength and extending the hold times can increase the capacity with which your body can withstand the posture. To challenge yourself further, try lifting the top leg and either holding, or lifting and lowering the top leg for 5-8 repetitions.

3. Boat (Sanskrit: Navasana)

Woman in Boat Pose

Boat is a wonderful posture to work on one’s strength as the “low boat” or “half boat” is essentially a hollow hold. It should be emphasized that while holding poses or positions will not take you to the heights of your fitness capabilities done alone, extending hold times trains our bodies to expand its capacity to deal with stress.

Points of alignment:

  • For boat, the sit bones are grounded with the legs either fully extended or bent with the shins parallel to the ground
  • The toes are spread and the back is more or less straight (no arched lower back)
  • The arms are reaching forward (traditional boat connects the hands to the feet by yogi toe lock).

For low/half boat:

  • The legs are lowered and extended forward with the thighs firm and toes spread.
  • The back is lowered to the ground with the tops of the shoulders and the head lifted.
  • The arms are reaching forward. *To make it more challenging, you can take the arms straight up or over the head.

There are so many poses (and variations) which can challenge your strength. Holding poses is just one way to work on your strength in a super simple (not necessarily easy to do though) way. Another way to challenge your strength is by adding external load (sometimes even a block will do) or incorporating repetitions of a particular exercise, such as going from low boat to high boat or turning your lunges into split squats. Again, I think it’s necessary to emphasize that both modalities should be treated as their own if you wish to effectively build strength and practice Yoga, but there are absolutely ways in which the two intersect and ways to customize to work with your life.

Locust Pose Sequence PDF

Yoga Class Sequence Building to Salabhasana

By Yoga Asana, Yoga Teachers

Salabhasana, aka Locust Pose, is a prone backbend meaning the pose is practiced lying flat on the belly. Generally speaking, backbends are energizing and uplifting. They tone and stretch the spine, shoulders, and upper back while opening the chest. Salabhasana is a great backbend to work on with beginners because it doesn’t require weight bearing on the hands and arms and there are multiple modifications available for practice.

A few of the essential actions in Salabhasana, which are the basic actions that are needed to perform the pose, include pressing the tailbone towards the floor and extending it towards the heels, lifting the inner thighs and stretching the legs, reaching the arms back and upwards, lengthening and lifting the abdomen, chest, and head. These actions are essential to maintain the integrity of the shape, but equally important when practicing this pose is to breathe deeply, relax the face and throat, and release unnecessary tension. This is the essence of Yoga Sutra 2.46 – Sthira Sukham Asanam – the pose should be a balance of effort and ease. Backbends, like Salabhasana, typically require a lot of physical effort to practice. With that effort could come strain, tension, or gripping. The work is to keep the effort while stripping away any undue gripping or tension that doesn’t assist the shape. Every pose has a different formula between effort and ease and when you find it there is a sense of peacefulness and equanimity that washes over the body and mind of the practitioner.

In this sequence, we start by preparing the body for backbends with poses that open the chest and back, increase shoulder mobility, and lengthen the psoas and fronts of the thighs. Standing Poses like Crescent Lunge, Warrior 1, and Warrior 3, shoulder openers like Parvartasana and Gomukhasana in Virasana, and psoas exercises are essential to this sequence in preparation for Salabhasana. We conclude with poses that help pacify the spine and quiet the mind leading us towards Savasana. Poses like Bharadvajasana, Child’s Pose, Supta Padangusthasana, and Halasana help wind us down.

We know that backbends are invigorating and exhilarating. Having a proper wind down after practicing backbends will ensure that our mind and body move from a Rajasic (active) state to a Sattvic (harmonious) state. After taking class you should feel vibrant and light.

Give it a try and let us know how it goes! To catch a few video clips of this sequence in action follow @patrickfrancojr and @yogarenewteachertraining on Instagram.

And, if you want more in-depth vinyasa sequences like this along with teaching notes + tips on how to cue them, enter your email below to grab our FREE guide:

Puttering/Warm-Up:

  • Virasana w/ Parvatasana
  • Virasana w/ Gomukhasana Arms
  • Downward Dog
  • Crescent Lunge

Sun Salutations:

  • 3-4 Rounds

Standing Poses:

  • Trikonasana
  • Extended Side Angle
  • Warrior 1
  • Utkatasana with Interlaced Palms Behind Back
  • Prasarita Padottanasana C

Balance Pose:

  • Warrior 3

Twist Pose:

  • Revolved Triangle

Prep Pose:

  • Supta Virasana

Peak Pose:

  • Salabhasana

Seated Poses:

  • Child’s Pose
  • Bharadvajasana

Wind Down Poses:

  • Supta Padangusthasana
  • Halasana

Savasana


4 Tips for Teaching Yin Yoga

By Yoga, Yoga Teachers

In this video, Kate Lombardo shares her personal introduction to the practice of yin yoga. After falling in love with it, she made it a point to develop a yin teacher training… but first she wants to shed light on some helpful tips she learned along the way.

Tip #1: Explain to your students what yin is

Many students may not be familiar with the practice yet — and that’s okay! That’s what you’re there for; holding space for them and able to speak on why people practice yin yoga. Giving an explanation of what students can expect in a yin class is a great way to get them comfortable with the practice and hopefully returning.

One good point to focus on is that it mainly differs from other types of yoga classes in the sense that poses are held a bit longer. If you don’t explain what’s going to happen throughout class, students may be confused when there isn’t as much of a flow happening. On the inverse, students who are regularly familiar with yin but have never taken a class with you will probably also appreciate being debriefed on what to expect in your class specifically.

Key points about yin yoga:

  • Poses are held anywhere from 5-7 minutes
  • Targets the connective tissues (fascia) of the body
  • Is a practice designed to find stillness
  • Engages the body to quiet the mind

Tip #2: Find a balance between silence & guiding

Work on finding a balance between speaking and guiding students. It’s beneficial to any yoga practice to allow students the time and space to notice how the practice feels for them and how the poses feel for their personal body. Unlike a vinyasa class, during a yin yoga class silence can create comfort as students adjust and find a space comfortable for them while being in such deep postures.

Tip #3: Create a comfortable environment

Music, lighting, temperature… these are all things that matter when setting up an environment that feels inviting, safe and comfortable for students. Remember, they most likely came to a yin class to find the stillness, peace and stress relief a yin yoga class offers. If you’re not guiding students as to which props to use, how to use them, and aren’t focused on creating a calm environment for them, they may be turned off to the practice completely. If you notice the ambiance of the room, your students are noticing it, too.

Tip #4: Be a little ‘hands-off’

Let your students find the practice in their own way… meaning, let them determine their own experience with the practice. You are simply a facilitator. This not only empowers students and makes them feel like they accomplished squashing their stress and getting a good workout in, but it allows them to feel like they received a one-on-one experience. The more space you can give students to explore the practice on their own, the more intimate of a relationship they’ll have with the class.

If you’ve enjoyed Kate’s chat, be sure to subscribe to our YouTube Channel with more content like this! As always, sign up for our newsletter if you are interested in becoming a yoga instructor yourself.

Join our mailing list for weekly content!

Vinyasa Yoga Sequence PDF download for Vashistasana (Side Plank)

Vashistasana (Side Plank) Sequence

By Yoga Teachers

Full Vashistasana, or side plank, is a pose that encapsulates the give and take of the yoga practice. It requires an embracing of strength and stretch and finding the balance in the pose comes from both effort and ease. With too much focus on strength and effort, it becomes difficult to lift the leg and open the heart. But, if all the focus is on the lengthening then holding the pose on one arm and one leg become impossible.

Creating a sequence for this class should focus on helping students to build familiarity with integrating the muscles of the body in towards the center line and also opening the shoulders and the hamstrings to allow for the lift of the leg.

The key is making sure that you visit side plank a few times in class while also not doing it so often that students become exhausted before you have a chance to teach your peak. Replacing chaturanga a few times with side plank in between your rounds of standing poses is a good way to achieve this.

As with any peak pose, it’s also important to offer steps along the way– staying with the top leg in a tree pose position in side plank or simply lifting the leg without reaching for the foot are great options for this.

The use of a strap can also be helpful if– and this is a big if– you are able to successfully demo how to use it. Sometimes that can get a little clunky and actually be more hurtful than helpful. In that case, staying with a tree pose leg is the way to go.

Puttering/Warm-Up:

  • Supta Padhagustasana
  • Supported Side Plank
  • Low Lunge Twist
  • Prasarita Padattonasana

Sun Salutations:

  • 3-4 Rounds

Standing Poses:

  • Warrior 2
  • Triangle Pose
  • Ardha Chandrasana
  • Warrior 3

Balance Pose:

  • Tree Pose
  • Padaghustasana B

Twist Pose:

Revolved Triangle Pose

Peak Pose: Vashisthasana (Side Plank)

Wind Down Poses:

  • Uppavistha Konasana
  • Paschimottanasana
  • Bridge
  • Recline Spinal Twist

Savasana

Give it a try and let us know how it goes! To catch a few video clips of this sequence in action follow @kate.lombardo and @yogarenewteachertraining on Instagram.

And, if you want more in-depth vinyasa sequences like this along with teaching notes + tips on how to cue them, enter your email below to grab our FREE guide:

Yin Yoga Teacher Training instructor, Kate Lombardo

Ever Hear of Fascia?

By Yoga

The more you study yoga and the more you inevitably study topics like anatomy, alignment, muscles, tissues, and all things body-related. During these studies, you’re bound to come across the topic of fascia tissue. When I did my first Yin Yoga Teacher Training, I was totally obsessed with learning about fascia tissue and wondered why I hadn’t studied it more in the past. It’s often understood as the connective tissue in our bodies, but it’s so much more!

Like almost everything else in the practice of yoga, this fibrous network goes beyond being only about connection. As you dive into the deeper study of fascia, it relates to so many other concepts within the mind and body and hope you move through this world.

The first time a teacher described fascia to me, they compared it to “that white stuff” you see when you peel an orange. It’s what keeps the fruit connected, but it’s not something everyone thinks about when they think of an orange. In your body, fascia is like the thread that interlaces through every fiber of muscle, every pivot of bone, every whisper of nerve, and every thrumming organ. With its fibrous collagen, its resilient elastin, and its nurturing gel-like matrix, fascia is the perfect blend of strength and vulnerability. It has a dual role of both supporter and facilitator within your body.

What exactly is fascia?

Fascia is an ongoing, continuous web of connective tissue that surrounds and supports every muscle, bone, nerve, blood vessel, and organ to the cellular level. Fascia is this super-thin, tough layer that wraps around all your muscles and bones. It helps keep everything in place and allows you to move, bend, and play without your insides getting all jumbled up. It’s really important because it serves as the connector to all the different parts inside of you and makes sure they work well together.

Why is fascia important in the yoga asana practice?

When you perform yoga asanas (postures), you’re not just stretching muscles; you’re also stretching and stimulating the fascia. Healthy fascia is elastic and resilient, so a regular yoga practice helps maintain its suppleness. This can lead to increased flexibility, improved range of motion, and a feeling of openness in the body. Doesn’t that sound amazing?

Yoga also encourages the mind-body connection through the practice. When you move mindfully, it may lead to a more nuanced perception of the body’s internal state. Since fascia is rich in nerve endings, it may play a role in proprioception (the sense of the relative position of one’s own parts of the body) and interoception (the sense of the internal state of the body). Yoga enhances this connection and awareness, which can, in turn, lead to better engagement and training of the fascial system.

What about trauma?

If you dig into the study of fascia, you are bound to come up with the connection it has to trauma. Yoga teaches us that every experience in life gets stored somewhere in the body. Fascia is thought to hold tension and trauma, both physically and emotionally. When fascial tension is released, it can sometimes help process and release emotional tension. Yin yoga specifically focuses on this concept and this practice.

What about flow?

In a vinyasa yoga class, there is more of a “flow” component to the practice than in other styles of yoga. You move from asana to asana in a more fluid way and also connect more deeply to the breath syncing with the movement. The quality of flow in yoga movements is similar to the quality of a healthy fascial system. A well-maintained fascial network allows for smooth, gliding movements of muscles and joints, which is something that regular vinyasa yoga practice can enhance.

Injury and Recovery

Regular movement, like a regular yoga practice, can help maintain fascial health, which is essential for injury prevention. When fascia is not well-maintained, it becomes dehydrated, stiff, or sticky. This can lead to a higher risk of injury. Yoga, and overall movement, can help keep the fascia and the body less prone to injury. When the fascia is well-maintained, recovery time from injuries may be shorter.

The Subtle Body

Through the study of the subtle body in yoga, you learn about the existence of channels of energy, or nadis, within the body. Some teachers I’ve had have suggested that fascia may correlate with these pathways because fascia penetrates all regions of the body. When you study the chakras, you also come to understand that some energetic blockages can cause physical blockages and vice versa. If the fascia tissue is healthy and well-maintained, it may be easier to move through blockages and create a better energetic flow throughout the body.

When the subtle body is in alignment, it may lead to more clarity, better decision making, deeper connections in relationships, and an overall healthier sense of self and feelings of wellbeing. As practitioners of yoga, we’re always learning how to connect the subtle body with the physical body and it’s so interesting how the fascia tissue can help support that connection.

Fascia as a Pathway to Awareness

As you aim to understand the landscape of your inner self, your perspective may shift from simply acknowledging the body’s mechanical nature to embracing its sentient capabilities. You may begin to notice the subtle cues of tightness or the signals of moving out of harmony and ease. When you’re aware that this fascia tissue is everywhere and that it’s one of the keys to healthy movement and awareness, it can help deepen your overall connection to yourself.

It’s so elegant!

Fascia is kind of like your body’s clever designer. It intricately layers itself from the outermost sheath that entwines nerves and blood vessels to the deeper fibrous networks that support muscles and bones, down to the webbing that encompasses each organ. Each layer is elegant support structure that delicately supports you.

It helps you be more graceful — The grace of our movement, the integrity of your posture, and your comfort within your own skin rely on the health of this connective tissue. Fascia isn’t just an observer in your bodily narrative; it’s an active participant in your ability to move through life gracefully. When cared for, it may feel like you’re moving with ease from place to place and with ease comes grace.

It’s all connected!

Yoga is about connection. As you bring this understanding to your mat, you can engage not only in a sequence of asanas but in a deeper relationship with the essence of your physical being. This practice goes beyond the physical realm. It asks you to connect with your soul and it revitalizes the hidden strands of your vitality. Begin to see each and every movement as a delicate tribute to the fascia. Try to see each breath as a gentle nudge to awaken its potential. With every asana, with every mindful transition, you can communicate with this web within you.

Garudasana Sequence PDF

Garudasana (Eagle Pose) Sequence

By Yoga Asana, Yoga Teachers

Garudasana, or Eagle Pose, is a standing balance. This is such a great pose to work on for beginners and experienced practitioners alike because it requires concentration and coordination to maintain balance which further enhances the physical benefits of strength and flexibility in the pose. The intertwining of the arms removes stiffness in the upper back and shoulders. The intertwining of the legs tones the feet, ankles, calves, and thighs.

Teaching standing poses is a great way to work on foundational alignment principles and movements that will carry over to more complex poses later on in class. In fact, B.K.S. Iyengar has a famous quote that says “you need to learn to stand on your feet before standing on your head.” This reinforces the importance of practicing standing poses in the overall arc of a student’s yoga journey.

Typically, we start with more open and spacious standing poses, like Warrior 2 or Triangle pose, before working our way to more compact and complex poses like Garudasana (Eagle Pose). Since Garudasana has intertwined legs and arms we work our way through many bent arm and leg poses that have similar actions to Eagle Pose. In addition, the rounding of the upper back with the shoulder blades moving away from the spine is also an important action of the pose that needs to be integrated throughout the sequence. Remember that even though the upper back is rounded, the rib-cage is still lifting up away from the pelvis and not sinking down.

Poses like Parvatasana, Gomukhasana Arms, and Garudasana Arms are great poses to weave into this sequence because they work on scapula mobility. Many of the bent leg poses like Virasana, Child’s Pose, and Extended Side Angle teach the action of the legs. Lastly, poses like Warrior 1 and Utkatasana were incorporated into this sequence because they have bent legs and lift the rib-cage away from the pelvis simultaneously. The wind down section of class takes the torso in the opposite of Garudasana bringing balance and harmony to the overall practice before Savasana.

Puttering/Warm-Up:

  1. Virasana w/ Parvatasana
  2. Virasana w/ Gomukhasana Arms
  3. Virasana w/ Eagle Arms
  4. Cat/Cow
  5. Child’s Pose
  6. Downward Dog

Sun Salutations:

  • 3-4 Rounds

Standing Poses:

  1. Warrior 2
  2. Extended Side Angle
  3. Warrior 1
  4. Utkatasana

Twist Pose:

  • Revolved Extended Side Angle Pose

Peak Pose: Garudasana (Eagle Pose)

Seated Poses:

  1. Gomukhasana
  2. Bharadvajasana

Wind Down Poses:

  1. Supported Fish Pose
  2. Bridge
  3. Reclined Spinal Twist

and finally… Savasana!

Give it a try and let us know how it goes! To catch a few video clips of this sequence in action follow @patrickfrancojr and @yogarenewteachertraining on Instagram, and if you want more in-depth vinyasa sequences like this along with teaching notes and tips on how to cue them, enter your email below to grab our FREE guide:

Blog Sequence Bird of Paradise

Bird of Paradise

By Yoga Asana

The first time I ever saw a teacher teach Bird of Paradise in a yoga class I almost thought it was a joke.

Wait, you want me to do a bind, hip opener, and hamstring stretch at the same time AND while standing on one foot?!

I had to apply a serious sense of humor to my practice when I first started working on this pose because there was a lot of falling and feeling more like a bird fall out of it’s nest than a bird in paradise.

The key to teaching this is building each of the components – the hip opening, binding, and balance – throughout your class, and making sure that you offer instruction on a step-by-step entrance into the pose so students can stop along the way. A strap is also hugely helpful!

Puttering/Warm-Up:

  • Sukhasana w/ forward fold hip stretch
  • Lizard lunge w/ back knee down
  • Supported Parsvottanasana (using blocks + back heel up)
  • Wide Squat
  • Uttanasana (with clasped hand behind the back)

Standing Poses:

  • Warrior 2
  • Triangle Pose (built from the ground up)
  • Extended Side Angle (with hand inside of the ankle)
  • Ardha Chandrasana (with half bind in top arm)

Balance Pose:

  • Tree Pose (enter from the ground up)

Twist Pose:

  • Anjenyasansa twist

Peak Pose: Bird of Paradise

Wind Down Poses:

  • Seated Twist
  • Baddha Konasana
  • Happy Baby

Savasana

Give it a try and let us know how it goes! To catch a few video clips of this sequence in action follow @kate.lombardo and @yogarenewteachertraining on Instagram.

Also, if you want more in-depth vinyasa sequences like this along with teaching notes + tips on how to cue them, enter your email below to grab our FREE guide: