As we make our final stop through our rainbow journey of the chakras, we land on the seventh chakra. In Sanskrit, the seventh chakra is called Sahasrara and is translated to: a thousand-petaled lotus. The physical location of seventh chakra is the crown of the head and actually extends beyond the confines of the physical skull to expand the energy up and out ✨.
The seventh chakra is where we deal with:
- Consciousness
- Awareness
- Universal identity
- Higher power
- Transcendence
- Divinity
- Meaning
- Unity. This the ultimate force towards transcending our physical selves and merging with the divine (or however you define a higher power).
The topics that are faced here, such as consciousness itself, are mysteries that cannot be accurately explained…only experienced. Think about it, how does one explain consciousness? How does one explain transcendence? How does one explain divinity? The fact that we cannot explain concretely these matters marks the very reason why many people do not complete the journey of the rainbow bridge in one lifetime…but that doesn’t stop us from trying, right?
To fully understand and experience the magic of Sahasrara, one would have to fully surrender to the fact that to be known means to let go of what is known. Sahasrara is about developing and expanding our capacity for universal intelligence, which is always present whether we are tuned into it or not.
As Anodea Judith stated, our operating system is located at seventh chakra. This means that we derive meaning from our experiences which develop our belief systems which ultimately govern the rest of our chakra system. As our consciousness evolves, our belief systems and operating systems continuously become updated thereby revealing the feedback process from chakra one through seven and vice versa. In order to allow change and upgrades in the direction of manifestation and transcendence, we have to be fully open to the fact that everything is subject to change.
Supporting Pose #1: Easy Seat with Arms Behind the Back (Sukhasana)
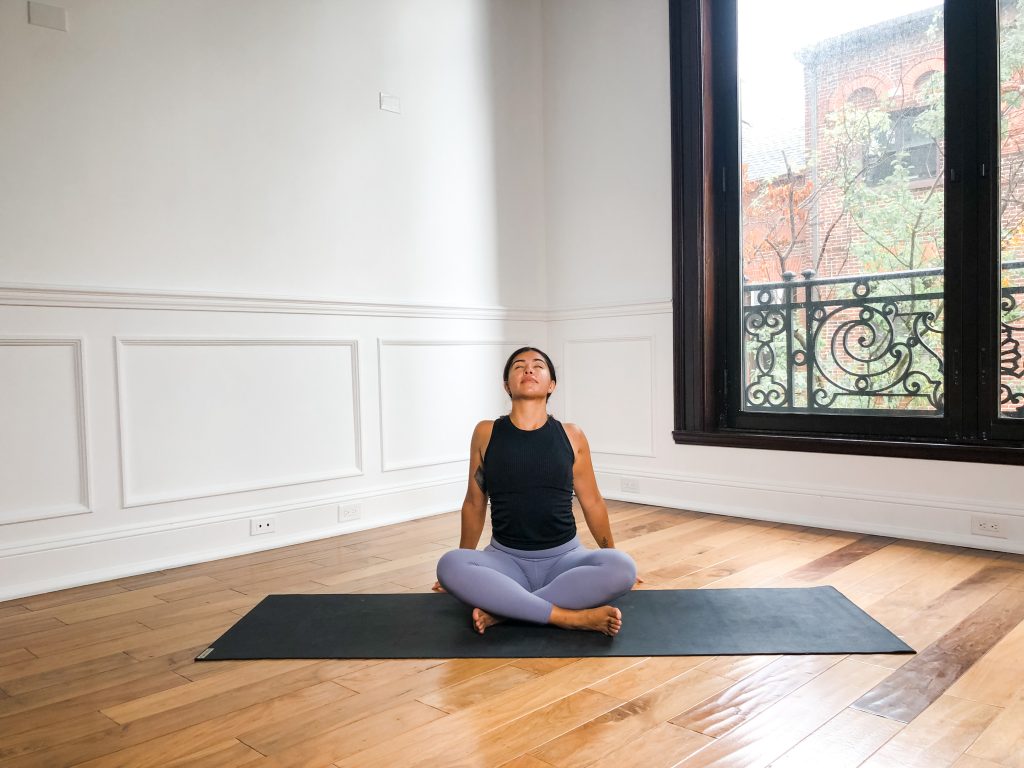
When prepping for a more complex peak pose, I like to use other more familiar poses to teach the elements of the peak. In this case, you’ll sit in an easy seat with your arms behind the back. This will help to firm the upper back in, which is vital for shoulder stand.
How to:
- Sit on the floor or blankets with the legs crossed at the shins/ankles.
- Take your hands behind you to the floor or edge of the blankets. If you’re using blankets, you can literally grab the back edge of the blanket and press down.
- As you press your hands down, firm the upper back in by drawing the shoulder blades towards one another and widening your chest.
- Lift the chest up and throat slightly up to open the front side of the body.
Supporting Pose #2: Wide Leg Forward Fold with Hands Clasped (Prasarita Padottanasana)
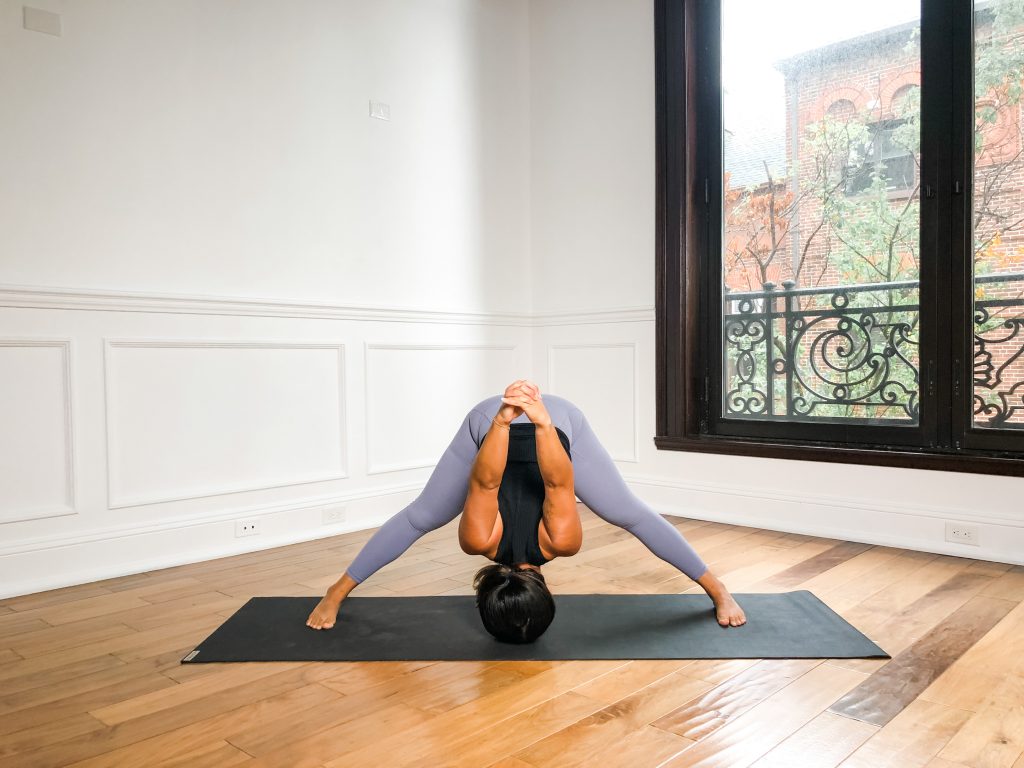
Wide leg forward fold can practically teach ANYTHING. In this case, we’re going to use this pose to create integrity in the legs (huge for shoulder stand) and we’ll clasp the hands behind the back to firm the upper back in again (yes, this is a very important element as you can tell).
How to:
- From a low lunge, straighten your legs and walk your hands and pivot your feet to the right. Ensure the feet are parallel to one another.
- Inhale to lift your chest halfway and as you do this, lift your toes and kneecaps to create integrity within the legs.
- Bring the hands behind your lower back and clasp them together. Use the clasped hands to help draw the heads of the shoulders back and the shoulder blades towards one another.
- As you exhale, fold to bring the crown of the head towards the floor and clasped hands up and overhead.
Supporting Pose #3: High Lunge with Back Knee Bent
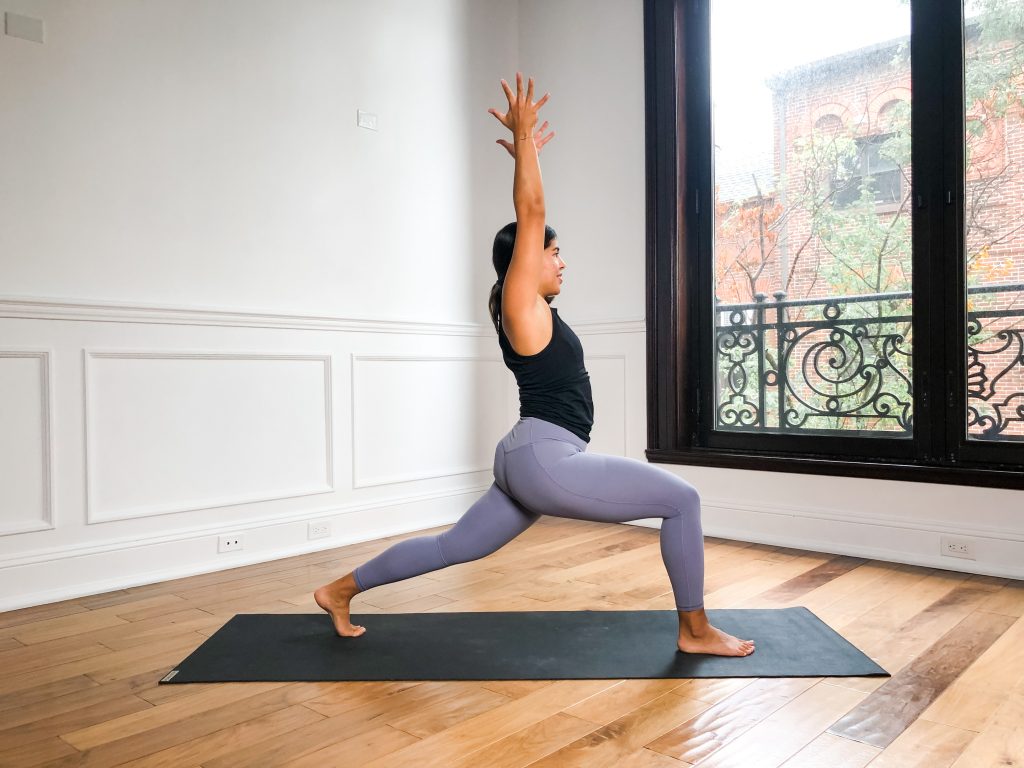
High lunge with the back knee bent will help to teach an element we haven’t touched on yet that is important for shoulder stand…firming the sacrum forward. The bent back leg will create more space to move the pelvis in the direction of a posterior pelvic tilt so that the hips and shoulders create one line.
How to:
- From low lunge, bring the torso upright to reach the arms up and overhead and look straight ahead.
- Do your best to bring the arms alongside the ears by firming the upper back in to draw the arm bones back.
- Slightly bend the back knee and press the sacrum forward so that you can lift the frontal hip points towards the navel. You can keep the pelvis in this position, or you can try to straighten the leg while maintaining the alignment of the pelvis.
Peak Pose: Shoulder Stand (Salamba Sarvangasana)
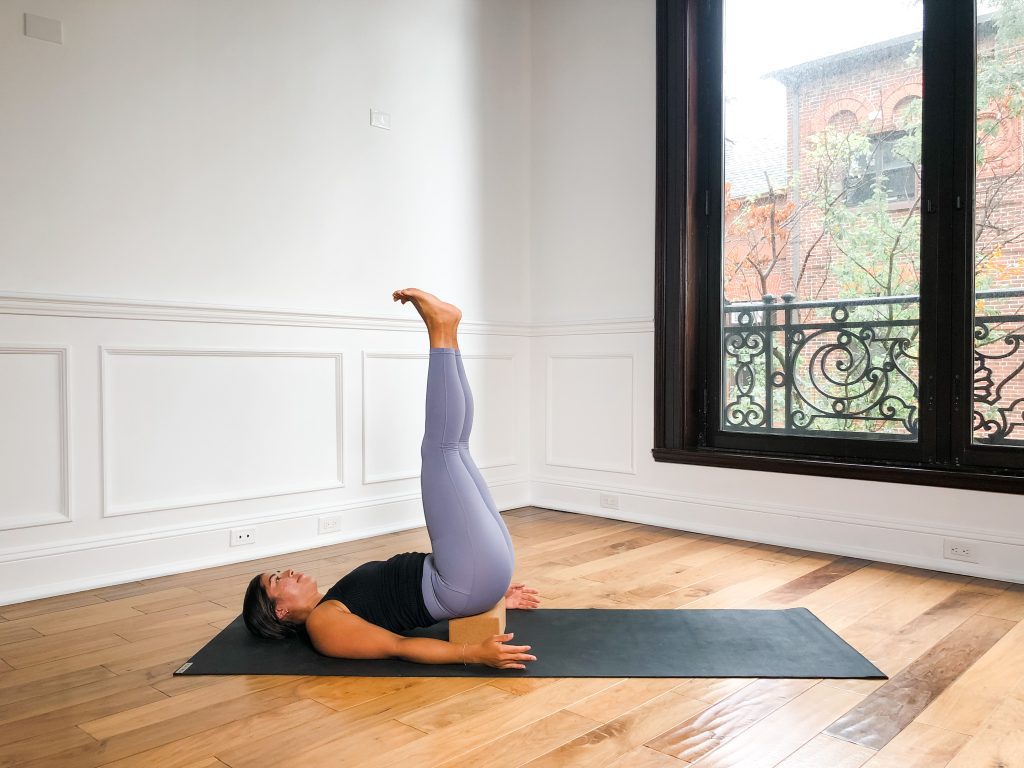
Shoulder stand is a wonderful pose to sequence towards 7th chakra. Not only does it reverse blood flow from toes to head, but it’s also in the true inversion family meaning that it is meant to calm the nervous system and prepare the body for rest and surrender. It also seems quite easy to set up, but takes patience and a deep understanding of body and alignment.
How to:
- Place 2-3 blankets towards the middle of your mat.
- Fold the bottom edge of the mat over the blankets with a few inches from the edge of the mat to the edge of the blankets. The mat will create a more stable ground for your shoulders.
- Lie down with your upper back on the mat/blanket pile and your head on the flat mat.
- Measure a thumbs distance between the top of your shoulders and the edge of the blanket and adjust yourself accordingly. This will be your foundation for the pose.
- Enter plow pose from here by pressing your arms into the ground and taking the legs overhead and the feet towards the floor behind you.
- Take your hands to your upper back with the fingers facing the pelvis. Walk your elbows together behind the back and firm the upper back in. Think about getting your hands as high up as possible.
- One by one, take your legs to the sky. Firm the sacrum in, press the thighs away, straighten the legs, and spread your toes.
- Continue to firm the upper back in, walk your hands towards the shoulders, and reach the balls of the feet up.
*The blankets are necessary for proper alignment of the shoulders, neck, and head. Good thoracic mobility is also necessary for proper alignment of the pose. A belt around the upper arms can assist the firm in action of the upper back, but this pose deserves a lot of time and attention to enter safely and efficiently!