We arrive now to our sixth chakra, otherwise known as our Third Eye chakra. In Sanskrit, this chakra is known as Ajna chakra and it means: to perceive. This energy center which is located between the eyebrows is the home of our intuition and imagination.
As mentioned in last week’s post, we are now in the more ✨ ethereal ✨ realms of the chakra system. Meaning we are now more concerned with: thoughts, mental images and symbols, and divine connection. It’s within these ethereal realms where we bring our earthly self towards the divine. It’s within these realms, particularly sixth chakra, where we can start to perceive things that are unseeable and make meanings/interpretations that contribute to our experience and perception of life.
Our Third Eye chakra governs:
- Intuition
- Dreams
- Pattern recognition
- Interpretation
- Imagination
- Archetypes
- Vision.
From Ajna chakra, we are able to see and gather information on our past and present to create a vision of the future. It’s our vision of the future which determines what actions to take in the present moment, which will ultimately lead to our manifested future. If you need to read that again, go ahead. ?
Our third eye allows us to perceive our inner landscape so that we can become conscious of patterns which no longer serve us, gain wisdom from noticing said patterns, and create deeper meaning to expand our perception of ourselves and the world around us. It’s almost like our third eye gives us psychic abilities lending us proper direction in a world that can feel chaotic and overwhelming.
*Practices like journaling, story telling, meditation, and modalities to strengthen our ability to turn inward and trust ourselves can increase the potency of our third eye.
Supporting Pose #1: Sphinx Pose (Salamba Bhujangasana)
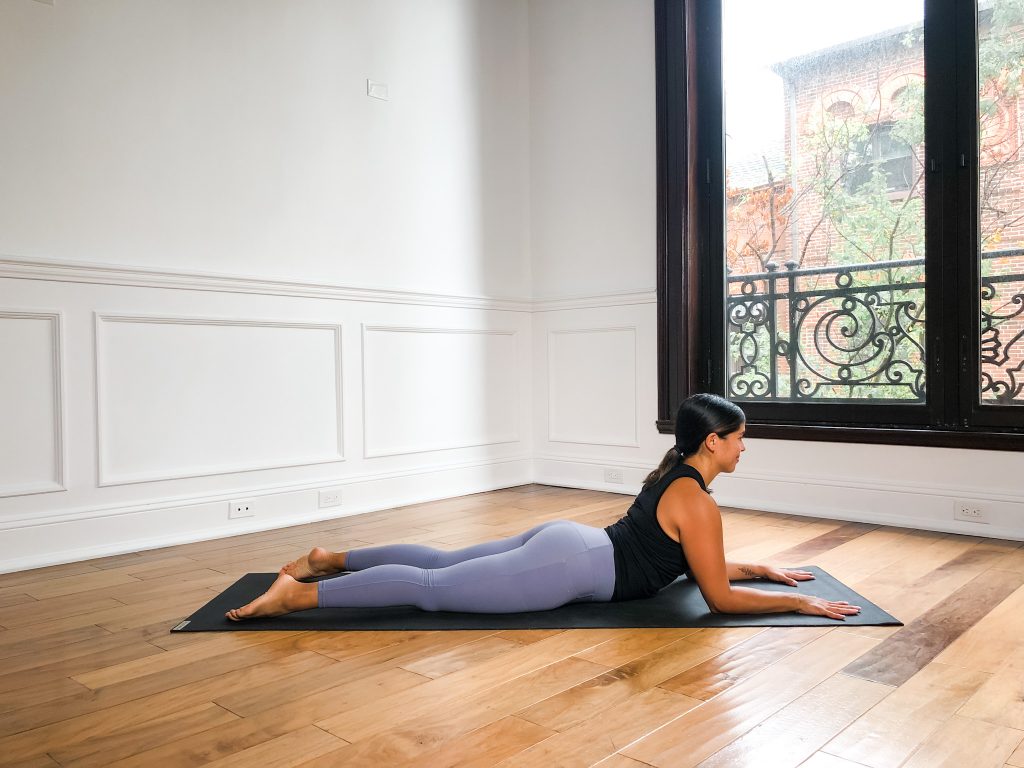
Sphinx Pose is a great option for teaching tripod headstand as it gives the ability to teach proper activation of the biceps and a firming in of the upper back necessary for the peak. The biceps must isometrically wrap inward in tripod headstand to support the rest of the frame. If the arms are just hanging out, (which I often see), it is much easier to fall out of the pose.
How to:
- Lie on the ground on your belly.
- Take your forearms to the floor with the elbows more or less beneath the shoulders (a little ahead of the shoulders is okay).
- Face the fingers directly forward as you would in downward facing dog.
- Extend the legs behind you and press the sacrum down into the ground.
- Draw the shoulder blades together to firm the upper back in and widen the chest.
- Energetically pull the elbows back and wrap the biceps in towards one another. This will make very little to no movement to the external eye but the hope is that you feel like you are pulling your chest forward and a firmness to the inner arm which supports the chest and head.
Supporting Pose #2: Wide Leg Forward Fold (Prasarita Padottanasana)
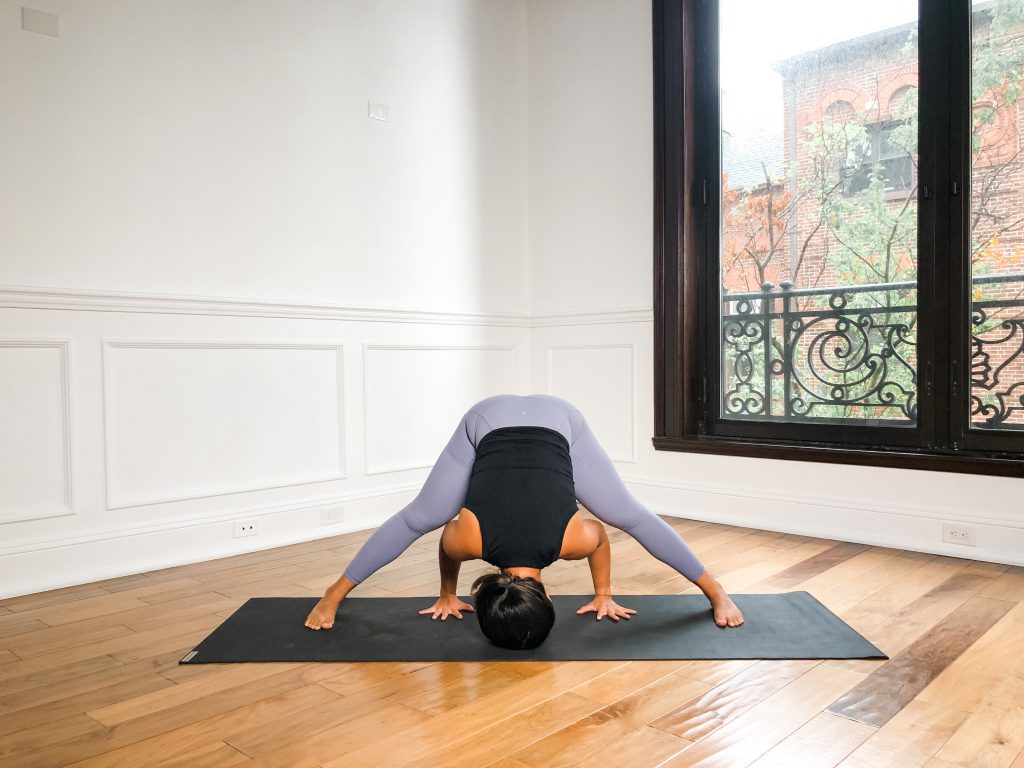
Wide leg forward fold is a good option in prepping for tripod headstand, especially if you are entering the pose from a straddle position. This pose teaches the practitioner to straighten the legs and how to pull the crown of the head to the floor by using the legs and arms. The technique of wrapping the biceps in which we covered above in sphinx pose should be employed here.
How to:
- From low lunge, straighten the legs, walk the hands, and pivot the feet to face the long edge of your mat.
- Ensure all four corners of both feet are pressing into the ground and lift the kneecaps in order to firm the legs and fold.
- Place the palms flat onto the ground with the fingers and toes facing the same direction. If you are working up to flat palms on the ground and can’t reach the floor fully yet, use blocks beneath the hands.
- Walk the hands back so the fingertips are in line with the medial arches of your feet, while keeping the fingers in the same direction and spread your fingers as you would in downward facing dog.
- Bend your elbows and use the biceps by isometrically wrapping them inward to pull the crown of the head to the floor.
- Once the crown of the head is on the floor, broaden the shoulder blades and firm the upper back in at the same time. We are looking for a firmness to the upper back, not necessarily retraction or protraction of the shoulder blades but somewhere in between.
Supporting Pose #3: Standing Split (Urdhva Prasarita Eka Padasana)
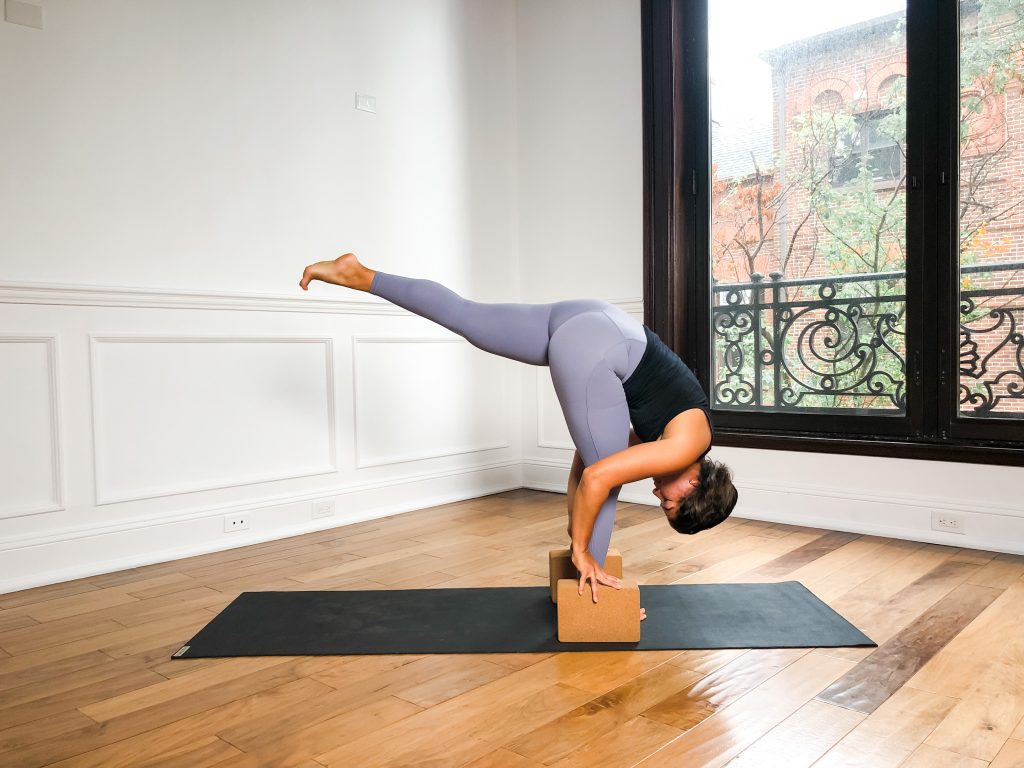
Standing split is yet another pose where students have the ability to employ the biceps wrapping in as the head is drawn downward. It also teaches good action of the legs in helping one fold (the leg on the floor) and in helping the leg find both firmness and lightness to lift (the leg that’s lifted).
How to:
- From low lunge (with the right leg forward), bring the hands to the ground directly around the front foot. Bring flat palms to the ground or blocks.
- Take the weight onto the hands and the right leg and lift the left leg into the air behind you.
- Firm the bottom leg but lifting the kneecap and use that leg to bring the nose towards the knee. Firm the top leg by toning the thigh, spreading the toes, and reaching through the ball of the foot. The more clarity within the back leg, the easier it will be to control your bodily movements. *Be aware if the left leg/hip is opening — try to maintain an internal rotation of the back leg to keep the hips more or less squared.
- Bend the elbows and wrap the biceps inward to bring the crown of the head in the direction of the floor.
Peak Pose: Tripod Headstand (Sirsasana B)
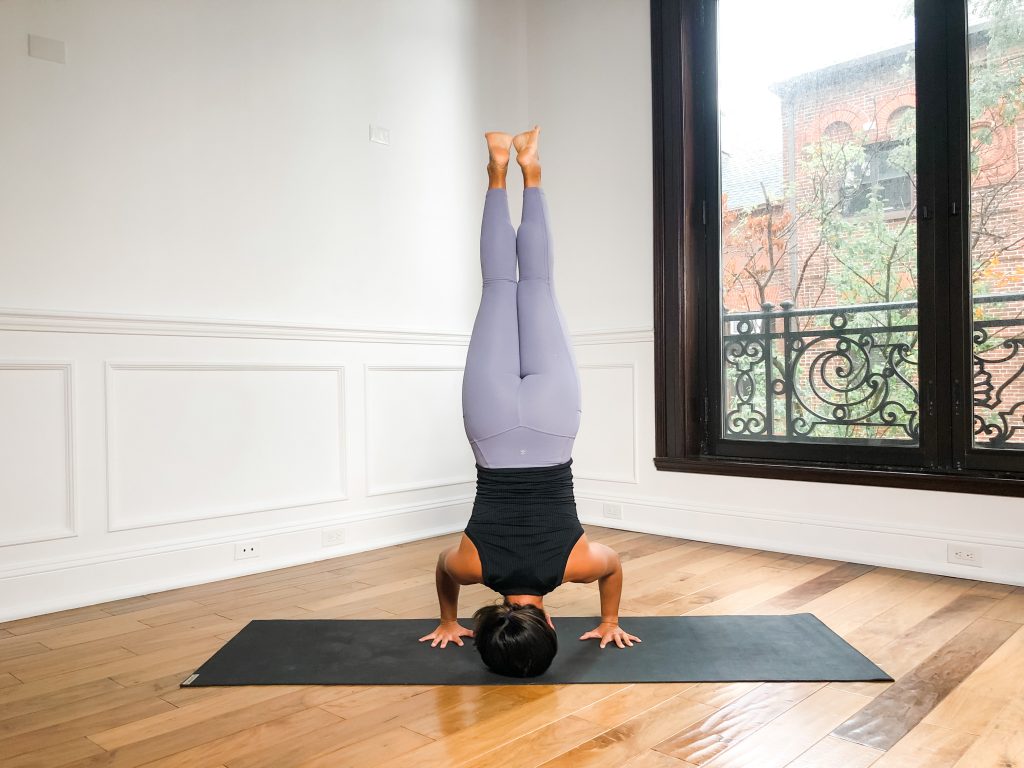
Bringing the crown of the head down and allowing the focus, energy, and blood of the body to move towards the head is a good option for incorporating sixth chakra work into your asana practice. This pose requires a deep understanding of the body as there are many nuances to learn to enter the pose safely and effectively. Trust, patience, and space to move through the steps leading up to tripod headstand are sure to support your journey here.
How to:
- From wide leg forward fold as described above, press the hands, feet, and head down into the ground. Maintain a firmness to the upper back and a wrapping in of the biceps (again, this should manifest as a firmness to the inner arm near the armpit) as you start to transfer the weight into the upper portion of the body.
- Pull the lower abdominals in as you shift your hips above your shoulders and hover the feet wide and above the ground by keeping the thighs firm and reaching through the balls of the feet.
- Once your feet are in mid-air move slowly as you bring the feet in a semi circular motion to meet above the hips. Once the feet are together, reach the balls of the feet UP and keep spreading the toes.
- Pull the front ribs in and fill out the lower back so the spine is stacked well and you can maintain balance.
Sources: Eastern Body, Western Mind by Anodea Judith