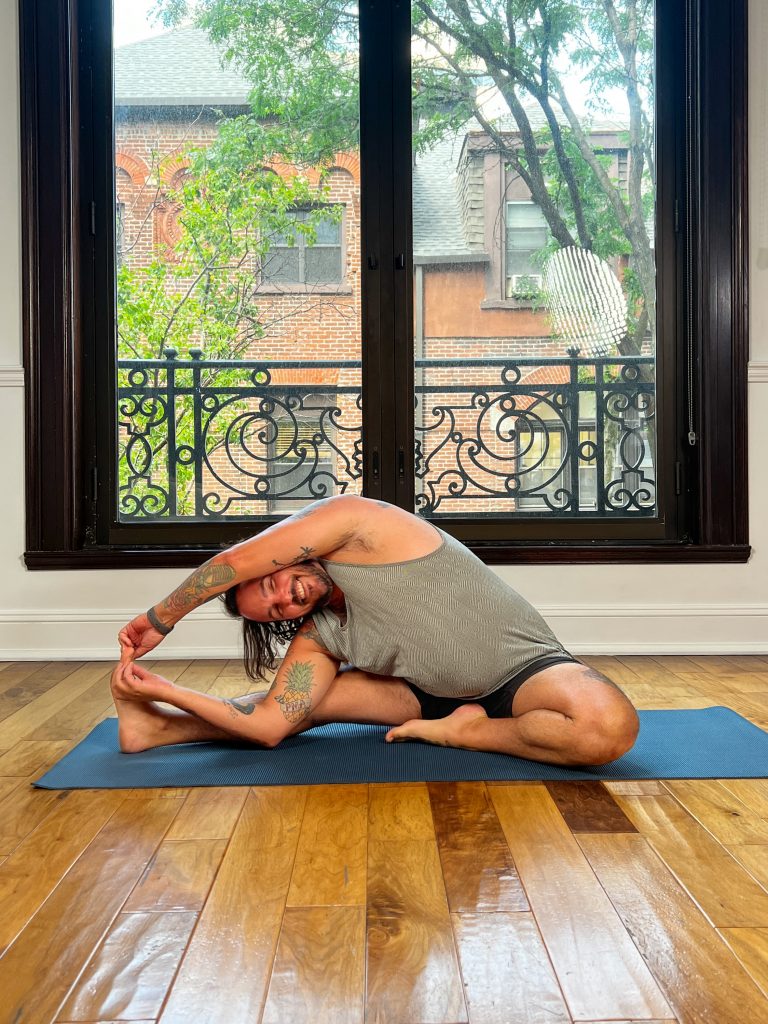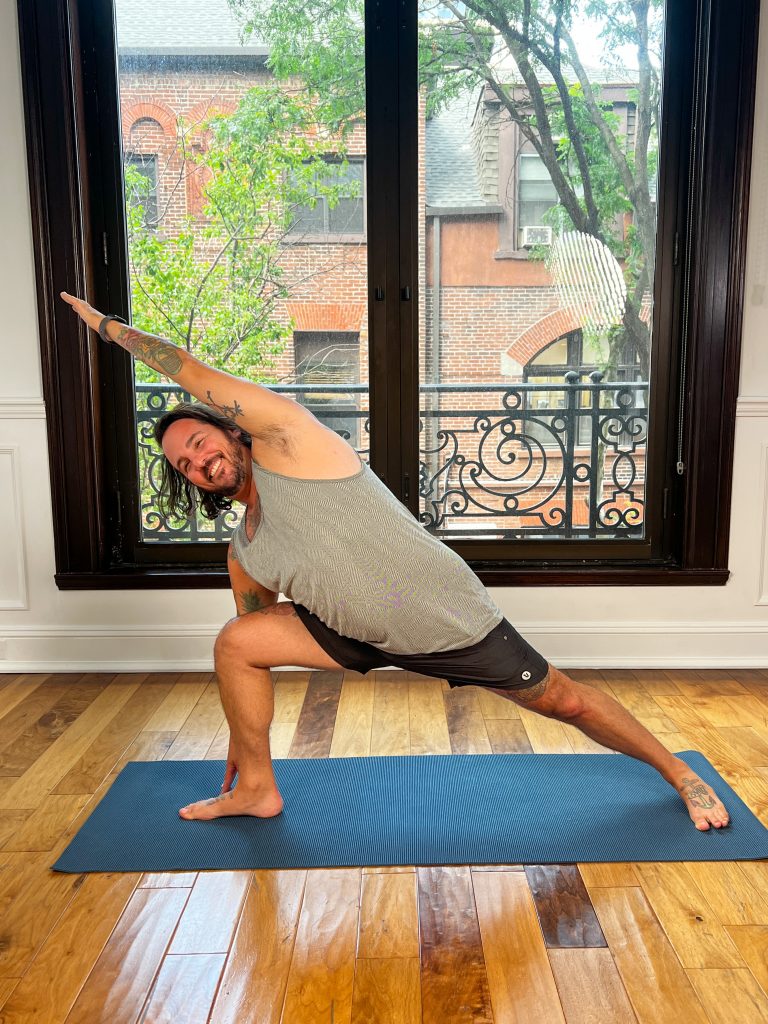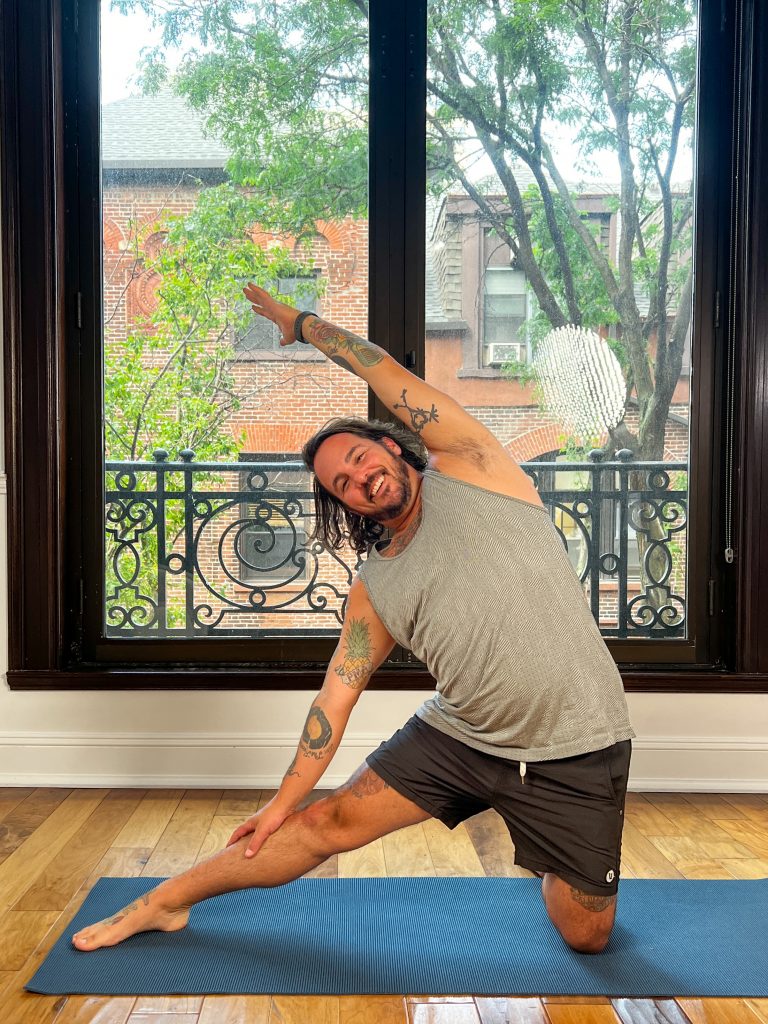
Yoga For Anxiety And Depression: 4 Yoga Poses To Uplift You

By Yoga Teacher Training

It’s not unusual for someone who suffers from anxiety to also suffer from depression, and vice versa. According to the Anxiety and Depression Association of America, major depressive disorder is the leading cause of disability in the United States for ages 15 to 44, affecting 6.7% of American adults 18 and older. On the other hand, Generalized Anxiety Disorder (GAD) affects 3.1% of the US population and often co-occurs with major depression.

womens hands working on yoga for anxietyYoga has been widely recognized as a way to manage symptoms of anxiety and depression, reportedly helping some practitioners adopt a more positive attitude toward life. Practicing yoga and moving the body has many physical benefits and there are also various benefits that yoga can have when it comes to mental health.

According to a Harvard University publication, yoga has been proven helpful in reducing anxiety and depression by helping regulate a person’s stress response system. With the ability to lower blood pressure and improve the quality of the breath, certain yoga poses in particular may help provide you with the means to cope with and alleviate anxiety and depression.

Here are some fundamental poses that help regulate the stress response system:

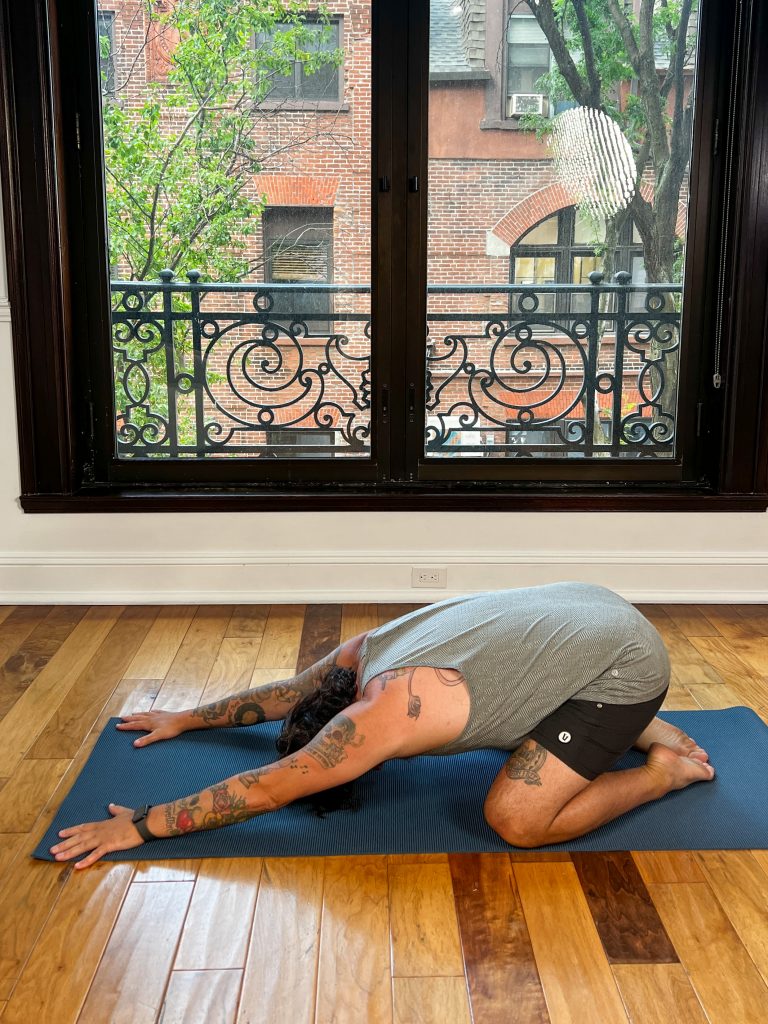
1. Child Pose

women in black outfit practicing yoga on the floor

This basic posture helps relieve tension in the hips and lower back. By resting the forehead down on the ground or on a prop, the parasympathetic nervous system is stimulated, producing a relaxation response.

Find a child’s pose by starting in a table top position, on all fours. Bring your big toes together and your knees apart. Sit the hips back on the heels and rest the torso in between the knees and thighs. Reach your arms out in front of you and take 5-10 deep breaths. With each breath, try to expand the ribcage in every direction, sending the breath to your sides and to your back as well as the belly and the chest.

2. Downward Facing Dog

women practicing yoga in her downward dog stanceThis is another foundational pose that lengthens the spine, strengthens the arms and shoulders and stretches the hamstrings. This pose is considered an inversion, helping blood circulate to the brain. This inversion of your blood flow is instantly energizing, and counters symptoms of anxiety and depression.

Start on the hands and knees. Tuck your toes under and lift the hips back and up, so your body is making an upside down ‘V’ shape. The feet should be hips-width distance apart but don’t worry if your heels don’t touch the floor. You can even bend your knees if you have tight hamstrings. Suck the belly in, firmly press the floor away and relax the neck and shoulders away from the ears. To warm up, peddle out the feet and bend one knee at a time. Then hold steady for 5 deep breaths.

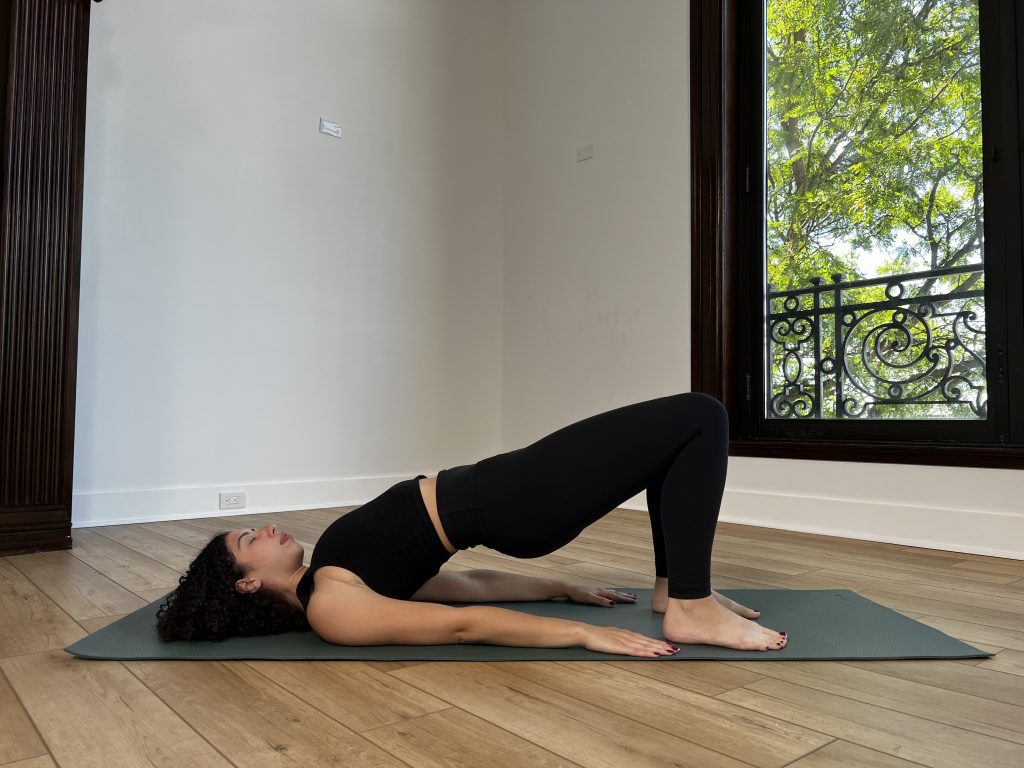
3. Bridge Pose

women showing how to properly hold a back bended yoga poseThis backbend and chest opener help open the front line of the body. In bridge pose, the back of the neck, where we naturally hold a lot of tension, is stretched. Holding this pose can relieve that tension and ease symptoms of depression.

Start laying on your back. Bend the knees and place the feet flat on the ground hips-width apart. Reach your hands toward your heels. On an inhale, press into your feet and lift the hips up off the ground. Strengthen the thighs and tuck your shoulders underneath to help you press up higher. The hands can interlace behind your back, reach for the heels, or press into the ground. Hold for five breaths.

4. Standing Forward Fold

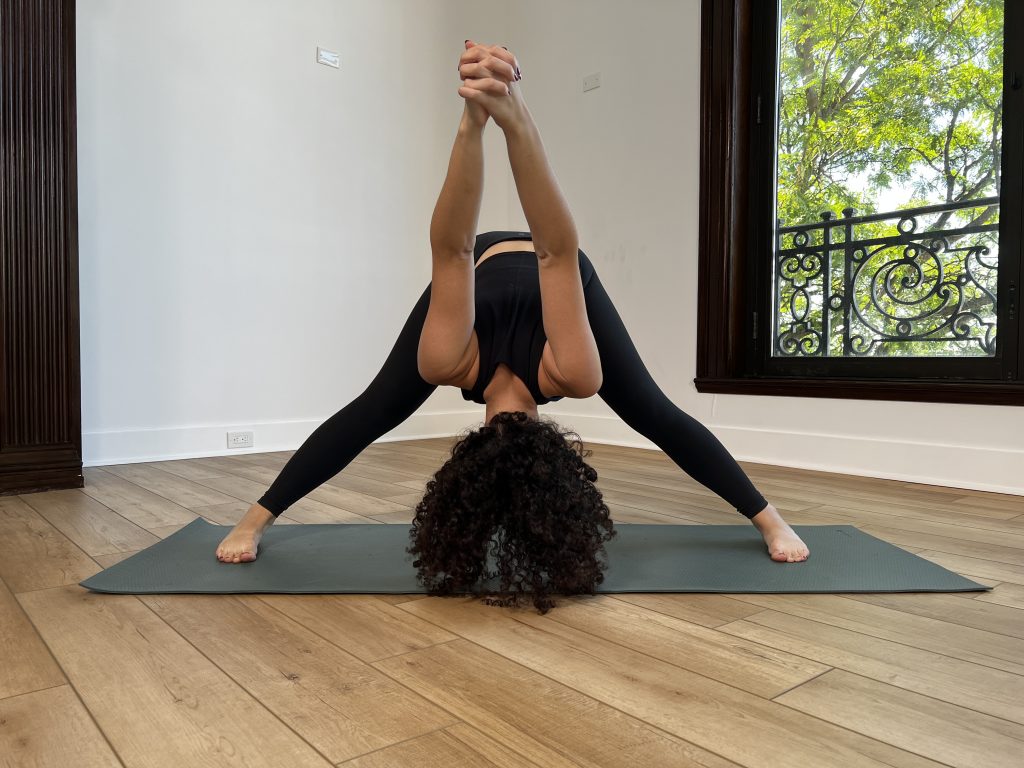
women doing yoga for anxiety at home with a dogwomen showing how half fold pose should be doneDropping the head below the heart has a calming effect on the mind and body. In a standing forward fold, the body can quickly relax and get a stretch of the entire back line: from the hamstrings all the way up to the back of the neck. The pose may also help ease headaches and chronic fatigue.

Start standing with your feet hips-width apart and your hands on your hips. Bend your knees, hinge at the hips, and fold forward. Drop your hands onto the floor or grab opposite elbows and let your head and neck hang heavy. You can sway the torso from side to side, and try to stay inverted for about one minute.

In Summary Of Ways That Yoga Can Help

Research suggests that the practice of yoga modulates the body’s stress response and can be helpful for both anxiety and depression. The scientific study of yoga indicates that mental and physical health are not only closely related, but are essentially two sides of the same coin. In addition, the holistic approach and low-risk involved in practicing yoga makes it an appealing option to manage anxiety and depression.


hands of someone doing a at home yoga sequence

Cozy At Home Yoga Sequence

By Yoga Asana, Yoga Teacher Training

While staying at home, it can be easy to feel lazy, unmotivated to exercise, eager to eat more than usual or even overwhelmed and stressed about current events. In addition to stress, the weather is cold which lures you into your warm bed, often unwilling to physically challenge yourself in your practice. What if I told you that you can incorporate a slow-paced, restorative at home yoga sequence into your daily routine which will leave you relaxed and refreshed instead of sore and tired?

At Home Yoga Sequence

Restorative yoga sequences usually consist of only a few asanas that are held for a minimum of 5 minutes in order to supply the full benefits of each asana. The following sequence provides a wonderful way to wind down during stressful times and treat your body without feeling exhausted.

1. Child’s Pose

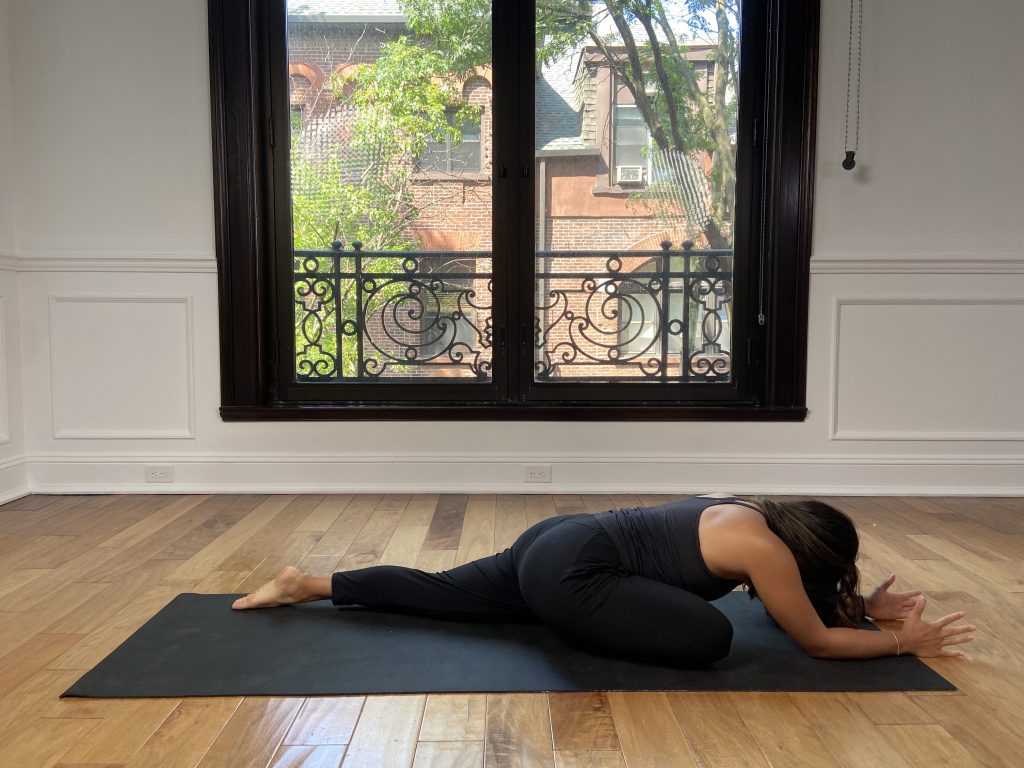
older women doing a at home yoga sequencewomen in black outfit practicing yoga on the floorBegin in Child’s Pose, sitting back on your heels with your knees spread apart. Extend your arms in front of you and allow your forehead to rest on the mat. Take a deep inhale and with every exhale, stretch your fingertips even further and let your hips sink down toward the mat. This asana is ideal to practice at the beginning and end of a restorative sequence as it provides a gentle stretch in the lower body while relaxing the upper body and releasing tension. After a few minutes of holding this asana, feel free to try variations. For instance, you can stretch your arms to either side or thread one arm under your torso toward the other side with the other arm extended forward for a deep shoulder stretch.

2. Happy Baby Pose

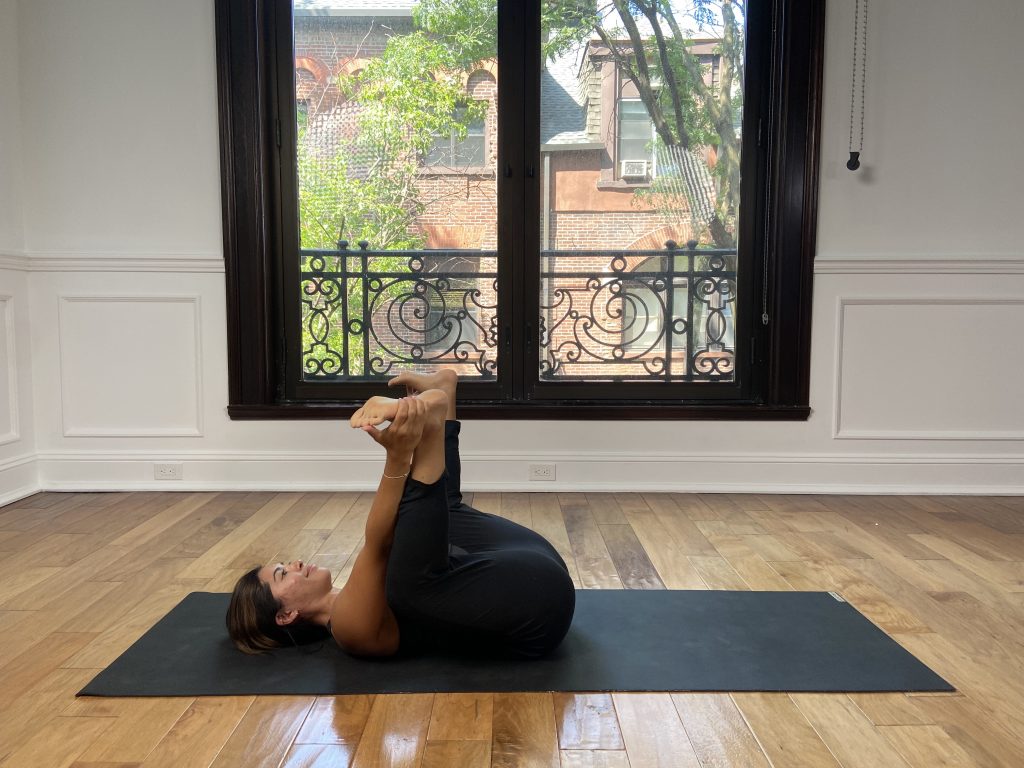
women showing how a pose while grabbing her feet with her handsAfter you’ve relaxed in Child’s Pose for several minutes, slowly transition to Happy Baby Pose. To do this, walk your fingers toward your torso as you lift your upper body from the mat. Then, untuck your feet from beneath your sit bones and lie flat on your back with your knees bent. Bring your knees into your chest and grip the outsides of your feet or your big tones with your hands. Gently pull your feet outwards so that your knees open wide and you feel a deep stretch in your hips. You can choose to rock side to side for an even deeper release in the groin area or simply find stillness in this asana for a few minutes. With every exhale, allow your knees to drop closer towards the mat and focus on letting go of stress and tensions as you continue to breathe through this deep stretch.

3. Reclining Bound Angle Pose

women showing how to pose with a pillow under her and legs spreadFrom the previous asana, release your legs onto the mat with your knees still bent and opened outwards to each side. Make sure to position your feet close to your pelvis Bring the soles of your feet to touch. Remain lying down and allow your arms to rest by your side or on your abdomen. Close your eyes and focus on taking deep breaths for up to 5 minutes in this classic, restorative asana. The benefits include stimulation of the abdominal organs, circulation, and heart as well as a gentle stretch of the thighs and knees.

4. Legs-Up-the-Wall Pose

women practicing with her legs up against the wall and blanket under her in order to stretchTransitioning from Reclining Bound Angle Pose, position yourself close to a wall and facing the wall, extend your legs up against it. Your back should remain straight and horizontal with your arms resting wherever they are comfortable. In this asana, your sit bones should be either touching the wall or close to it while supporting your legs and your body should be creating a 90 degree angle. Remain in this position for at least 5 minutes as you continue to breathe deeply and steadily. The benefits of this asana include increased circulation, a deep stretch in the lower back and hamstrings, stress relief, and relaxation of the pelvic floor. To exit this pose, slowly bend your knees and shift them to one side as you come to a seated position.

Step 5. Seated Forward Fold

man working on a at home yoga sequencewomen reaching her toes and holding them for a poseBegin by sitting on the mat with a straight back and your legs extended in front of you. Feel free to sit on a folded blanket or a bolster for additional support. As you inhale, reach your arms up towards the sky and with a deep exhale, fold your body from your hips as you attempt to reach your knees, feet, or even toes. A key thing to remember is that the goal is not to force your fingertips to your toes; instead, focus on bringing your chest to your thighs, nose to your knees, and forehead to your legs during this stretch. With every exhale, allow tension to be released from your body and surrender even further in this asana. Some benefits of Seated Forward Fold include stress relief, a deep stretch in the shoulders and spine, and improve digestion.

Step 6. Corpse or Savasana Pose

women laying on white background showing yoga poseLet’s end this sequence with a mindful asana to eliminate any meaningless thoughts and ground yourself. Keep your legs extended in front of you on the mat with your arms resting by your sides with your palms facing up. Make sure that your back is straight and there is no arch in your lower back as you lie flat on the mat. Close your eyes and feel your body sink as it becomes heavier with every breath. Corpse Pose is a favorite asana for many people due to its restorative nature. Corpse Pose is a pose of total relaxation which requires remaining in a neutral position, often a challenging task. The purpose of corpse pose is to consciously calm the mind which in turn, calms the nervous system and lowers blood pressure resulting in a state of ultimate serenity. The duration of this asana depends on your preference, however 10-20 minutes are recommended.

Reach Out To YogaRenew For More Sequences

Don’t let the stress or being at home hinder your yoga practice and instead, let it nourish it! There’s nothing wrong with leaving hatha and ashtanga yoga aside during this time and focusing on restorative poses to feel relaxed, rejuvenated, and at peace. For more info on becoming a yoga teacher contact YogaRenew.

How To Stay Centered During Stressful Times

By Lifestyle & Wellness

It can be easy to become uncentered due to things that occur in our daily lives. When we feel uncentered, we feel as though we’re being spread too thin in many different directions. Our minds can become crowded with thoughts and we can feel anxious or stressed in our bodies.

When left unchecked, prolonged stress can lead to diseases, lowered immunity, tiredness, fatigue, and burnout. Long term stress can also lead to depression, anxiety, and social or communication issues. Another important point to keep in mind is that how we react to stress determines how stressed we actually feel, as well as our outlook on life. For example, two people could be in the exact same stressful situation, but if one has learned to reframe that situation in a positive light—or learned how to react less to it—that person will have a completely different experience than the other.

Regular yoga, pranayama, and meditation practice can help us to combat stress and help us with how we respond to stressful situations. By quieting the mind and allowing ourselves to be more deeply aware of the present moment, we can start to become more mindful of our emotions, our thoughts, and how we react to stressful situations. It’s important to take time each day to sit in stillness for a few moments to rediscover the place of centeredness in ourselves. As we practice sitting with this place of centering, we often find that we can access our centeredness more easily in times of chaos or stress. By strengthening our connection to it, we can allow this space of being centered to guide us in every moment. Some other ways we can return to our centers are taking walks daily, being in nature, eating healthy, journaling, yoga, breathwork, or meditation

5 Simple Centering Practices

By practicing calming the mind and building awareness of ourselves and the world around us, we gain dominion over our thoughts and our emotions.

Here are a few simple practices you can do today to help you feel more grounded in times of stress.

1. Centering Breath Practice

The simplest way to center in any moment of our lives is through our breath. The best part of this practice is that is easy and we can do it anytime we begin to feel stressed. To practice this centering breath practice, find a pace of breathing that feels good to you. Then, as you inhale, say the words I’m breathing in either out loud or internally. As you exhale, say the words I’m breathing out either out loud or internally. Repeat this up to a minute or longer. If you find that your mind wanders away, just gently bring your awareness back to this centering breath practice.

2. Sitting Grounding Practice

Grounding and feeling rooted helps us get in touch with feelings of stability and support. To practice, begin in a comfortable seated pose, with eyes either closed or open. Begin to center your mind with your breath; breathing deeply. Bring awareness to your sit bones and your connection with the earth beneath you. Observe how firm and supportive it is as you connect to it. Take several breaths in and out as you feel this connection deepening and begin to feel support and stability.

3. Counting Breath Practice

Focusing on our breath and breath practices can be a powerful way in which we can turn away from fear and move towards peace. To do this practice, begin in a comfortable seated position. Start off easily with a slow three-count inhale in and a slow three-count exhale out. Then, take a deep breath in for a count of three and hold for a second. After the hold, exhale slowly for a count of three. You can do this for up to a minute, and even extend the count for up to five seconds (five seconds inhaling and five seconds exhaling out, slowly).

4. Standing Grounding Meditation

In times of stress, this simple grounding meditation can allow us to come back to the present moment. To practice, begin standing tall in Mountain (Tadasana) with your legs hip distance apart. Bring awareness to your feet rooting down into the Earth and feel supportive energy rising up from the Earth into your bodies. Engage your core and your leg muscles and feel this energy rising up all the way to the crown of your head. Bring your hands to prayer position at your chest, take several deep breaths, and take a quiet moment to express gratitude and respect to our home, Earth.

5. Calming Peace Prayer Practice

Compassion has a powerful effect on our minds and how we feel. Practicing compassion can take us from feelings of fear to feelings of love and understanding. To practice, begin in Easy pose or a comfortable seated position with your spine upright. Bring your hands to Namaste or Anjali mudra at your heart center. Allow your heart center to open and fill with love and light. Repeat the following peace prayer mantra, either out loud or internally. Imagine that you are directing this mantra to the entire world:

Lokah samastah sukhino bhavantu

This ancient Sanskrit mantra translates to, “may all beings everywhere be happy and free.” Repeat this up to ten times and feel your heart radiating with love and peace for all beings in the world.

​Savasana: The Crown Jewel of Yoga Asana

By Yoga Asana

Though we follow different traditions of yoga asana, most all lead us to the final destination of relaxation, savasana. The practice of asana prepares our students’ minds and bodies for deeper awareness, by which savasana is the gateway. Savasana is subtle, a practice that builds the foundation for meditation and pratyahara. As yoga teachers, we can prepare our students for a deep savasana practice once we comprehend why we do it, and how.

class working in downward dog doing SavasanaSavasana integrates asana and ujjayi breathing on a deep level. It also serves as a transition from the formal practice of yoga into the outside world. Many students fall asleep during savasana, which is normal, but not the intent of the practice. The body becomes fatigued from the work of a balanced asana practice, while the mind becomes focused and calm through concentrated breathing. In savasana, the needs of the body and mind are transcended, and true relaxation and release can take place.

In savasana, some yogis may experience a dreamlike state, not quite like sleep, but unconscious nonetheless. Others may simply lose themselves, remembering nothing but the lingering stillness after the practice is complete. And some may have experiences beyond the mind and body that defy explanation. Because of the subtle nature of savasana, it is best to let whatever comes come, and to speak little of the inward nature of the practice. To articulate into words what cannot be perceived by the intellect bypasses the mysterious nature of our connection to the unknown. Just like yoga asana, some sessions are difficult, and some come with gentle ease, but in the end, savasana is a practice– a process to apply again and again.

From the outset, savasana appears to be simple and defined. Lie down, close your eyes, do nothing. However, for yoga teachers to hold space for our students to enter this deep state of relaxation, we require technical know-how, practice, and attentiveness. If your students are restless in savasana– fidgeting, coughing, or are lying with their eyes open, implementing the following techniques will help you to prepare them for deeper restoration. First, a balanced asana practice, with both rigor and cool down, is essential. The body must be worked in order to access the mind, and that work must be released in order to fully relax. Offering a cooling sequence about 10 minutes long is effective, especially if the final poses are done on the back, such as jathara parivattanasana, Revolved Belly Pose. Next, allow for 5 minutes of deep ujjayi breathing, either lying down or sitting up. Smoothly transitioning your students from the dynamic practice of asana into meditative breathing will prepare them to relax and will support the integrative process of savasana.

women rolling up mat after SavasanaCreating a calming environment during the cool down portion of your class will subconsciously prepare your students for savasana. Dim the lights if possible, or turn them off completely. Slowly lower the volume of your regular music until it is mute prior to beginning your breath exercises. Similarly, begin to soften your instructional voice and slow your cadence as you bring your students into their final postures. I find that using the same words to guide my students to the floor, class after class, signals a state of relaxation, with each instruction slower and quieter than the last. Encourage your students to lie down quietly with minimal movement. Instruct them, practice after practice, to relax, to be still, and to let go. Finally, play a rhythmic selection of music especially reserved for savasana, ideally, without words that the mind can grab ahold of.

While your students are journeying inward, it is important for you, as the teacher, to reinforce the subtle work of their practice. Savasana is not a time for a teacher to check their phone, to leave the room and socialize in the reception area of the studio, or any number of things that might pull attention away from the students. Savasana is a time for you to go inward, as well. During savasana, you can sit in silent introspection, chant mantra in your mind, or lie down quietly. Be present in the subtly of the practice, for this space is our forum of learning, as much as it is for our teaching.

Allow your students to remain in savasana for at least 5 minutes, and then slowly, softly, and quietly draw them out of their inner space by bringing awareness back to the breath. Take several breaths yourself and give ample silence between your cueing in allowance for the deep state your students are coming out of. Encourage gentle movements before the greater motion of turning to a side. Patiently guide them to a seated position, and end your class as appropriate. In this way, the effects of the entire practice of asana, ujjayi, and savasana will stay with your students long after they leave the studio space. In the end, savasana is the crowning jewel of an asana practice, one that can touch the heart and souls of all who practice it.

​5 Common Yoga Injuries And How To Avoid Them

By Yoga Teacher Training

Over 30 million people worldwide practice yoga regularly. According to estimates, 14 million of those people include Americans who have been prescribed by a physician or other therapist because of yoga. Although the practice of yoga has earned a good reputation for promoting well-being, practitioners should be aware that a number of commonly taught yoga poses (or asanas, as they are referred to in class) can also be risky if done incorrectly.

5 Common Yoga Injuries and How To Avoid Them

women holding her yoga injuriesThis calls to attention the importance of an experienced teacher, who is educated in the contraindications of each pose and the ability to communicate that information clearly to the practitioners. At the end of the day, that is as far as a yoga teacher can go to protect their students from a yoga injury. So are the therapeutic benefits of yoga worth the risk? (Yes, of course they are!)

1. Wrists

Often already aggravated by overuse of computer work and texting, the wrists are vulnerable small joints. Especially if arm balances and inversions are within your scope of practice, the wrists can be at risk for strain or injury if they are not properly prepared or overused.

A proper warm-up and the gradual increment of pressure on the wrists before putting your full body weight on them is important to prevent muscular or structural damage. More specifically, you can help prevent injury by avoiding cupping the palms and turning the fingers inward. Yoga wedges, or a rolled up mat/towel, can help take extra pressure off the wrists and are great props. In addition, placing the knees on the ground to modify poses can help alleviate excessive pressure, as you work toward building strength in the wrists and shoulders.

2. Lower Back

Lower back pain is the most common complaint in the yoga community, due to rounding through the spine in poses like downward dog, forward folds, or keeping the legs too straight when getting into a pose. Rounding causes the spine to do the opposite of what it’s supposed to. Overstretching the major muscle groups in your back can lead to an unstable vertebra and poor intra abdominal pressure, a recipe for lower back discomfort.

In addition, the sacroiliac joint (SIJ), which contributes to spinal stability and connects the sacrum to the bones of the pelvis, may be aggravated by improper alignment.

The key to preventing lower back strain is slightly bending the knees in forward folds to allow the lower back to decompress. Keeping a micro-bend in the knees throughout the practice as needed is key. Make sure to slow down during twists and go in and out of them mindfully. Engaging the lower abdominals is also important because core strength and stability protect the spine.

3. Shoulders

One of the main reasons why shoulder yoga injuries are common in yoga is because of the chaturanga- the transition from high to low push up that is often added to classes to make the experience more of a workout. Many students should be should be modifying or skipping chaturangas, but many of those people are looking to get the workout factor from the class.

As a rule of thumb, before the transition you should always keep the four Immaculate Dissection cues in tact: neck long, chin tucked, chest wide, ribs down. Then, shift your weight forward on the toes, bringing the shoulders right over the wrists, and transition to the low push up to a comfortable proximity to the ground, which will vary from person to person.

4. Knees

women shoulder that is a yoga injuriesTight hips or preexisting yoga injuries can cause knee pain or discomfort around the knee. The common instructions to maintain proper alignment in poses that involve bending the knees are to track the kneecaps over the second middle toe, but that is something that can vary from person to person, depending on their circumstances and goals of their practice.

In many poses you can protect the knees by flexing the foot (like in pigeon pose or figure 4). You can also strengthen the quads and engage them throughout standing postures to avoid hyperextension of the knees. Prolonged hyperextension can lead to injury or chronic pain.

5. Neck

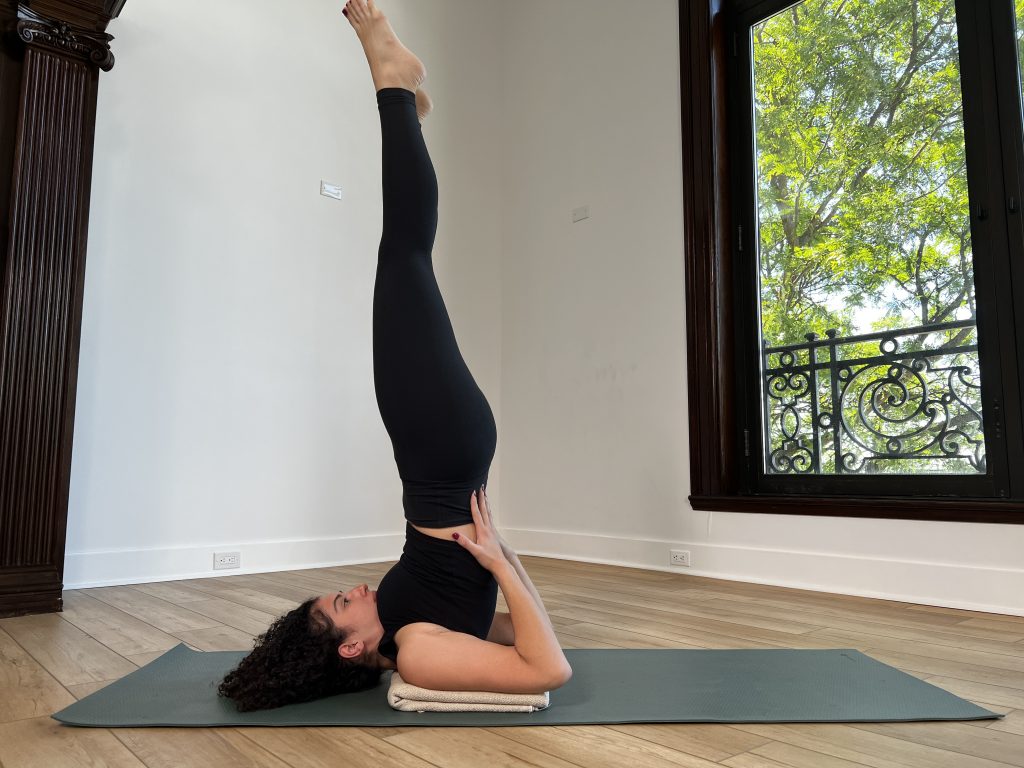
Neck issues often occur as a result of compression, which can lead to issues in the cervical vertebrae. This type of injury is highly intimidating because of the lengthy healing time necessary if they are to happen. Advanced postures like headstand and shoulder stand put a lot of pressure on the neck, especially if done misaligned.

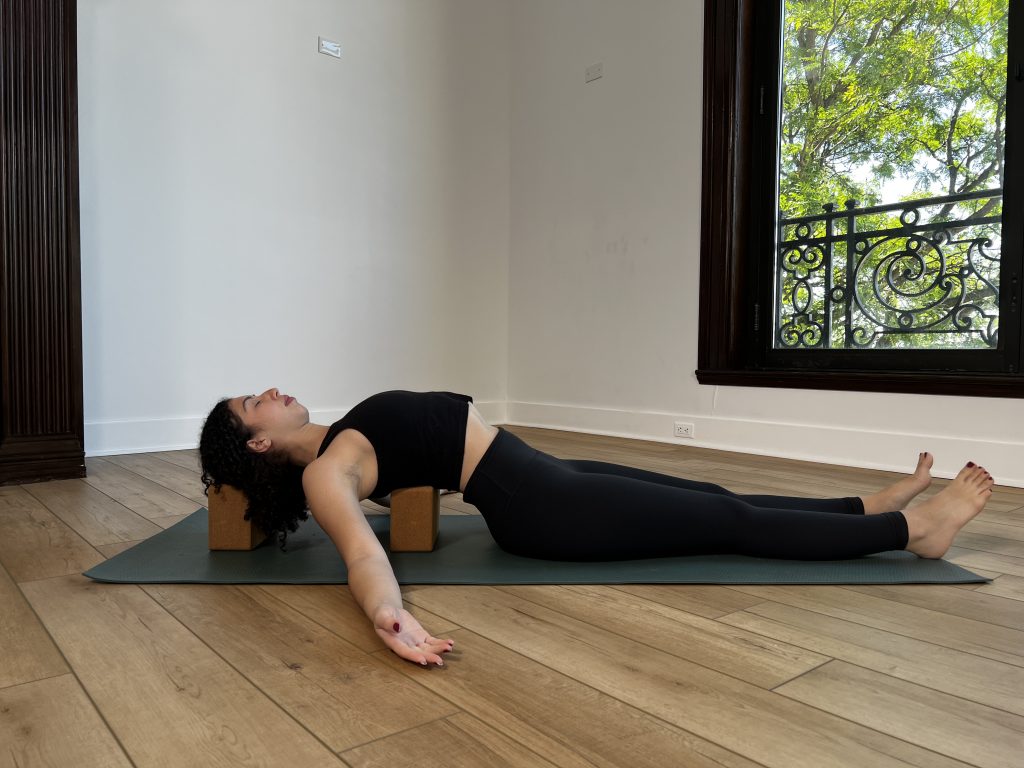
It’s important to only attempt these postures after building the necessary strength to hold them for a few breaths and to go at your own pace, especially if you’re a beginner. It’s also important to warm up and always do a counterpose after advanced postures. A child’s pose after headstand is relieving and fish pose after shoulder stand is important.

A 2012 study conducted in Australia found that 20% of all yoga practitioners claim to have experienced a yoga-related injury at some point throughout their time practicing. Additionally, a 2016 study discussed how yoga-related injuries have nearly doubled from 2001 to 2014. When practicing yoga, it’s important to find a knowledgeable teacher but more importantly, a mindful approach of your own can protect you from injury and pain. Modify your practice as needed, go at your own pace, and take calculated risks when attempting new postures. Take care of your body, and it will take care of you.

Join our mailing list for incredible weekly content!

Teaching Yoga Through Difficult Situations

By Yoga Teachers

Generally, yoga classes are predictable and constant. As a teacher, I find yoga students are mostly amiable and open to instruction, whether they are new to the practice, or I am the new instructor to an established class. Occasionally, however, situations arise in class that are challenging to us as teachers, and we must gracefully navigate the interference to insure a quality practice for the whole.

Common Challenges With Yoga Teaching

Here, I offer you some common disruptions to a yoga practice, and techniques for keeping your sequence, students, and focus undisturbed.

1. Students Who Come Late or Leave Early

women working on Teaching Yoga onlineSh!t happens: traffic, family issues, deadlines at work, a missed morning alarm clock… While the reasons may vary, tardiness is an occurrence that you can prepare for. Studio protocol varies. Some studios lock the door 15 minutes after class has begun. Some, like group exercise classes at a health club, have an open door policy. Once a late student has entered the asana room, it is the responsibility of the teacher to include them into the practice as smoothly as possible.

Lets run a few scenarios: You are guiding your opening mediation. All eyes are closed, and the room is quiet and still. A late student arrives with a rolled mat, a large bag, and a frazzled demeanor. Oftentimes, the late student is unaware of their disruptive effect on the class, and will noisily drop their bag, loudly walk to an open spot, and thwack down their mat. Before this can happen, silently go to them and indicate for the bag to be set down by the door, which eliminates the unnecessary sounds. Guide them to an open spot in the room, and gently take their rolled up mat into your hands, and set it down on the floor. Ask the student to quietly sit down, and wait to unroll the mat until movement begins. To anticipate late comers of this sort alleviates unnecessary disruption, and sets a standard for entering the asana space with awareness.

Another instance: It is twenty minutes into class and the studio door is locked. You are demonstrating Sun Salutes, and all of your students watching your instruction. A latecomer arrives, tries the door to no avail, and begins knocking loudly. Despite the interruption, you are beholden to class in progress. You are building their heart rate and establishing your pacing and flow. To stop your instruction, open the door, and guide the student into the asana room at this point is to prioritize the latecomer over the practice already in session. In this situation, it is best to leave the door locked, and continue teaching yoga. If your studio has a policy of locking the door, avoid logistical issues with a notice stating the door is locked so many minutes after class has begun. Honoring the class schedule and the sanctity of the practice space by consistently locking the door at the specified time will teach your students timeliness and responsibility. In an alternate situation, with an unlocked door, the late student can enter and jump into the practice with little guidance. In this case, carry on with instruction, bringing as little attention to latecomer as possible.

After class, you can connect with your students and give them instruction on how they can gracefully enter the class late. Advise them to turn their phone off, put their keys away, take off their shoes, and open their mat all prior to entering the asana room. Encourage them to walk softly and find the nearest open space to practice. With guidance, even chronically late students can enter the asana space with little disruption, and receive the benefits of the practice.

On the flip side, students can abruptly pack up their belongings and leave the class before it’s done. Though the reasons vary, generally a student will let you know if they have to leave early. Usually this student will sit by the door, in anticipation of their departure. Encourage your student to sit and take five slow meditative breathes before they leave to properly conclude their practice. The best time to leave the practice early is just after asana, but prior to pranayama and mediation. Avoid situations where students leave during shavasana. Any disturbance in at this point in the practice is unsettling. If you have had this experience before, it is acceptable to let your entire class know that if they need to leave, do so before the lights are dimmed. This sets a standard for early departures in the future.

2. Attention Seeking Behaviors

Some students need more of your attention in class than others. New students may require additional instruction, injuries may need extra modifications, and misalignments need to be corrected. These conditions are normal to any class, and highlight your versatility as an instructor. However, there are students who regularly draw attention to themselves. Identifying attention seeking behaviors, or high needs students, will help you to conserve your energy and maintain the focus of your class. Though attention seeking behaviors vary, certain attributes can be addressed in order to maintain harmony and flow in your practice.

women Teaching Yoga outside Some attention seeking behaviors present themselves easily. There is the student who talks during class, either to you, or to other students. To respond to this student encourages on-going dialogue. To allow for conversation among your students during class is a distraction to others. In response, you can offer the direction of “just breathe,” to the class as a whole, or discreetly remind the talkative student(s) to focus on their ujjayi. There is the student who exaggerates and dramatizes their poses and transitions, adding extra movement or flair that draws the attention of other students. As a teacher, pay no mind to their personal space. What draws your focus will also draw your students’ focus. In time, you can build your relationship with this student, and refine their transitions and postures as their trust in you deepens. There is the student who displays their discomfort as a call for attention. This may take the form of groans, moans, sighs, and vocal releases in postures they have aversion to. Again, direct the class as a whole to breathe in and out through their nose. In the case of excessive sounds, remind everyone that asana gets easier with practice and to “stay with it” for however many breaths remain in that pose. Finally, for the student who is restless or excessively coughing during shavasana, you can show them how to use blankets or bolsters to prop themselves up, elevating their chest for additional comfort. Sometimes, a small, individualized technique is enough for a student to feel special, which alleviates their need to seek out further attention.

My policy as a teacher is to treat all students equally, without focusing attention on one student more than another. Recognize the variance of one student receiving more assistance than others in terms of adjustments, instruction, or interaction. From there, assess if you are prompting the additional attention, or if the student is. For example, adjusting the same student several times during class, whereas others are not adjusted at all, creates imbalance among your students. The student receiving the adjustments may feel singled out, while the other students may feel ignored. Conversely, a high-needs student may feel entitled to personalized attention, and may even keep you after class with questions if you did not focus on them personally during class. If this happens regularly, take advantage of the opportunity to suggest private lessons. In this way, you can assert professional boundaries and your attention seeking student will benefit from the one-on-one instruction.

Ultimately, you, as the teacher, set the tone and focus for your class. If an occurrence distracts you, it will distract your class. If you are prepared for the unexpected, unperturbed, your students will be as well. If you giggle when a student passes gas, your class will giggle with you. If you carry on like nothing happened, no one will be the wiser. The truth is, yoga classes are not a stage for us as teachers, nor should they be focused on any one student. The essence of teaching yoga is to share practice of yoga, regardless of the individual players. Each student is on his or her unique developmental path, and we, as teachers, are there to simply guide them through an unadulterated and consistent practice. As teachers, we maintain the sanctity of the asana space and our sequences so that the yoga can impress itself upon our students with as little interference as possible. Challenging situations will arise in your classes, and each will offer you the opportunity for introspection, growth, and refinement of your teaching skills.

Join our mailing list for incredible weekly content!

essential lavender oil

7 Essential Oils for Stress Relief and Relaxation

By Lifestyle & Wellness

Stress is experienced by everyone; the very nature of our fast-paced lifestyles often triggers stress and anxiety which, understandably, can be challenging to cope with. That said, the use of essential oils is a very effective way to combat the overwhelming effects of stress in a natural way. Aromatherapy has been utilized since ancient times in order to encourage relaxation and tranquility in the midst of stress. There are various ways to use essential oils such as applying them directly to the skin, inhaling them from a bottle, diffusing them in water or adding them to your hygiene products. Essential oils have a variety of purposes such as boosting energy, relieving headaches, helping with focus, improving sleep quality, and decreasing stress.

7 Essential Oils for Stress Relief and Relaxation

Feel free to diffuse the following oils while practicing yoga or meditating in order to increase the relaxing effects of your practice. The essential oils listed below provide a natural remedy for stress and can be used to promote calmness and peace.

1. Jatamansi Oil

This calming and anxiety-relieving oil essential oil will especially benefit those who suffer from overthinking and it also supports deep, high quality sleep. Jatamansi is extracted from the spikenard root and it has a rich history of medicinal use in Ayurvedic medicine. It provides antioxidant and anti-inflammatory effects while also offering stress relieving properties. One way to use Jatamansi oil is by placing a few drops on the crown of your head at night to promote deep, restorative sleep. Otherwise, use it as a massage oil, add it to a bath or even a warm compress if a specific part of your body is tense.

2. Lavender Oil

This oil is the most commonly used essential oil for stress relief due to its relaxing effects on the mind and the body. Lavender oil is also a very effective way to deal with sleep-related problems as it serves as a sleep-aid while enhancing the quality of your sleep. Often used in aromatherapy, lavender oil has been shown to react the same way as anti-anxiety medications. This essential oil can be added to your bath or even added to an aromatherapy diffuser to promote a deep sense of relaxation and stress relief.

3. Chamomile Oil

Chamomile is an essential oil that relieves stress by reducing common symptoms of anxiety, promoting relaxation, reducing inflammation in the body, and regulating your mood. Chamomile extract is often used in tea to combat stress and improve sleep quality. It’s important to keep in mind that chamomile extract can be ingested but chamomile oil cannot. That said, chamomile essential oil can be used by adding it to an aromatherapy diffuser or to your favorite body lotion to help you feel at ease. Aside from its stress-relieving properties, chamomile also relieves pain, helps with anxiety and depression, aids digestion, and improves sleep quality.

4. Ylang-Ylang Oil

This fragrant essential oil derives from the flowers of Cananga Odorata Genuina which is a plant native to India but it can be found in other countries in Asia such as Malaysia, the Philippines, Indonesia, and also Australia. Ylang-ylang provides many benefits for the cardiovascular and immune system as well as lowers blood pressure and helps with depression. Additionally, this essential oil is known to relieve feelings of anxiety and stress due to its calming effects. Use this oil in your bath, diffuser or directly on your skin with a carrier oil such as jojoba oil. Bonus: this floral-scented oil can also be used as a natural perfume!

5. Valerian Oil

Valerian is an earthy essential oil that eases anxiety, stress and restlessness by promoting a sense of peace and tranquility. Its calming abilities might be attributed to its mild sedative effect on the body which also aids with sleep quality. The best way to utilize Valerian is by adding a few drops to an aromatherapy diffuser before bed and allowing its scent to guide you into a deep sleep.

6. Jasmine Oil

This sweet-scented oil has been used for hundreds of years in Asia to naturally treat depression, anxiety, and even sleep problems. Jasmine oil is an essential oil that is extracted from the white flowers of the jasmine plant and it is known for its sweet fragrance. Apart from its beautiful scent, jasmine oil is also used to effectively reduce anxiety and stress, exhaustion and depression. Jasmine oil will also boost your energy levels, improve your mood, and provide an overall sense of relaxation. Try adding this oil to an aromatherapy diffuser, a bath or applying directly to the skin.

7. Bergamot Oil

This cold-pressed essential oil has a sweet, floral scent and it has been used in Ayurvedic medicine for various purposes such as soothing irritated skin, ingested as a health tonic, and used as an antiseptic and analgesic. This essential oil is obtained from the peel of Citrus Bergamia, a fragrant citrus fruit. Bergamot oil can be added to a massage oil or body lotion, it can be added to an aromatherapy diffuser, and it can also applied directly to the skin. That being said, this oil is commonly used to effectively relieve psychological stress and anxiety.

Common occurrences like arguments, traffic, financial struggles, deadlines, and responsibilities can all contribute to stress. Stress is experienced by everyone and when life gets overwhelming, it’s best to resort to a natural remedy for some relief. Aromatherapy is often used as a natural way to relieve feelings of stress without resorting to medication with inevitable side effects. Essential oils provide a sense of relaxation as well as better sleep quality which is needed after a long, stress-inducing day. Some essential oils are better than others at relieving stress such as Jatamansi, Lavender, Ylang-ylang, Jasmine, and others listed above. Be creative and embrace the various ways that these oils can be incorporated in your daily routine in order to keep you feeling calm, tranquil, and serene.

3 Pranayama Breath Practices To Try Today

By Miscellaneous

Breath work is an invaluable tool for yoga teachers. Pranayama techniques use breathing to fully maximize each cavity in our bodies. Retention of the breath, focused exhalations, and the pauses in between allow the body to flood fresh prana (life force) throughout our system.

3 Pranayama Breath Practices To Try

Pranayama practices can invigorate or relax the body. Practicing pranayama outside of yoga classes or meditation may take some getting used to at first, yet incorporating breath practices at work and home make a huge impact.

In between meetings, a few minutes after lunch, or when you get home from a busy day. Just a few minutes of deep breathing techniques can quiet the autonomic nervous system and calm your mind. Try these three pranayama techniques, and teach it to your students!

1. Nadi Shodana

Alternate Nose Breathing (Nadi Shodhana) is an ancient yoga practice that balances the nervous system. The left side associated with the parasympathetic (relaxation action), and the right side with the sympathetic (fight, flight or freeze response). By regulating the breath through the left nostril and right nostril, the body is well balanced and right and left brain synchronize.

Nadi in Sanskrit means “channel” and Shodhana means “purification”. By practicing Nadi Shodhana our channels are more open, unclogged and with less congestion. A range of benefits happen as a way to bring equilibrium, treat a headache, stress, or even bring a little more lightness to your day.

For beginners, sitting in a comfortable seated position like Sukhasana (Easy Pose) with your sit bones higher than your knees helps to make more space to sit comfortably. A general rule is to start on the left side, left-nostril breathing decreases your heart rate.

Use your right hand ring finger to close your left nostril, and your right thumb to block your right nostril. The index and middle finger can fold in your palm. Close your right nostril, inhale through your left nostril for five counts. Close the left nostril with ring finger, and exhale through your right nostril for five counts. Alternate between the two sides open and closing, and add retention. You can practice retaining the breath for five counts, and gradually increase.

Nadi Shodhana is a useful breathing technique to incorporate into your yoga classes. It can lift the mood and vibe of the class, and is great to do in preparation for meditation.

2. Bhramari

Bhramari translates to the sounds of the bees. Bhramari (Bee Breath), for beginners an audible practice, with the mouth closed uses vibration to create a soothing sound. The gentle buzzing sound can quiet the chitta (mind chatter) that tends too loop in our thoughts that leads to sufferring. A way to alleviate, or shift perspective happens with the Bee Breath practice.

Also calming to the autonomic nervous system, Bhramari is a therapeutic practice that especially helps those with throat issues, sinus congestion and maintaining peace of mind. For yoga teachers, having a strong awareness of the technique will make you more confidant to teach the pranayama practice to your yoga students.

To practice, sit comfortably on blankets, yoga blocks, a meditation cushion, or anything that suits you. A chair is too a good prop to use. To direct your senses inward, close the eyes and center with a few deep inhalations and exhalations. At you last exhalation, fully exhale all the air out and take a deep inhale. On the exhale, begin making a gentle buzzing sound as you exhale to four counts. The sound should be soothing, and originate from deep in the throat as possible. When you exhale all of your air, inhale slowly to four counts. Continue to repeat the breathing cycle. Exhale, buzzing until you release all your breath, and inhale slowly. Notice on the exhalations, the vibration originating low in your throat, reverberating at the roof of your mouth, and up to your brain.

With practice, your thoughts will become absorbed by the sound vibrating inside. Build up to practicing Bhramari for one to five minutes is ideal. As the practice progresses, using your fingers to block the ears and eyes deepens the benefits of Bhramari.

3. Ujjayi

Ujjayi in Sanskrit translates to victorious, and is compared with the sound of the ocean. As part of your asana practice or with retention for a seated breathing pratice, Ujjayi breathing assists with tuning your senses inward. The audible sound in the beginning, helps to focus on the breath. So much can be told from listening to your students breathing, and a reminder to keep the victorious breath during yoga class is something to encourage.

When Ujjayi is engaged, the pelvis is better supported because of its relationship with the diapham. On inhalation, the pelvic floor and diaphragm descend down toward the ground. On exhalation, the pelvic floor and diaphragm ascend up. This focused breathing leads to lower back and pelvis support.

Another pranayama practice that opens up the channels and releases blockages, Ujjayi breathing centralizes your focus during asana practice. The sound of the ocean breathing reduces your attention on other distracting sounds that may be in the room.

To practice first, sit in any comfortable position. Take a few grounding breaths. Begin by inhaling through your nose and exhale out of your mouth making the sound “ha” for 4 counts. After a few rounds, inhale through your nose, and on the exhale keep the mouth shut as you create that same audible exhale through your nostrils. Notice the action at the back of your throat. As your vocal cords narrow you can regulate the amount of breath moving in and out, similar to the mechanism of a hose nozzle. Practice Ujjayi for a minute or two, and become aware of its power.

Learn Pranayama Technique From YogaRenew

Pranayama techniques are profound impacts on the overall health of your mind and body. Remember to take time to teach breathing exercises during your yoga class, often the asana is the only focus. For yoga to be of the most benefit, learning to use the power of the breath to shift stagnant energy better supports your healthiest version. Contact YogaRenew for more information.

Pregnancy & Ayurveda Practices

By Miscellaneous

Pregnancy, when viewed through the scope of Ayurveda, is a natural state of being for a woman’s body. Inclusions of simple Ayurvedic practices can make pregnancy more comfortable, healthier, and more enjoyable for a mother-to-be. The application of Ayurveda practices wisdom can balance, nourish, and support an expectant mother physically, emotionally, and spiritually. Pregnancy, when experienced from this balanced state, may be the healthiest, happiest, and most fulfilling season of a woman’s life.

women holding her belly doing ayurveda practicesApana vayu is the subtle downward movement of energy within the body, and the key to maintaining a pregnancy to full term. Certain therapies, exercises, and herbs may disturb apana vayu. Therefore, the intent of this article is Ayurveda practices insight, rather than a treatment protocol. Due to the complexities of pregnancy, it is wise to leave treatments in the hands of experienced Ayurvedic practitioners.

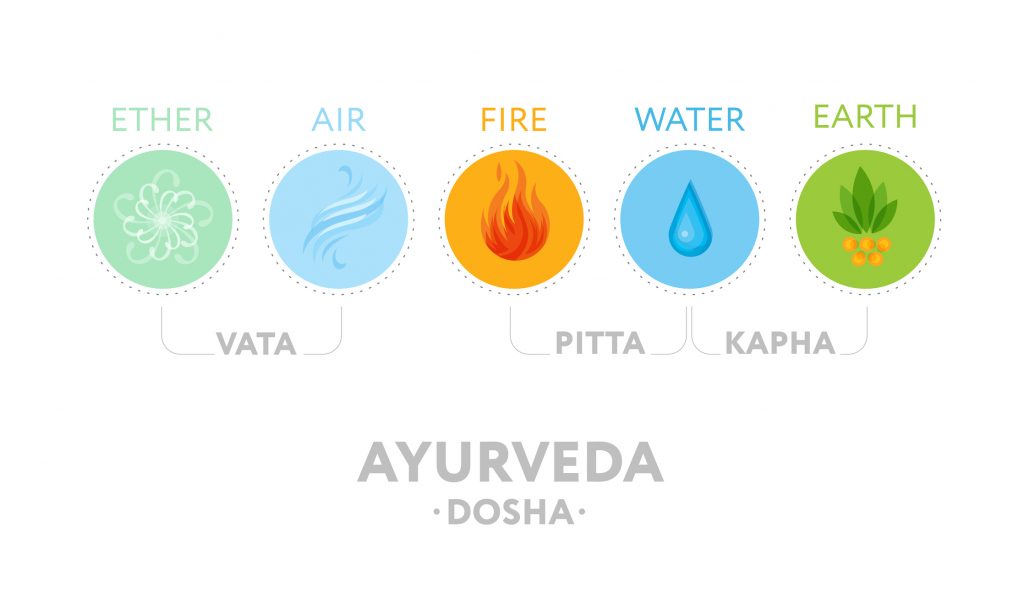
All three doshas are naturally empathized during pregnancy. Pregnancy is a process of change, expansion, and creation, which are qualities of Vata. In pregnancy, the metabolism increases, bringing warmth to the body, which are qualities of Pitta. Kapha is the most dominate dosha during pregnancy, signified by the increase of body weight and size. The succession of changes during pregnancy interplays with an expectant mother’s constitution, her baby’s constitution, and the environment around her.

A woman’s nutritional needs are increased during pregnancy in both quality and quantity. She needs more calories, more calcium, more protein, and more iron. Eating intuitively, according to her body’s current condition, is preferable to choosing food based on constitution alone. On a subtle level, the baby’s needs may be sensed by the mother and expressed in her food preferences. She should eat sattvic foods, those that are pure and fresh. The most sattvic foods are those that are organically grown and offer the best source of vitamins and minerals. She should avoid tamastic foods, foods that are processed or left over. Food cravings should be satisfied by appealing to the basic tastes prescribed by an Ayurvedic diet, avoiding refined sugars, very spicy foods, cold or frozen foods, or those high in additives.

Eating has a direct effect on the doshas. The common side effects of pregnancy are the result of eating foods that promote imbalance, or eating foods that are not nutritionally optimal. Morning sickness and mood swings are connected to low blood sugar. Backaches, hypertension, and severe pain during childbirth are linked to insufficient calcium. Varicose veins, hemorrhoids, constipation, and skin discolorations are evidence of a lack of nutrients. Pre-eclampsia, pregnancy induced high-blood pressure, is a severe pregnancy complication, and a form of acute malnourishment. Herbal tonics can improve general health by helping to balance the doshas. In Ayurveda practices, special herbal tonics have been used in childbirth for thousands years, and are considered to be relatively safe. Many references are available as to which tonics are appropriate for specific needs, as is professional consultation.

In Ayurveda, the process of digestion is of equal importance to eating. Ayurveda practices suggests eating only when the previous meal has been digested, avoiding foods where there are known difficulties with digestion, and not drinking too much liquid with meals, especially cold drinks. Generally, cooked, moist, soft and warm foods are easier to digest than raw, cold foods. Signs of poor digestion include gas, belching, stomachaches, and intestinal discomforts. Adding digestive herbs to food will aid the process of digestion. Some digestive herbs that are safe for pregnancy include mints, tarragon, cardamom, jasmine, cumin, cinnamon, and basil. Papaya contains digestive enzymes, but may increase Pitta if used frequently.

And while bodily nutrition is essential, the heart-and-soul nourishment of the mother and baby is just as vital. By increasing her sentiments of deep love, the mother creates a more sattvic womb for her baby to grow and develop in. She should surround her self with people who are supportive and uplifting. Further, she should avoid disturbing images and forms of violent entertainment. The mother’s home should be beautiful and peaceful, with fresh clean air and natural light.

women in yoga pose doing ayurveda practicesIn her Ayurvedic essays, Terra Richardson of Cambridge University explains that a baby is physically conscious of his or her gestational development through the mother’s sense organs. Ancient Ayurveda acknowledges the development of the fetus’s sense organs through ceremonial rites preformed during different stages of pregnancy. According to Richardson, a modern-day pregnant woman can feed her baby’s senses by increasing the quality of her sensory input. She should “see beautiful and loving things, listen to loving and melodious sounds, touch pleasing things, and be touched in loving ways, taste wholesome tastes, and smell fragrant odors.” In other words, by surrounding herself in a beautiful, supportive, and loving environment, a mother’s womb becomes an equally safe, nourishing, and peaceful space for her baby’s consciousness to develop in.

During the eighth month of pregnancy the mother’s ojas, vital fluids, move from her to her baby. This is a time to eat ojas producing foods like ghee, dates, milk, and apricots. Staying at home and resting will conserve the vitality of the mother and her baby. She should avoid energy wasting activities in favor of letting her focus go inward. The final weeks of pregnancy lend themselves effortlessly to reflection, meditation, and deep, soulful contemplation. It is important that she avoids anger, does not overwork herself, does not experience hunger, and abstains from drugs, devitalized foods, and excessive intercourse.

Though it is best to consult with qualified health care practitioners, simple day-to-day Ayurvedic applications can make the season of pregnancy more enjoyable. Many common side effects of pregnancy can be avoided with preventative care and holistic treatments. Well-balanced nutrition, appropriate exercise, and relaxation techniques can combine to create strong, confident mothers and healthy babies. Physical and emotional balance, fortified with love and support builds and sustains the vitality of both the mother and her baby. From this sattvic state, a woman can deepen the connection between her and her baby, her and her mate, and enhance her awareness of self.

Join our mailing list for incredible weekly content!

An Ayurveda Primer

By Miscellaneous

Ayurveda has made its way into popular Western culture, though by and large, it is still a mystery to most. For those of us who have not been raised a culture where Ayurvedic philosophy is at the core of our perceptions and practices, it can take a lifetime to comprehend. Typically, in Western societies, Ayurvedic practitioners take a two-year certification course. In Eastern traditions, though Ayurveda is part of the collective consciousness, most practitioners have been trained at doctorate levels, or have studied with masters through classic oral traditions of unbroken lineage. To really know and embody Ayurveda, we would have to travel to the East and spend incalculable amounts of time in deep study with the masters of ancient traditions, which is scarcely the reality for many of us.

Ayurveda practice laying downOutside of renouncing our Western lives for a medical school-length period of time with the masters of yore, how can we both learn Ayurvedic principles and inculcate them within our lives? Take an online quiz to determine our dosha (body constitution)? Self diagnose and treat perceived imbalances with herbs from our local health food store? Invest hundreds, maybe thousands of dollars on Ayurvedic treatments from a certified practitioner, only to find that such remedies are subtle, and require months, if not years of implementation to soothe our ailments?

Perhaps the most prudent course of action is to expand our perception to include a new vantage, a new point of view. Let’s compare the science of Ayurveda to the color spectrum. Just as there are three primary colors that combine to create all colors visible to our eyes, so to are there three primary aspects to Ayurveda. The three basic elements of Ayurveda are the prakruti, our original state of being, the vikruti, our current state of being, and the gunas, the elemental qualities of being. These states, though separate and integral, come into flux with one another in the creation of our body constitution and senses.

The prakruti is the essence of our being in balance, determined upon conception. The prakruti is the balance of the three doshas (vata, pitta, and kapha), along with the fixation of our unique psychology and physiology. The prakruti is our inherent tendencies towards certain attributes, such as our body type, emotional proclivity, and our intellect. These attributes generally remain consistent throughout our lifetimes, with each of the three doshas present in varying degrees. Our body constitutions are as unique as a fingerprint, and are defined by the ratio of the three doshas in relation to one another.

An interaction between the environment and ourselves occurs from moment we are conceived. This is the interaction with all manifestation, both within the womb and out, including, but not limited to: nutrition, seasonality, day-to-day weather, social interactions, contagions, and exposures. Health and wellness depends on maintaining the ideal ratio of the three doshas in relation these factors. If one or more of the doshas become vitiated, imbalanced, symptoms of disease can present themselves. This dis-ease may be subtle, displaying itself within the intellectual or emotional body, or gross, manifesting in sickness of the physical body. The variance away from the prakruti is known as the vikruti, meaning “after creation” in Sanskrit. The main work of the Ayurvedic practitioner is to establish the display of the vikruti, the variance of the doshas, in relation to the prakruti. In ideal health, the prakruti and the vikruti are equal.

Ayurveda practice reading papersThe basis of Ayurvedic practice is to identify environmental disturbances within lifestyle practices, and derive a treatment that balances the current state of the doshas. Qualities of being, known as the gunas, range from gross to subtle. Just as there are three distinct doshas, there are three specific gunas: tamas, rajas, and sattva. Tamas is most gross, and is associated with kapha (earth and water). Its qualities are dull, inert, and heavy. Rajas, the intermediary guna, is associated with pitta (fire and water). Rajas is the quality of transformation, heat, and activation. Sattva, the subtlest quality, is associated with vata (air and ether). It is the quality of illumination, purity, and clarity. The display of the gunas indicates the vikruti. For example, a kapha constitution in a tamastic state may be overweight, sluggish, and have difficulty remembering. Before moving to a sattvic state, the kapha constitution must first apply rajastic practices, such as yoga asana, waking up earlier, or eating spicy foods. A kapha constitution, having moved through a rajastic state, may display sattvic qualities, such as stability of character, physical stamina, and maternal or paternal love. It is important to note that the gunas should not be associated with moral constructs like positive or negative, rather, they should be assessed as independent qualities that are expressed throughout creation.

The science of Ayurveda is vast and complex. It is difficult to assess our own prakruti or vikruti at a glance, or with a quiz from a magazine or website. Ayurvedic assessment is best left to the knowledgeable insight of an experienced practitioner. However, once the dosha has been established, lifestyle changes can be implemented to maintain optimal health and wellness. By gauging the guna of a food, for example, you can make positive changes to your diet. For comparison’s sake, a bag of Cheetos is tamastic, whereas fresh lettuce is more sattvic. Then, go deeper. What is the guna of conventional lettuce from the grocery store compared to that of the homegrown, organic lettuce from your garden? Through this perspective, you can begin to apply Ayurvedic principles to your life without the need of herbal supplements and on-going treatments from a practitioner. While it may take a lifetime to comprehend Ayurvedic philosophy, viewing your environment from an Ayurvedic vantage may bring your dosha into a more balanced state of being naturally.