Ahhh Sarvangasana – the “Queen” of all poses. For many years I had a love/hate relationship with Shoulderstand. I am happy to say that recently that relationship has evolved into much more love and way less hate, and all of that has come down with using the wall to get into the pose and teaching students to do the same. I love teaching this inversion because it’s one that students of all levels can work on and get its full benefits while staying in a place that feels comfortable for where their practice is that day.
For this sequence, the teaching actions focus on the external rotation of the arms to lift the upper back and the tailbone moving in to create a straight, stacked spine. And of course in any Shoulderstand class, the sequence includes lots of shoulder opening as well.
A key thing to remember when teaching this is to leave yourself enough time to really demo and set up your props at the wall with your students. Setting up Shoulderstand at the wall takes a good amount of time and if you rush it, it’s very easy for students to get confused. So – make sure to leave some wiggle room when planning.
Ooo… how lovely is that?!
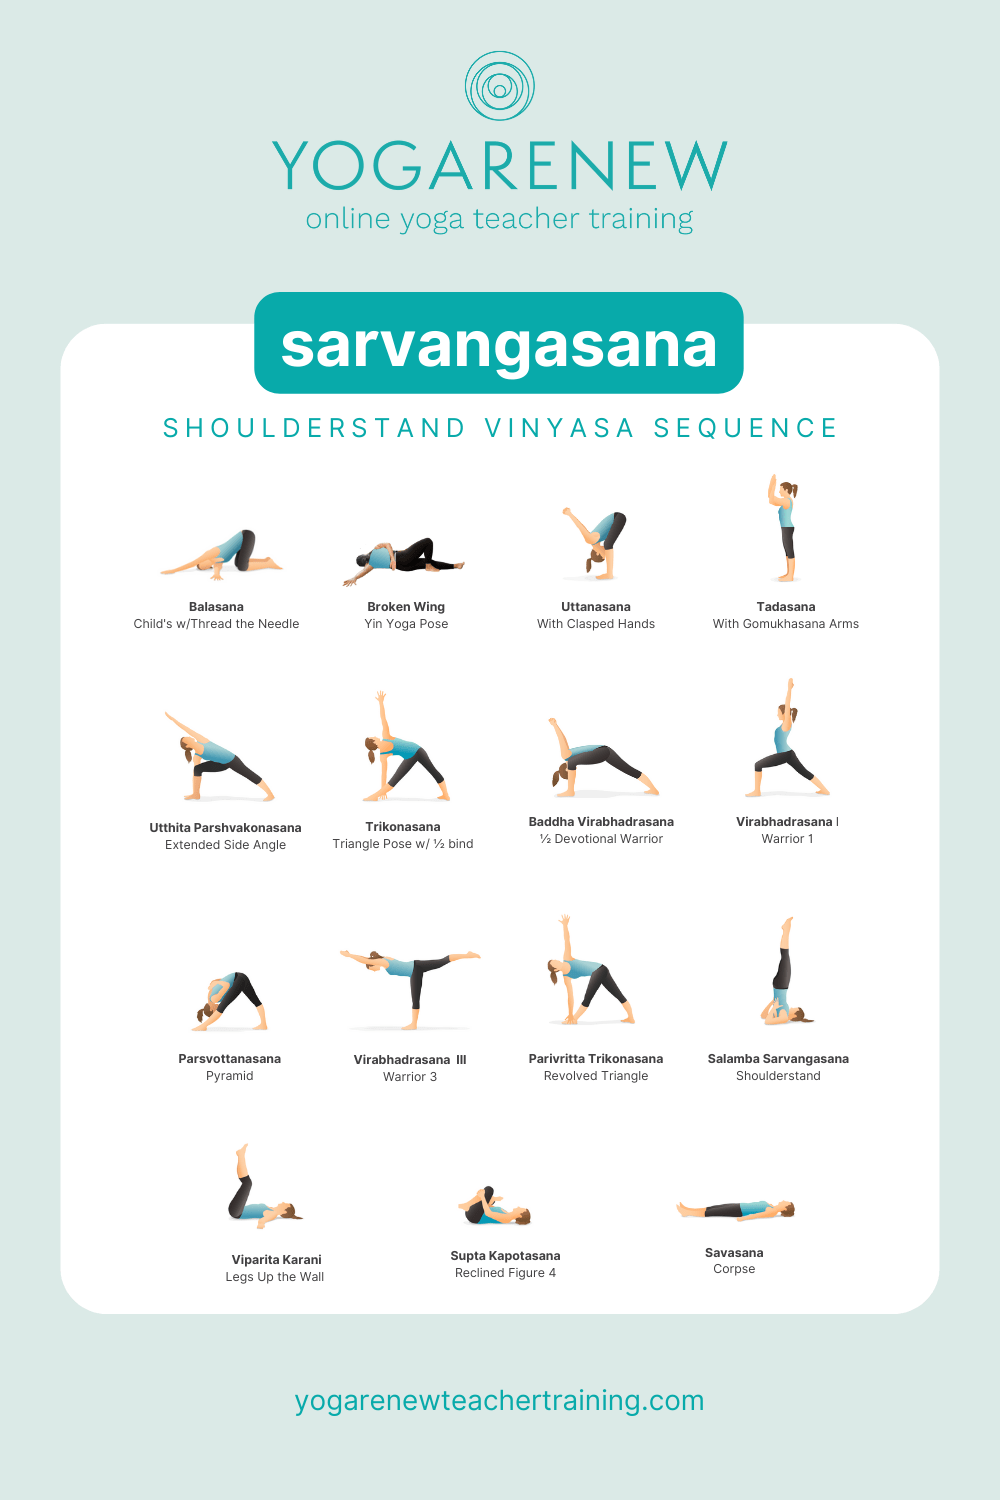
Puttering/Warm-Up
- Child’s Pose w/ Thread the Needle
- Broken Wing Pose
- Uttanasana with Clasped Hands
- Tadasana with Gomukhasana arms
Sun Salutations
- 3-4 Rounds
Standing Poses
- Extended Side Angle
- Triangle Pose w/ Half Bind
- Half Devotional Warrior
- Warrior 1
- Parsvottanasana
Balance Pose
- Warrior 3
Twist Pose
- Revolved Triangle
Peak Pose
- Shoulderstand
Wind Down Poses
- Viparita Karani
- Reclined Figure 4
Savasana
Give it a try and let us know how it goes! To catch a few video clips of this sequence in action follow @kate.lombardo and @yogarenewteachertraining on Instagram.
If you want more in-depth vinyasa sequences like this along with teaching notes + tips on how to cue them, enter your email below to grab our FREE guide:


