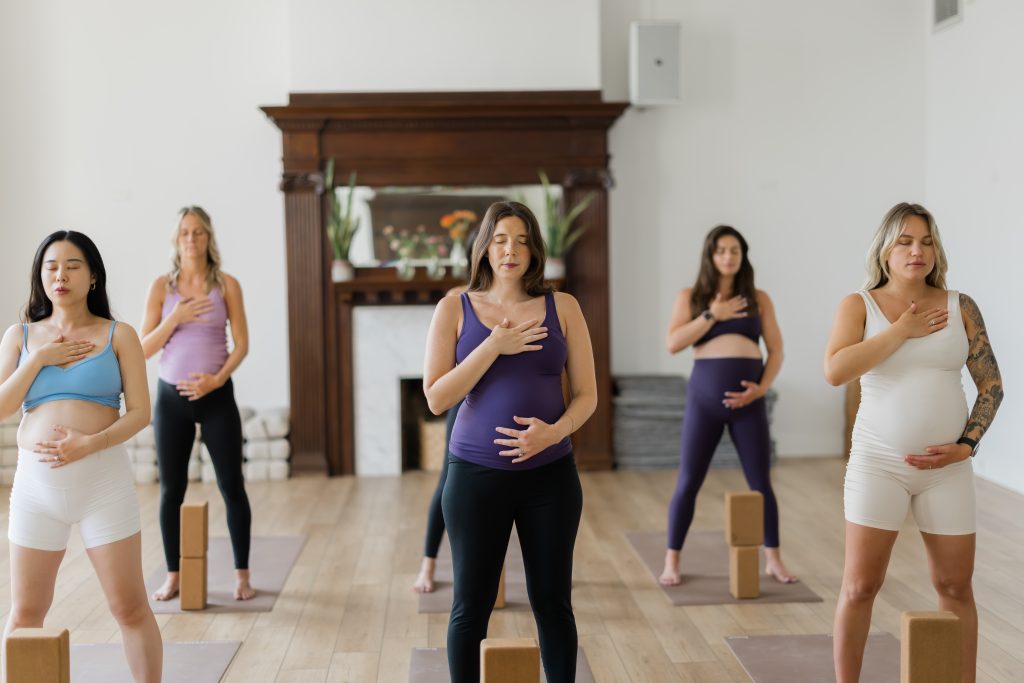
Why Practice Prenatal Yoga?
Prenatal yoga is more than a gentle stretch—it’s a holistic practice designed to support expectant parents through every stage of pregnancy. According to YogaRenew’s prenatal yoga training philosophy, the goal is to build strength, encourage relaxation, and foster connection to the changing body and growing baby.
With modifications tailored for each trimester, prenatal yoga promotes circulation, stability, breath awareness, and emotional balance, making it one of the most recommended practices for a healthy pregnancy.
Prenatal Yoga Class Framework (YogaRenew Style)
YogaRenew’s prenatal sequencing format typically includes:
- Centering and Intention Setting
- Gentle Warm-Up & Breath Awareness
- Standing Postures for Strength & Stability
- Seated or Side-Lying Postures for Grounding
- Pelvic Floor & Hip Opening
- Restorative Final Relaxation
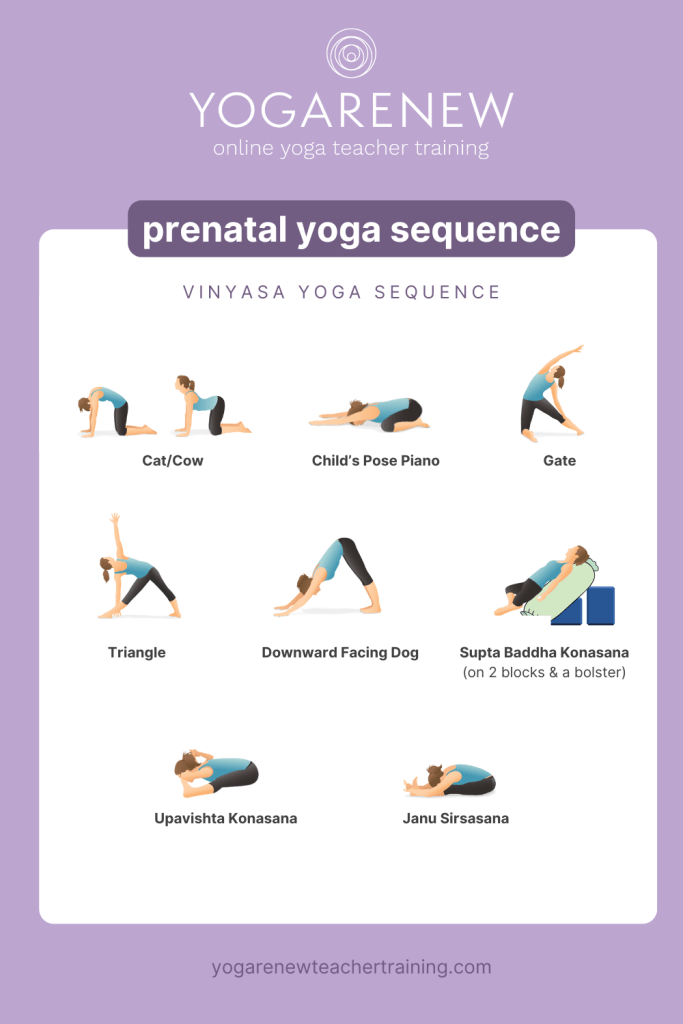
Below is a sample 30-minute prenatal yoga sequence you can safely explore or share with your prenatal students.
Full Prenatal Yoga Sequence (30 Minutes)
Props Suggested: Yoga blocks, bolster, blanket, strap, and a chair (optional).
1. Centering + Breath Awareness (5 min)
Sukhasana (Easy Seat) on a bolster
Rest hands on belly or heart and practice three-part breathing (dirgha breath).
Intention suggestion: “I am connected to my body and baby.”
Neck Rolls & Shoulder Circles
Gently release tension while syncing movement to breath.
2. Gentle Warm-Up (5 min)
Cat-Cow (Marjaryasana-Bitilasana) in tabletop
Move with the breath, offering space through the spine and belly.
Bird Dog Variation
Extend opposite arm and leg, maintaining core engagement and pelvic stability.
Seated Side Stretch
Support one hand on a block while reaching the opposite arm overhead to open the ribs and side body.
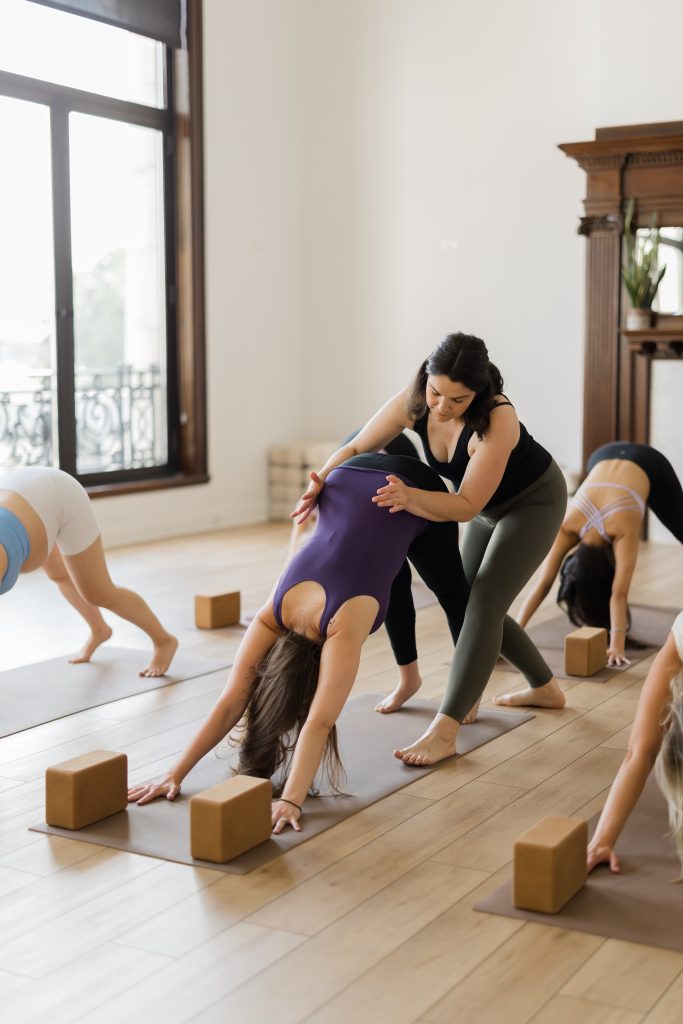
3. Standing Sequence (8–10 min)
Supported Warrior II (Virabhadrasana II)
Use a chair for stability if needed. Focus on grounding through the feet and opening the hips.
Goddess Pose (Utkata Konasana)
Practice pelvic tilts or gentle pulses while focusing on breath. Great for building strength and preparing for labor.
Seated Wide-Legged Forward Fold (Prasarita Padottanasana)
Use blocks & a bolster under hands for support. This encourages circulation and relieves low back tension.
4. Seated & Hip Opening (5–7 min)
Baddha Konasana (Bound Angle Pose)
Sit on a folded blanket, supporting knees with blocks. Gently fold forward if comfortable.
Seated Figure Four (Ankle-to-Knee Pose)
Flex the feet and breathe into the outer hips. Use props to elevate hips as needed.
5. Pelvic Floor Awareness + Restorative (5–7 min)
Pelvic Floor Breath (Diaphragmatic Breathing with Awareness)
On each inhale, visualize the pelvic floor gently expanding. On each exhale, feel it drawing in and lifting without strain.
Side-Lying Savasana (Left side preferred)
Use a bolster between knees and under the belly for comfort. Focus on the breath or guided relaxation.
Empower Your Pregnancy Journey with YogaRenew
Prenatal yoga isn’t about perfection—it’s about presence. With the YogaRenew-inspired approach, this gentle yet strengthening sequence provides the tools to support your body, mind, and growing baby through every trimester.
Whether you’re a yoga teacher looking to expand your offerings or an expecting parent seeking holistic wellness, this prenatal flow is designed to nourish and empower.
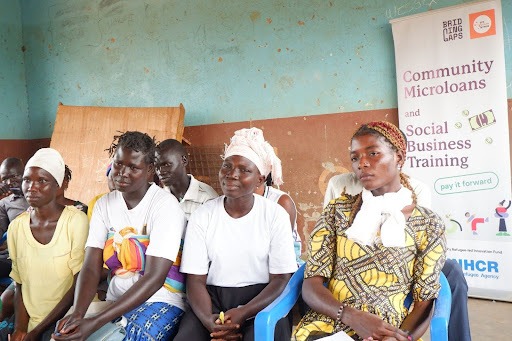 One of the many things that deeply resonated with me is the exploration of yoga philosophy, especially karma yoga. In Mark Stephens’ Teaching Yoga, he defines karma yoga as “the yoga of service,” literally translated as the path of “union through action.” He writes that it involves acting without consideration of desire or selfish need—and that idea really stayed with me. Years ago, I spent time at a yoga retreat where karma yoga meant helping in the kitchen or sweeping floors. Today, learning more about it, I expanded my definition of it to bringing microfinance to refugee settlements, co-creating community-based programs, and holding space for others to lead.
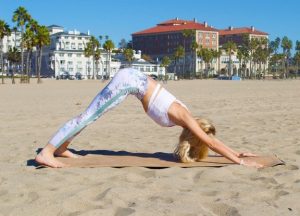 This pose is very popular in yoga sequences, especially in vinyasa yoga. The benefits of
 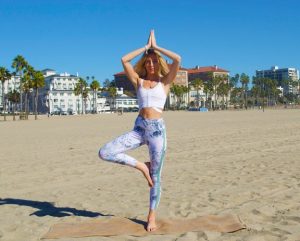 I don’t know about you but something about being by the ocean provides peacefulness and balance to my body and soul; why not practice a pose that embodies that? Benefits of this pose include stretching the thighs, core and shoulders while strengthening the spine, thighs and calves.
 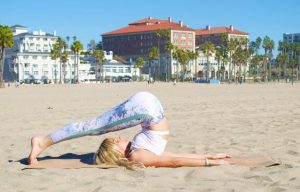 This pose is excellent at reducing back pain and stress, calming the mind and stretching the spine and shoulders. To get into
 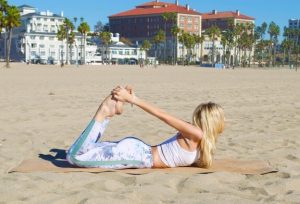 Take a deep breath and say goodbye to any tension. Being by laying on your stomach with your arms extend by your sides with your palms up. Take a deep exhale and reach for your heels with your hands while bending your knees. Hold onto your feet while trying to lift your thighs slightly off the mat and gaze forward. Keep in mind that it might be harder to breathe in
 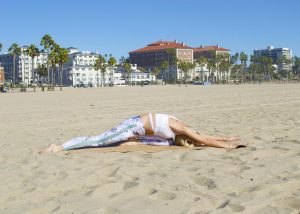 This pose is wonderful at lengthening the hip flexors, preparing the body for backbend poses as well as opening the hip joint and reducing stress and anxiety. Begin in seated position with your feet tucked under your glutes. Extend your right leg back on the mat while keeping your left leg bent in front of you. Take a deep inhale and as you exhale, release your body onto your front leg and extend your arms on the mat in front of you. Try to bring your forehand to touch the mat and close your eyes. Take a few deep breaths, allowing your body to sink even deeper into the pose with every exhale. To exit
 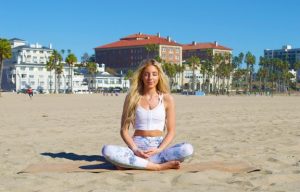 Now, let’s take a moment to sit still and breathe in
 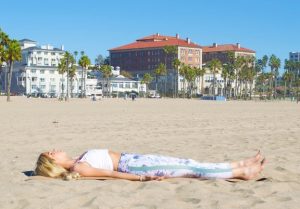 This posture will help you relax even more after getting out of Easy pose. Lay down on your mat or the sand with your legs extended in front of you and your arms by your sides with your palms facing up towards the sky. Close your eyes and bring your awareness to your breath once again but this time, don’t force deep inhalations or exhalations; instead, breathe naturally and simply bring your attention to your breathe. Allow the soothing sounds around you to increase your sense of mindfulness and purpose. The benefits of this asana are endless, a few of which are body awareness, stress reduction, better sleep quality and deep mind relaxation. This asana can be held for anywhere from 5 minutes to an hour and it might just end up in a wonderful nap in the sun.