Needless to say, the restorative and relaxing effects of yoga compliment the scenic and serene atmosphere of the beach. Working in Catalina Island during the summer inspired me to embark on my yoga practice while expanding my knowledge about the physical, mental and spiritual benefits of yoga. You can always use a towel or yoga mat to support your postures or simply embrace the imperfect, sandy foundation beneath you. Sand can be especially beneficial for practicing challenging and balancing poses because it provides a soft cushion for your body if you happen to fall out of a pose.
8 Yoga Poses for the Beach
The beauty of sand is that it conforms to your body; you can create small mounds to support your knees or flatten it out entirely to support your forearms during inversions. Let’s not forget the fresh, salty breeze and the sound of ocean waves complimenting your beautiful flow. I’m eager to share some excellent asanas for your next seaside practice which will make you fall in love with yoga all over again.
1. Downward Facing Dog (Adho Mukha Svanasana)
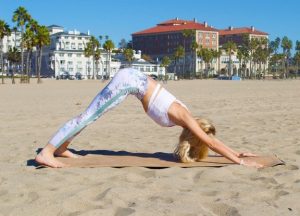 This pose is very popular in yoga sequences, especially in vinyasa yoga. The benefits of Downward Facing Dog include stretching the hamstrings, calves, shoulders and hands while strengthening the legs and arms. It also makes your feel energized and helps calm the brain which makes it an ideal pose to relieve stress. This classic yoga pose can be practiced pretty much anywhere however, practicing it on the sand can allow your body to sink even deeper into it. Begin in tabletop position with your knees stacked directly under your hips and your wrists stacked under your shoulders. Exhale while tucking your toes and lifting your knees off the sand. Spread your fingers and press your hands down in front of you while straightening your back as much as possible. Gently bend your knees, one at a time, working your way into your own version of Downward Facing Dog. Bring your gaze towards your feet while aligning your hand with your spine creating a straight line. Take a few deep breaths and when you’re ready to exit the pose, gently lower your knees back onto the sand into tabletop position and release into Child’s Pose.
2. Tree Pose (Vrksasana)
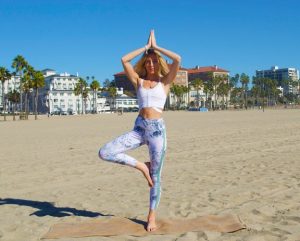 I don’t know about you but something about being by the ocean provides peacefulness and balance to my body and soul; why not practice a pose that embodies that? Benefits of this pose include stretching the thighs, core and shoulders while strengthening the spine, thighs and calves. Tree Pose is a great way to ground yourself and focus on your breathing while improving your balance. Begin in Mountain Pose (Tadasana); inhale while lifting your arms towards the sky and exhale, bringing your hands by your heart. Choose a focal point to provide balance and slowly lift your right foot off the sand and place it on your left ankle. Taking your time, lift your right foot further until it reaches the side of your left knee. Take a few deep breaths here and whenever you’re ready. return to Mountain Pose; repeat this pose on the opposite side.
3. Shoulder Stand (Sarvangasana)
This might seem like an odd pose to practice on the beach but the combination of an inverted posture and a serene, ocean atmosphere will undoubtedly relax you to the core. Be cautious when practicing a shoulder stand because it is definitely e a more advanced pose. The benefits of this shoulderstand include relieving stress and depression, strengthening the glutes, arms, core, legs and arms as well as improving digestion. To get into this pose, start by laying down on your mat (or the sand) and bring your knees towards your face. Bring your hands to your hips to support your lower body and lift your hips and legs towards the sky while trying to keep them straight. Take a few deep breaths; to exit the pose, slowly lower your hips and legs to the ground. You can also choose to stay in a shoulder stand in order to transition to the next posture. The best part? Even if you happen to lose your balance during this asana, the sand provides a soft cushion to avoid injuries.
4. Plow Pose (Halasana)
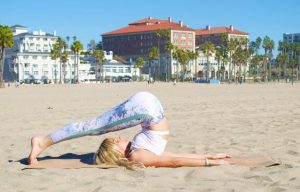 This pose is excellent at reducing back pain and stress, calming the mind and stretching the spine and shoulders. To get into plow pose, simply begin in a shoulder stand and slowly bring your extended legs back towards your head until your toes touch the mat behind your head. Remember to bring your chin away from your sternum and keep your hands on your lower back for additional support or release them onto the mat and stretch them behind you. This pose can be held for a few minutes; when you feel ready to exit, bring your hands to your lower back again and exhale while slowly lowering your legs down towards. This a a great pose for the beach because it encourages deep relaxation and stress relief.
5. Bow Pose (Dhanurasana)
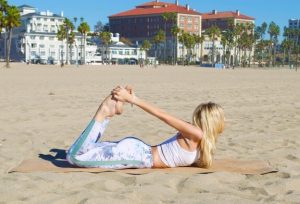 Take a deep breath and say goodbye to any tension. Being by laying on your stomach with your arms extend by your sides with your palms up. Take a deep exhale and reach for your heels with your hands while bending your knees. Hold onto your feet while trying to lift your thighs slightly off the mat and gaze forward. Keep in mind that it might be harder to breathe in bow pose but make sure to keep breathing steadily. Stay in this pose for about 30 seconds and release your legs and arms towards the mat while taking a deep exhale. The benefits of this pose include improving your posture, strengthening the back muscles and stretching your thighs, core, chest, throat and hips.
6. Pigeon Pose (Kapotasana)
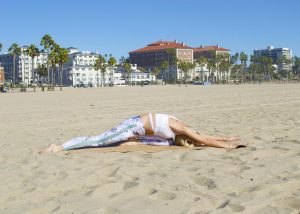 This pose is wonderful at lengthening the hip flexors, preparing the body for backbend poses as well as opening the hip joint and reducing stress and anxiety. Begin in seated position with your feet tucked under your glutes. Extend your right leg back on the mat while keeping your left leg bent in front of you. Take a deep inhale and as you exhale, release your body onto your front leg and extend your arms on the mat in front of you. Try to bring your forehand to touch the mat and close your eyes. Take a few deep breaths, allowing your body to sink even deeper into the pose with every exhale. To exit pigeon pose, slowly walk your hands back up towards your torso and return to seated position.
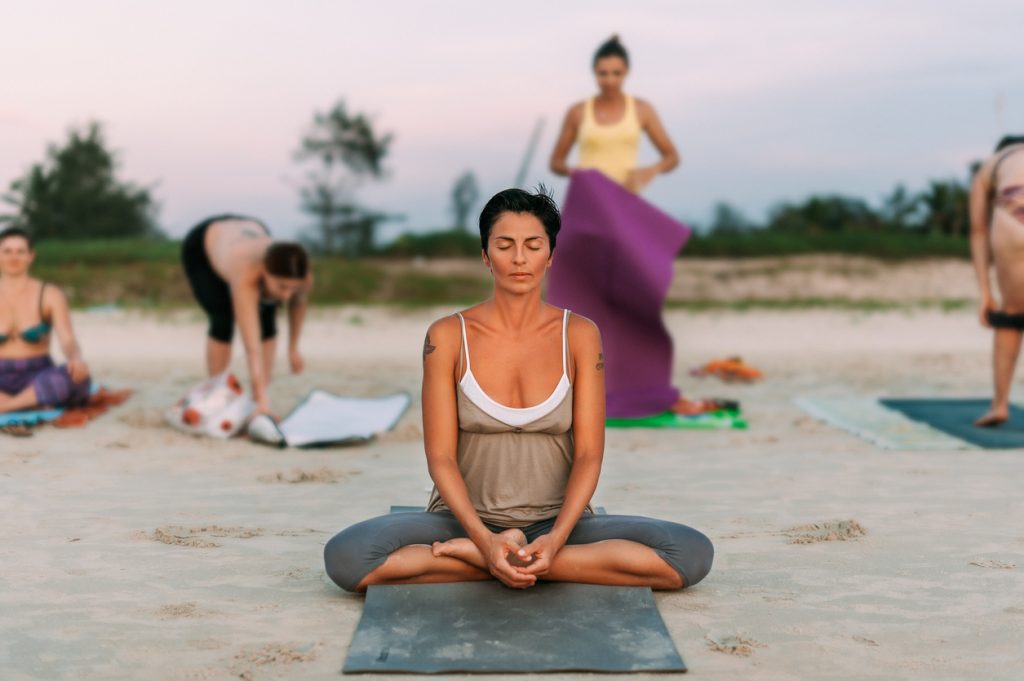
7. Easy Pose (Sukhasana)
 Now, let’s take a moment to sit still and breathe in Easy Seat. Sit comfortably with your legs crossed, your spine straight and your hands in your lap. Close your eyes and take several deep breaths, trying to hold your inhale for a few seconds before exhaling. Try to eliminate any stressful or negative thoughts while bringing your entire focus o your breath. While continuing to breathe deeply, bring your attention to the sound of the ocean waves crashing endlessly against the shore, one by one. Inhale the fresh, salty breeze and feel your body sinking heavily into the sand. Let go of any fear or stress about what will happen tomorrow or the day after because all that is guaranteed is this moment, sitting cross legged on the sand in front of the vast ocean that covers our beautiful planet. In this moment, you are blessed and all you can do is immerse yourself in gratitude. You can attempt the Ujjayi breath which is often referred to as the “oceanic breath” and it is used to synchronize your breathing with the asana. This wonderful technique will enhance your yoga practice as well as increase the oxygen in your blood, relieve tension, detoxify your body and mind as well as help to increase your mind-body awareness. The Ujjayi breath consists of breathing through your nose, inhaling deeply and exhaling slowly through your nose. To practice, open your mouth and exhale making a “ha” sound. Now, try this with your mouth closed but maintain the intensity of your exhalations. Every time your exhale, it should sound like ocean waves and this technique is ideal to practice while you’re in easy pose, during Hatha yoga or simply when you’re stressed or frustrated.
8. Corpse Pose (Savansana)
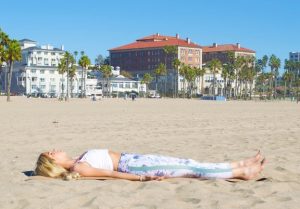 This posture will help you relax even more after getting out of Easy pose. Lay down on your mat or the sand with your legs extended in front of you and your arms by your sides with your palms facing up towards the sky. Close your eyes and bring your awareness to your breath once again but this time, don’t force deep inhalations or exhalations; instead, breathe naturally and simply bring your attention to your breathe. Allow the soothing sounds around you to increase your sense of mindfulness and purpose. The benefits of this asana are endless, a few of which are body awareness, stress reduction, better sleep quality and deep mind relaxation. This asana can be held for anywhere from 5 minutes to an hour and it might just end up in a wonderful nap in the sun.
Start Your Yoga Beach Session
What are you waiting for? Head to the beach and take some time to indulge in these asanas; you deserve that time to gain perspective and awareness. Take the time to leave any stress that you might be experiencing behind and relax yourself physically, mentally and spiritually. The past has already happened and the future is uncertain so all that really matters is this present moment, right here, right now. Submerge yourself in an abundance of spiritual awareness, gratitude and bliss.
Let’s ride your wave, together.
Namaste.
Looking to lead yoga classes of your own on the beach? Get started on your yoga teacher training online with YogaRenew.