You’ve just started teaching yoga. You’ve memorized your sequences, your playlist is set, and you’re finally feeling confident at the front of the room. And then… a visibly pregnant student walks in.
Your heart skips a beat.
What do I say? Can she do this pose? Am I liable if something goes wrong?
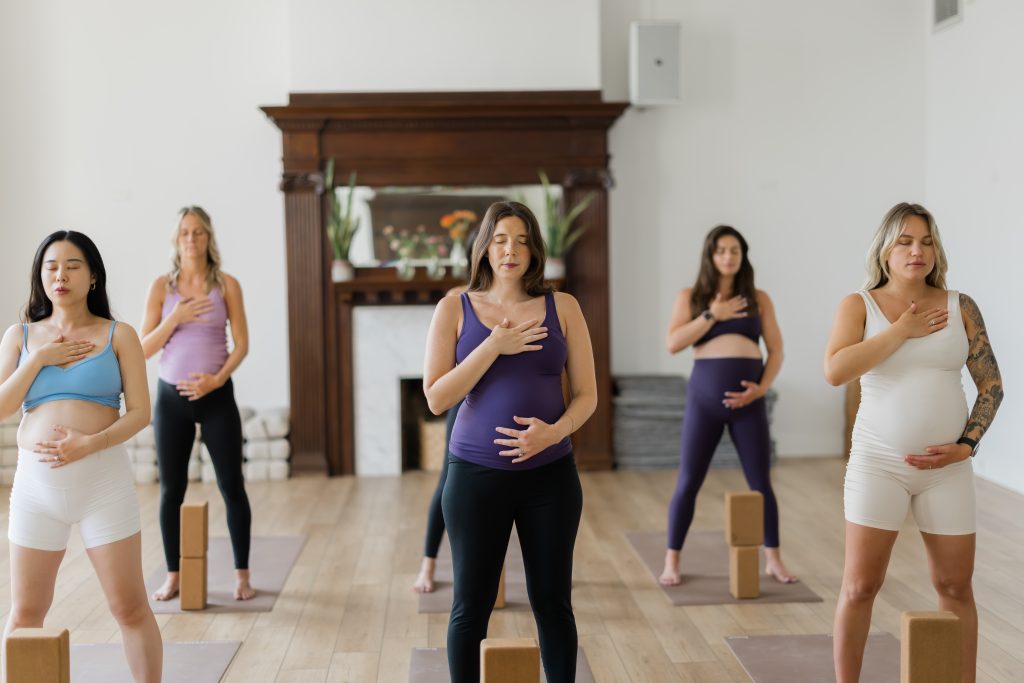
You’re not alone. Most yoga teachers—especially newer ones—have that moment of panic when a student with a visible difference, like pregnancy, injury, or disability, shows up. You were trained on “modifications,” maybe covered pregnancy in a few bullet points during your 200-hour training, but you didn’t get to feel what it’s like to teach bodies that don’t match the demo.
The Unknown Feels Risky
When you haven’t worked with a variety of bodies, they feel unpredictable. And fear creeps in when we don’t know what to do—so we default to avoidance. “Maybe she’ll just modify on her own,” or “I hope she’s done yoga before.”
But that’s not really teaching, is it?
What If You Could See the Body Differently?
The truth is, pregnancy isn’t a mystery. It’s not a disability or a limitation—it’s just another version of a human body going through change. When we take the time to study, to learn the physiological changes, the emotional landscape, and the biomechanics of a pregnant person’s body, it stops being scary. This is a huge reason why I love teaching prenatal yoga.
It becomes fascinating.
Continuing education—especially prenatal-specific training—doesn’t just teach you what to avoid. It teaches you how to see. You begin to read shape and direction rather than fitting someone into a pose. You stop asking “Can she do triangle?” and start noticing, “What’s the intention here? What needs support?”
Shape and Direction Over Aesthetics
The heart of smart, inclusive teaching lies in understanding shape and direction. Whether your student is pregnant, postpartum, recovering from injury, or simply having a wobbly day, the bones tell the story. The energy of a pose comes from its direction, not how it looks on the outside.
A prenatal student in Warrior II might need a shorter stance. They might take more space, support their pelvis differently, or skip certain transitions—but the essence of the pose remains. Strength, direction, and awareness don’t disappear. They just show up in new ways.
Yoga Is Never One-Size-Fits-All
When we treat all students like they’re supposed to fit a mold, we miss the whole point. Yoga is about meeting people where they are and supporting them with clarity, creativity, and compassion.
And that means not being afraid to adapt.
It also means asking for help, investing in your education, and learning the skills that make you a real teacher—not just someone who recites cues.
Education Helps Replace Fear with Curiosity
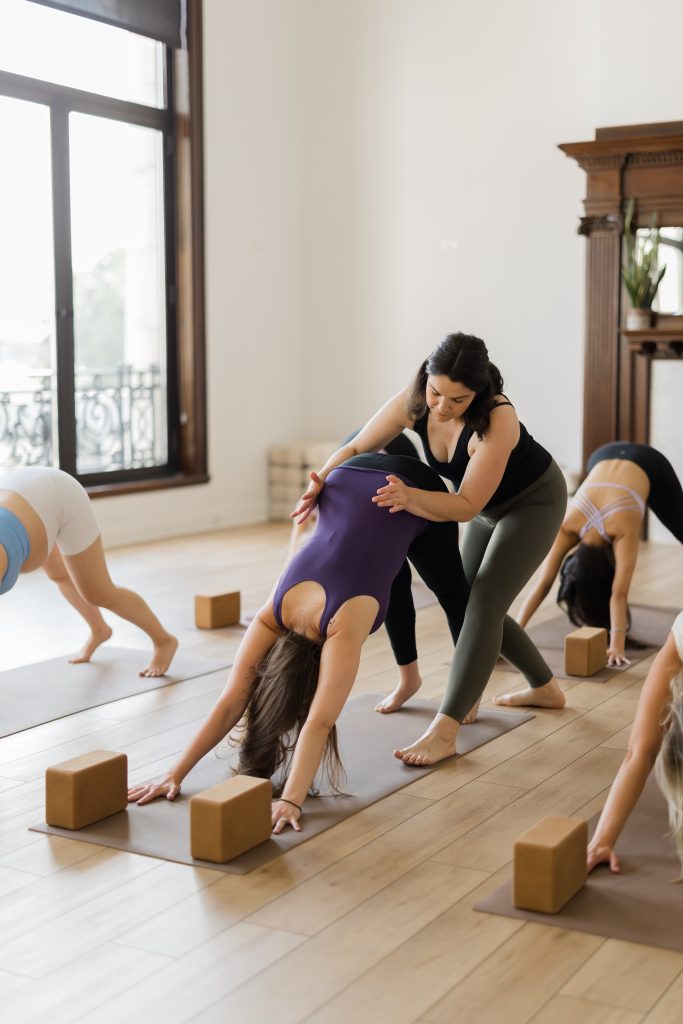
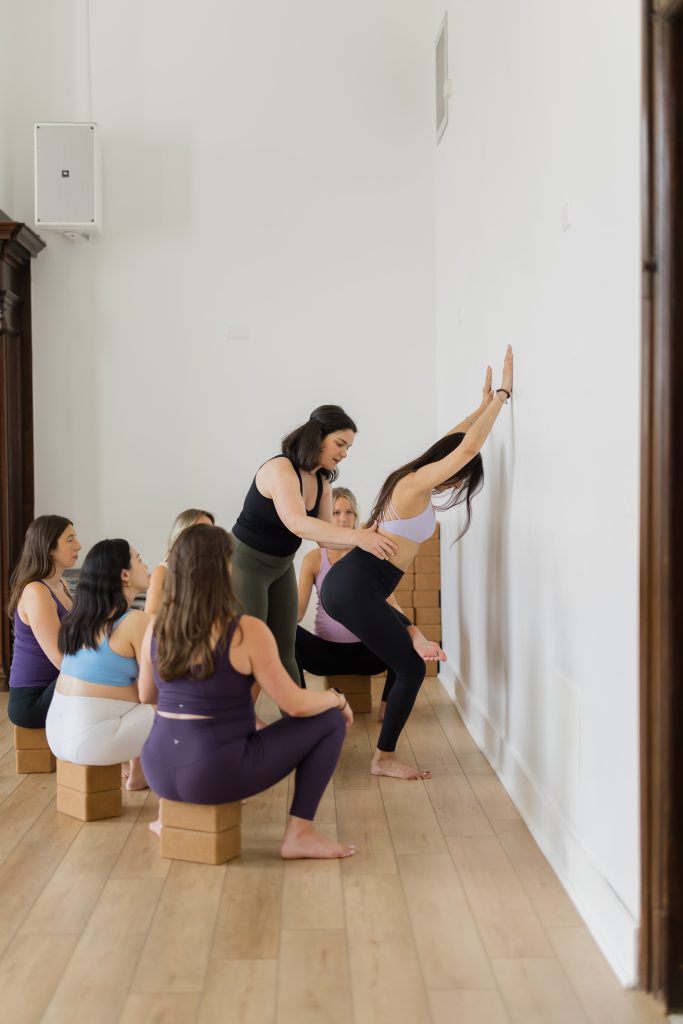
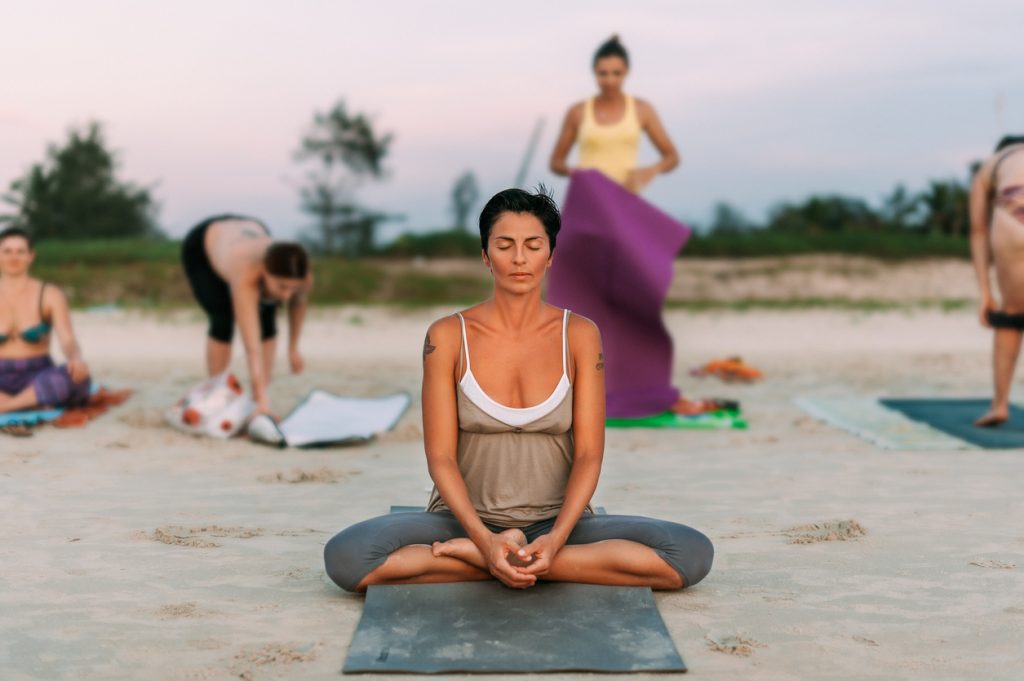
Mélie Purdon giving a Downward Facing Dog assist on a pregnant yogi
The more you know, the less you fear. Once you understand what’s happening in a pregnant body, you don’t tiptoe around her. You offer options confidently. You hold space respectfully. You invite her to experience yoga with agency and support—not with a spotlight on what she can’t do.
So, are you still afraid of the pregnant yogi?
If yes, that’s okay. But don’t stay afraid. Get curious. Study. Ask questions. Seek out teachers who’ve walked the path before you.
Because when you learn to see differently, you teach differently.
And your students—all of them—deserve that.
Ready to Get Started?
Join me for our next Prenatal Yoga Teacher Training Immersion in Hoboken, NJ on June 20, 21, and 22. You’ll gain hands-on experience and leave with a toolkit to support your students with clarity and confidence.
Or, if you’re looking for flexibility, enroll in the self-paced, online 85-hour Prenatal Yoga Teacher Training with YogaRenew.
And if you want to see prenatal yoga in action, come move with me in our LIVE weekly Prenatal Yoga class every Saturday at 9:30am ET on the YogaRenew app.
Because the more we learn, the less we fear—and the more skillfully we serve.
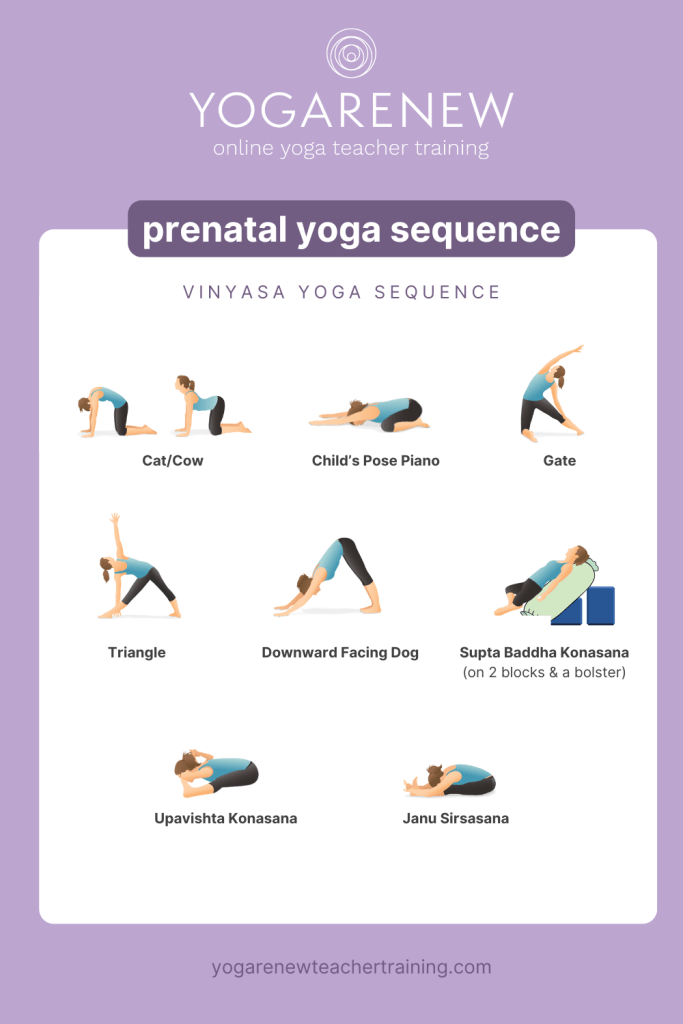
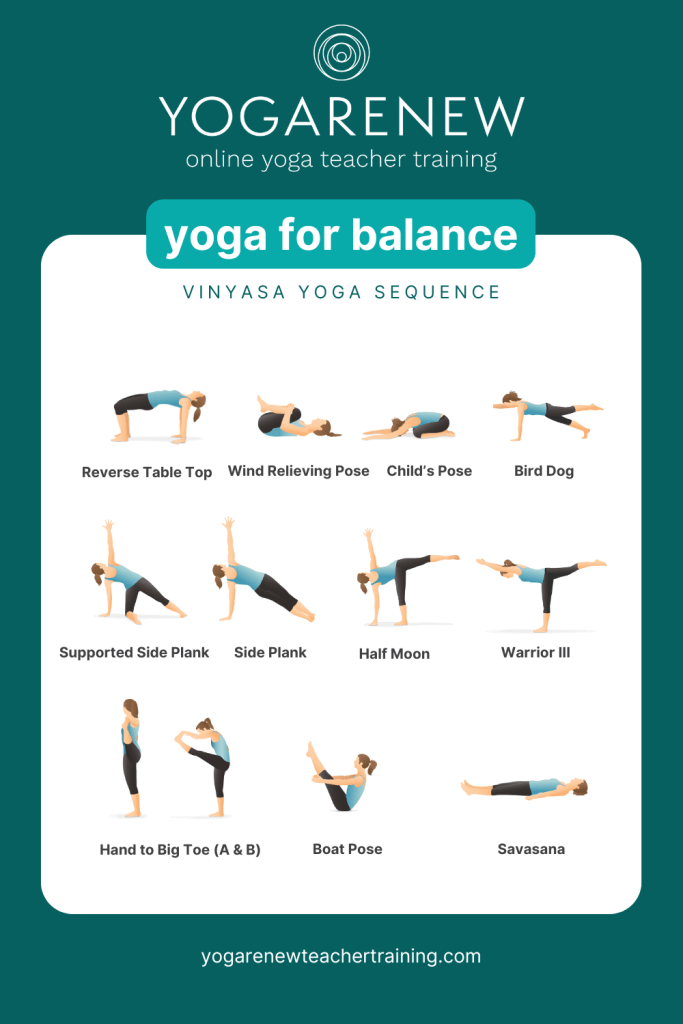
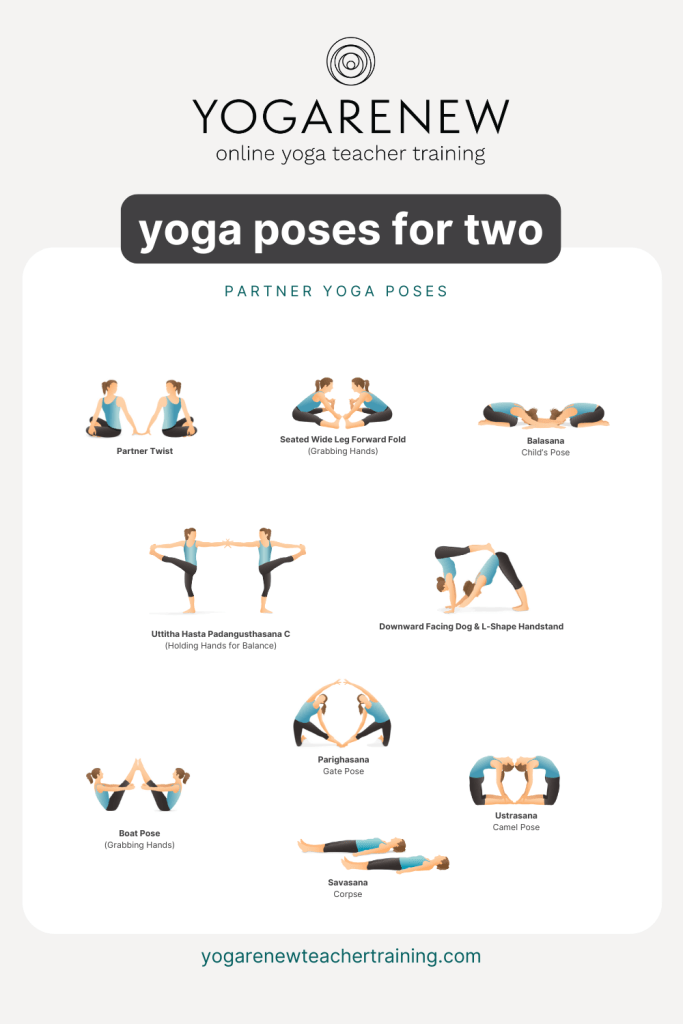
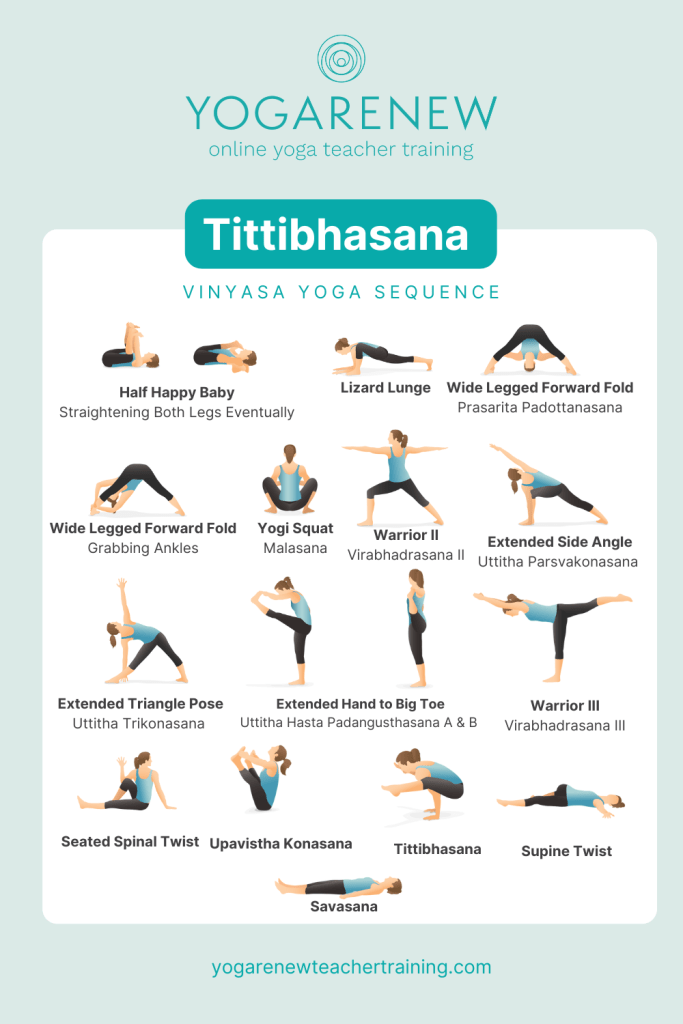
 This pose is very popular in yoga sequences, especially in vinyasa yoga. The benefits of
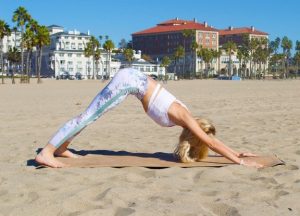
  I don’t know about you but something about being by the ocean provides peacefulness and balance to my body and soul; why not practice a pose that embodies that? Benefits of this pose include stretching the thighs, core and shoulders while strengthening the spine, thighs and calves.
 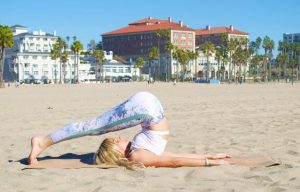 This pose is excellent at reducing back pain and stress, calming the mind and stretching the spine and shoulders. To get into
 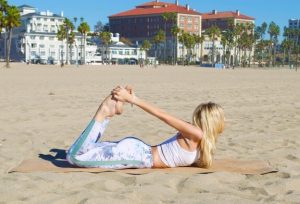 Take a deep breath and say goodbye to any tension. Being by laying on your stomach with your arms extend by your sides with your palms up. Take a deep exhale and reach for your heels with your hands while bending your knees. Hold onto your feet while trying to lift your thighs slightly off the mat and gaze forward. Keep in mind that it might be harder to breathe in
 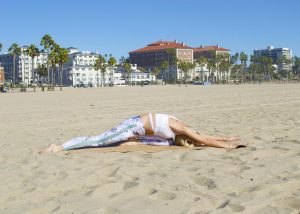 This pose is wonderful at lengthening the hip flexors, preparing the body for backbend poses as well as opening the hip joint and reducing stress and anxiety. Begin in seated position with your feet tucked under your glutes. Extend your right leg back on the mat while keeping your left leg bent in front of you. Take a deep inhale and as you exhale, release your body onto your front leg and extend your arms on the mat in front of you. Try to bring your forehand to touch the mat and close your eyes. Take a few deep breaths, allowing your body to sink even deeper into the pose with every exhale. To exit
 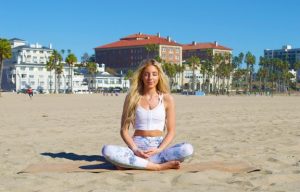 Now, let’s take a moment to sit still and breathe in
 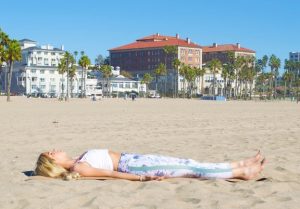 This posture will help you relax even more after getting out of Easy pose. Lay down on your mat or the sand with your legs extended in front of you and your arms by your sides with your palms facing up towards the sky. Close your eyes and bring your awareness to your breath once again but this time, don’t force deep inhalations or exhalations; instead, breathe naturally and simply bring your attention to your breathe. Allow the soothing sounds around you to increase your sense of mindfulness and purpose. The benefits of this asana are endless, a few of which are body awareness, stress reduction, better sleep quality and deep mind relaxation. This asana can be held for anywhere from 5 minutes to an hour and it might just end up in a wonderful nap in the sun.