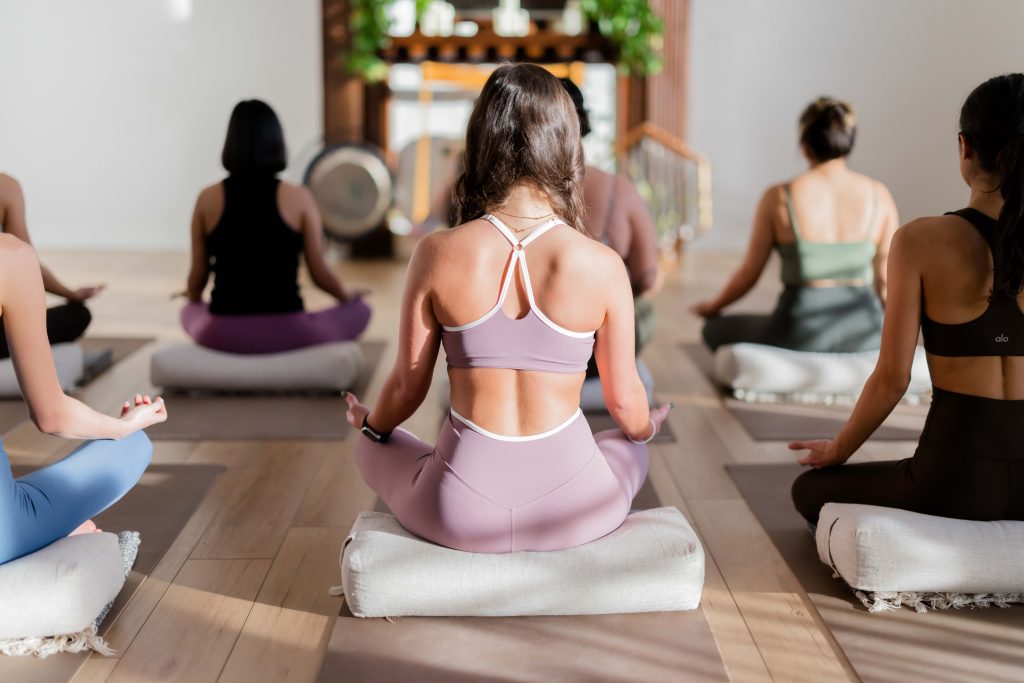
In a world that constantly asks us to do more, move faster, and push further, restorative yoga offers something radically different: an invitation to pause.
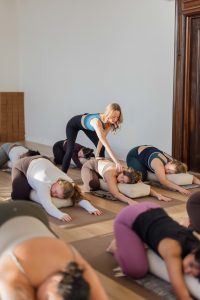
This week’s class is centered around restorative yoga, a practice designed to support the body completely so the nervous system can soften, the breath can deepen, and the mind can settle. With the help of props like bolsters, blankets, and blocks, each pose becomes an opportunity to release effort and receive support.
Rather than stretching deeply or building strength, we’ll focus on stillness, comfort, and ease—allowing the body to unwind naturally.
What to Expect
This class is slow, grounding, and deeply nourishing. Each posture is held for several minutes, giving your body time to shift out of “doing mode” and into a state of rest and repair.
Slow your breath
Release muscular tension
Support your joints fully
Cultivate awareness without effort
This is a practice of letting go, not pushing further.
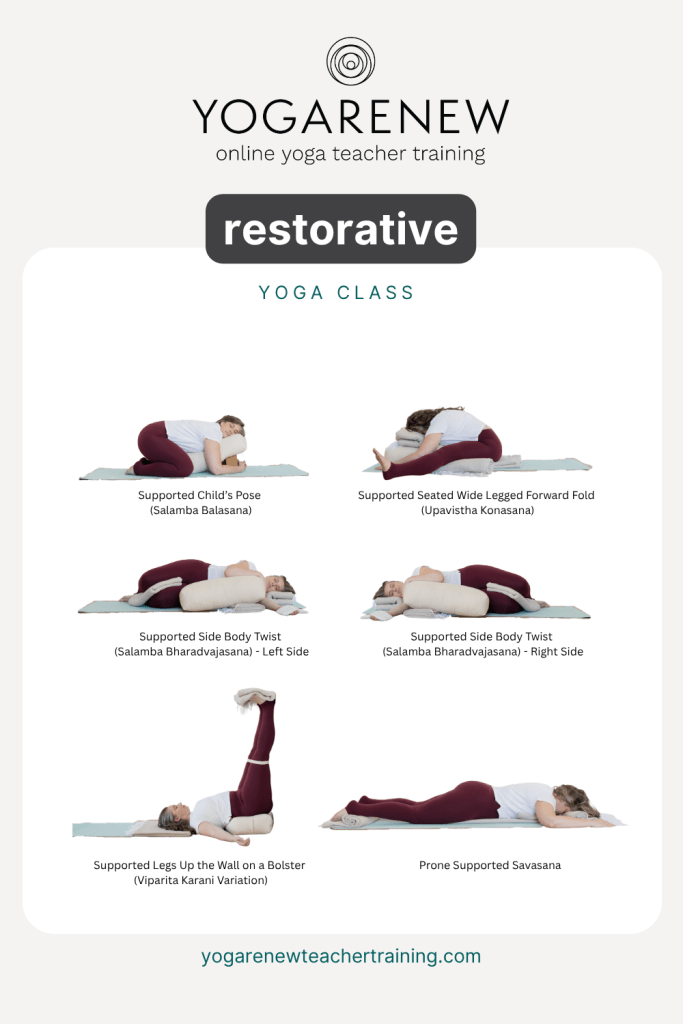
The Sequence
Supported Child’s Pose (Salamba Balasana)
We’ll begin in a gentle, grounding shape using a bolster to support the torso. Supported Child’s Pose encourages a sense of safety and ease, helping to quiet the mind and gently stretch the back body.
Allow your weight to fully melt into the props and bring awareness to the rhythm of your breath.
Moving into a seated position, you’ll fold forward over a bolster, allowing the spine to round softly.
This variation removes any strain and invites a passive release through the back body, calming the nervous system and encouraging introspection.
Supported Side Body Twist (Salamba Bharadvajasana) – Both Sides
Twists in restorative yoga are less about depth and more about gentle unwinding.
With the support of a bolster, this reclined twist allows the spine to softly rotate while the body remains completely held. This pose can feel like a reset—wringing out tension while maintaining ease.
Take your time transitioning between sides, keeping the experience slow and intentional.
Supported Legs Up the Wall on a Bolster (Viparita Karani Variation)
In this variation of Legs Up the Wall, the legs are elevated using a bolster, allowing for a gentle inversion without effort.
This pose supports circulation, soothes tired legs, and deeply relaxes the body. Let gravity do the work while you rest into stillness.
Prone Supported Savasana
We’ll close the practice lying on the belly with a bolster supporting the body.
This variation of Savasana offers a grounding, cocooning effect—perfect for anyone who feels restless lying on their back. It encourages a sense of containment and can be especially calming for the nervous system.
Allow yourself to fully surrender here, with nothing left to do.
The Takeaway
Restorative yoga reminds us that rest is not a luxury—it’s essential.
By slowing down and supporting the body, we create space for healing, clarity, and balance. This practice is an opportunity to reconnect with yourself in a quieter, more subtle way.
This week, give yourself permission to do less—and receive more.
Don't miss a beat! Sign up for our weekly newsletter.
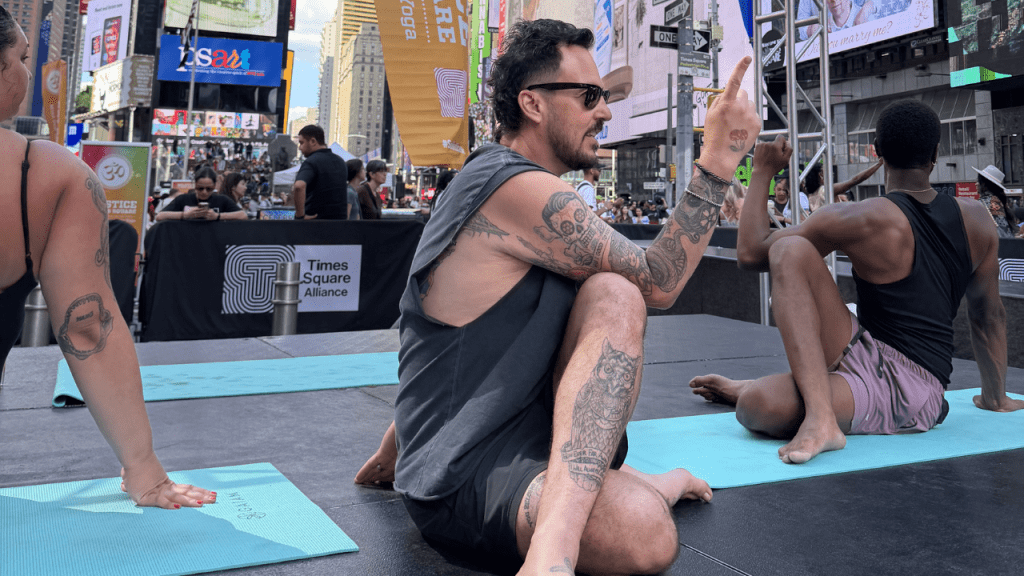
There are few places in the world more energetic, vibrant, and iconic than Times Square. Known for its flashing billboards, endless movement, and unmistakable New York City energy, it may seem like the last place you’d expect to find thousands of people practicing stillness and mindfulness together.
Yet on June 21, 2026, that’s exactly what happened.
In celebration of International Yoga Day, YogaRenew Co-Director Patrick Franco stepped onto one of the world’s most recognizable stages to lead approximately 10,000 students through a powerful all-levels yoga practice in the middle of Times Square.
As the city buzzed around them, thousands of yoga practitioners rolled out their mats and gathered together in a collective celebration of movement, breath, and community. The event brought people from all walks of life together to honor a practice that has connected individuals around the globe for centuries.
Bringing Yoga to the Center of the World
International Yoga Day, observed annually on June 21st, celebrates the profound impact yoga has had on physical health, mental well-being, and global connection. Every year, practitioners gather around the world to practice together, but few events capture the spirit of yoga quite like the annual Times Square gathering.
Standing before a sea of students stretching across one of the busiest intersections on earth, Patrick guided participants through a thoughtfully sequenced flow that reflected the signature YogaRenew teaching style: intelligent movement, creative transitions, and accessible challenges that encourage students to explore their potential.
The practice featured several YogaRenew fan favorites, including:
Parsva Bakasana (Side Crow)
Urdhva Dhanurasana (Wheel Pose)
Dynamic twisting sequences
Heart-opening backbends
Balancing postures designed to cultivate focus and presence
Students were invited to challenge themselves while remaining grounded in the foundational principles of breath awareness and mindful movement.
A True New York City Savasana
Of course, no yoga class is complete without Savasana, but this wasn’t your typical quiet studio ending. As students settled onto their mats beneath towering skyscrapers and giant digital billboards, the sounds of New York City continued all around them. A last minute siren became part of the experience, creating what Patrick jokingly referred to as a true New York City Savasana. Rather than distracting from the practice, these sounds became a reminder of one of yoga’s most valuable lessons: finding stillness amidst chaos.
In a city famous for its constant motion, thousands of people paused together, breathed together, and experienced a moment of collective presence.
Watch the Entire Class
The best part? You don’t have to travel to New York City to experience the class yourself. The team at Times Square NYC captured the event on video, allowing practitioners around the world to join Patrick’s International Yoga Day practice from anywhere.
A Little About Patrick Franco and YogaRenew
Patrick Franco serves as Co-Director of YogaRenew’s Online Yoga Teacher Training Programs alongside fellow educator and YogaRenew Co-Director Kate Lombardo. Together, Patrick and Kate have helped shape YogaRenew into one of the world’s leading online yoga schools, educating and certifying thousands of yoga teachers across the globe. Their shared passion for thoughtful sequencing, effective cueing, anatomy-informed movement, and accessible teaching methods has become the foundation of the YogaRenew teaching methodology.
Since joining forces with YogaRenew, they have developed numerous online teacher training programs, continuing education courses, workshops, and educational resources designed to support yoga students and teachers at every stage of their journey.
What makes their approach unique is a commitment to balancing tradition with practicality. Their trainings emphasize not only what to teach, but how to teach—helping future instructors develop the confidence, clarity, and teaching skills needed to lead meaningful classes.
Teaching on One of the World’s Biggest Stages
For Patrick, teaching yoga in Times Square wasn’t simply about leading a large crowd. It was an opportunity to share the transformative power of yoga with thousands of people simultaneously and demonstrate that yoga truly belongs everywhere.
From quiet studios to bustling city streets, yoga continues to serve as a practice that helps us connect more deeply with ourselves and with one another.
And on International Yoga Day 2026, in the heart of New York City, that connection was on full display. If you missed the live event, don’t worry—you can still practice with Patrick and experience the energy of this unforgettable International Yoga Day celebration from wherever you call home.
Juneteenth, celebrated on June 19th, marks the emancipation of the last remaining enslaved African Americans in the United States. This significant day in American history is a time for reflection, education, and celebration of freedom and African American culture. One meaningful way to honor Juneteenth is through the practice of yoga, which can offer both physical and mental benefits while providing an opportunity for mindful reflection on the past and present.
The Significance of Juneteenth
Juneteenth, also known as Freedom Day or Emancipation Day, commemorates the moment in 1865 when Union soldiers arrived in Galveston, Texas, to announce the end of the Civil War and the abolition of slavery. This day serves as a powerful reminder of the struggles and triumphs of African Americans throughout history.
Juneteenth became a federal holiday when President Joe Biden signed the Juneteenth National Independence Day Act into law on June 17, 2021. It is the first new federal holiday established in the United States since Martin Luther King Jr. Day in 1983.
Why Yoga?
Yoga is a holistic practice that integrates the mind, body, and spirit. It is a practice that honors everyone and every body. Practicing yoga on Juneteenth can be a profound way to connect with the day’s themes of liberation, resilience, and inner peace. Incorporating yoga into your celebration of Juneteenth will honor the integrity, perseverance and appreciation of Black Americans and their impact on history. Juneteenth is a way to celebrate Black culture and history, just as yoga is an emblem of the Eastern world; an ancient practice brought over to the West to bring peace and tranquility to the people.
How to Incorporate Yoga into Your Juneteenth Celebration
Start with Intention: Begin your yoga session with a moment of silence or a brief meditation. Reflect on the significance of Juneteenth and set an intention for your practice. This could be a personal goal, a thought of gratitude, or a dedication to those who fought for freedom.
Choose Inclusive and Diverse Practices: Support and participate in yoga classes led by Black instructors or those that emphasize inclusivity and cultural awareness. This not only enriches your practice but also supports the diverse community within the yoga world.
Focus on Poses that Promote Reflection and Strength:
Mountain Pose (Tadasana): A grounding pose that encourages stability and presence.
Warrior Poses (Virabhadrasana I, II, and III): Warrior poses in yoga symbolize strength and inner spirit.
Child’s Pose (Balasana): A resting pose that allows for deep reflection and tuning inward.
Tree Pose (Vrksasana): Trees are resilient, tall, fierce. They represent unwavering stability.
Incorporate Breathwork and Meditation: Breathing exercises, such as deep diaphragmatic breathing or alternate nostril breathing, can enhance your mental clarity and bring a sense of calm. Guided meditations focusing on themes of freedom, resilience, and unity can deepen your connection to Juneteenth.
End with Gratitude: Conclude your practice with a moment of gratitude. Acknowledge the progress made since Juneteenth and honor the continued fight for equality and justice.
Supporting the Black Community
In addition to practicing yoga, consider supporting Black-owned businesses, artists, and organizations. This could involve attending Juneteenth events, donating to causes that promote racial equity, or educating yourself and others about African American history and culture. If there are Black teachers and Black-owned yoga studios in your community, find them and amplify their message on this celebratory day. Find people in your community that share the sentiment of making this a day special and honoring it for all that it embodies. Just as a yoga practice is often amplified through community, the message of Juneteenth is best shared amongst family, friends and people in your immediate community.
Honoring Juneteenth Through Yoga
Honoring Juneteenth through the practice of yoga is a powerful way to reflect on just how important and meaningful this day is. Yoga teaches us to be present and fully in the moment. Using the breath, intentional movement and a clear mind, we can honor this day in a way that embraces all of its power and integrity. Through yoga, we are able to honor the past, embrace the present, and contribute to a future rooted in unity, freedom, equality and justice.
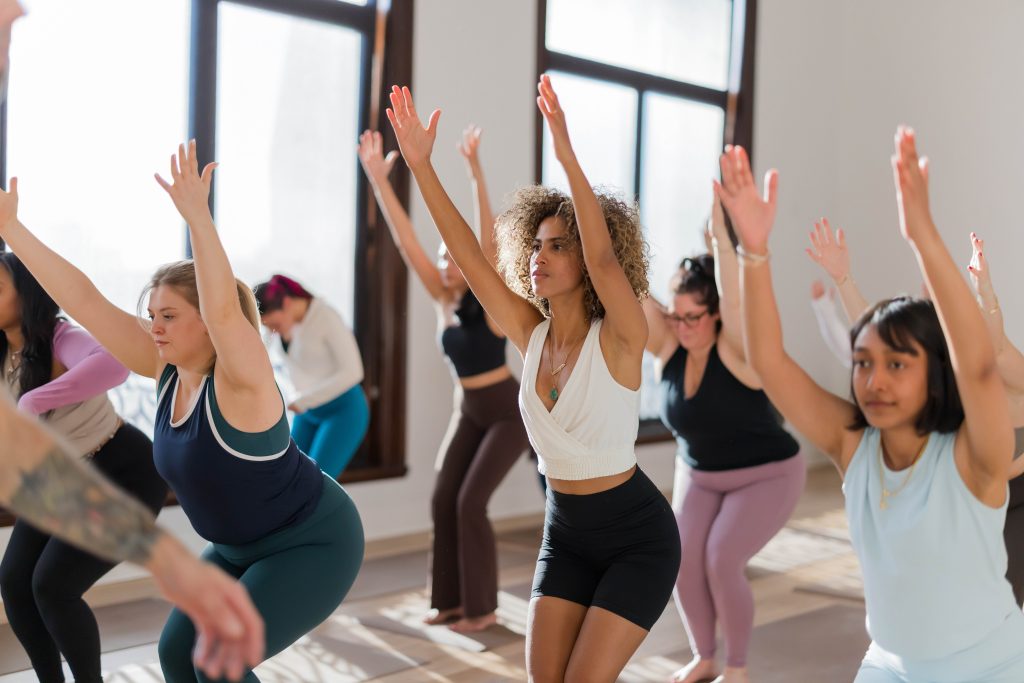
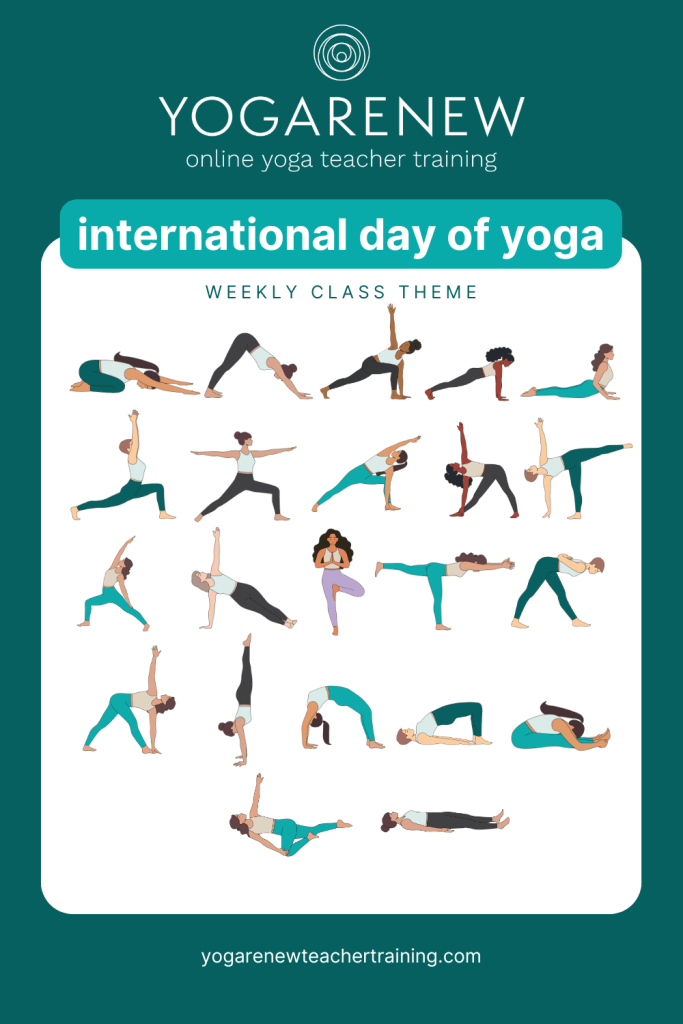
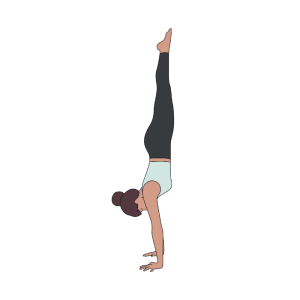
This International Day of Yoga on June 21st 2026, we are celebrating with a class leading towards Handstand and Wheel! International Yoga Day is a time where people usually reflect on the practice of yoga and what it means to them, take a class or teach a class, and find ways to celebrate the ancient practice in today’s modern world. Typically, there are events and ways to get involved worldwide!
This week’s Weekly Class Theme will be in honor of International Yoga Day 2026 and will give include some of the quintessential poses that help prepare you for an inversion, Handstand and a nice backbend, Wheel.
Roll out your mat and practice with us and Happy International Yoga Day!
The warm up
Child’s Pose with arms reaching out so elbows lift off the mat
Downward Facing Dog
Plank
Rolling Cobra
Downward Facing Dog
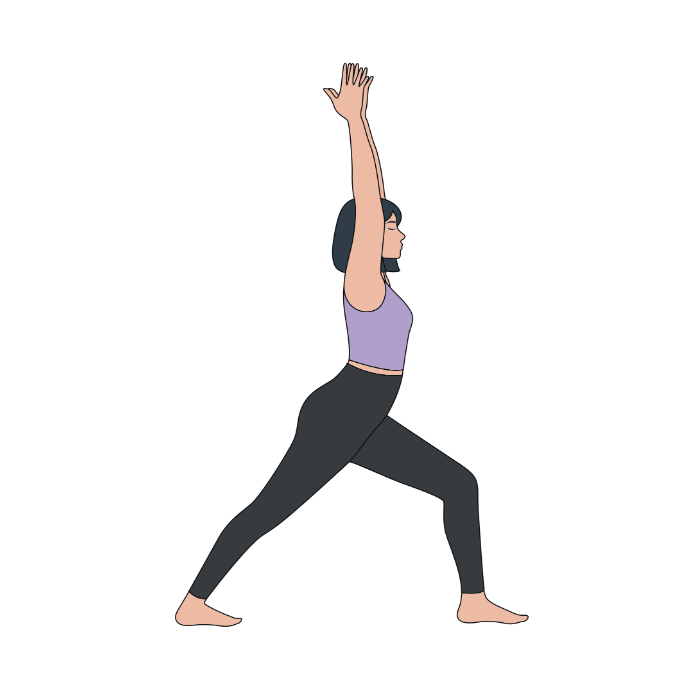
High Lunge
The standing poses portion of class
Warrior 2
Extended Side Angle
Peaceful Warrior
Side Plank
Now, balance & twist
Start at the top of your mat for Tree pose
Warrior 3
Pyramid
Revolved Triangle
Double peak pose: Handstand + Wheel
Instruct your students (or yourself) to try handstand at the wall, Handstand hops, or you can incorporate handstand hops in the balance and twists portion of class when they are in Pyramid pose. For Wheel, you can offer to have them start with a bolster underneath their back to bring the ground a little closer. If you have wall space, you can also attempt Wheel at the wall with two blocks against the wall to place the palms of the hands on them and make an easier lift-off.
It feels fitting to me that the International Day of Yoga is celebrated around the longest day of the year, the summer solstice. The abundance of light that this time of year holds feels congruent with the infinite potential of the practice of yoga. So many people assume yoga is just about physical exercise and postures, but its depth expands far beyond that.
There are a full eight limbs within the scope of the practice of yoga. It could take many lifetimes to reach the goal of yoga, enlightenment, or samadhi. I’ve been studying, practicing, and teaching yoga for many years, and I am for sure not even close to enlightenment! And despite spending a lot of time with yoga teachers and practitioners, I do not know a single enlightened being.
Someone who didn’t know about the magic of yoga might think that the practice is pointless if there is nothing guaranteed to be achieved. But there is magic inside the path itself. There is magic in continuing to return. There is magic in being changed slowly, sometimes so subtly that you do not even notice it until you look back and realize you are meeting your life differently.
Yoga unites us
This International Day of Yoga, I’m reflecting on how yoga is not just a practice, but something that has the power to appeal to and connect all of humankind. It is a common denominator that can magically speak to the heart of anyone, no matter their geographical coordinates, what language they speak, or whether they can touch their toes. The practice of yoga offers a place where people from different countries, cultures, life stages, and personal histories can arrive for different reasons and somehow recognize something shared.
I know this to be true, and I’ll tell you how…
Being part of the YogaRenew faculty has shown me, in a very real way, how far reaching this practice is. Every week, I log online to support teacher trainees in the YogaRenew Teacher Training program, and I lead a cycle of sessions that teach how to sequence vinyasa yoga classes. Students tune in from all over the world, from so many different countries, cultures, and life circumstances.
Just last week we had more than one hundred students join the live session, and there were more than twelve different countries accounted for:
Canada
Greece
The Netherlands
Australia
Vietnam
Italy
The UK
France
Jamaica
Mexico
The list goes on! This has been one of the most beautiful things to witness.
All of us gathered in one place to talk about and learn about yoga. A screen full of people in different time zones, in different homes, in different seasons of life, all choosing to spend time studying this practice. Some students are brand new teachers. Some are teaching already and want to refine their skills. Some are still figuring out whether they even want to teach at all. But even with all of that distance and difference, there is something deeply shared in the reason people are drawn to yoga.
All of us, at some point, took a yoga class and said to ourselves, “Oh, there is something special here, and I need to know more about it.”
A common thread, a shared feeling
Yoga reminds me how human this practice really is. We may arrive from different circumstances, but so many of us are looking for some version of the same thing:
Steadiness
Clarity
Healing
Connection
Self-understanding
Collectively, a way to feel more at home in our own lives.
I recently asked students on a live session what it was about yoga that resonated with them. So many of the responses were along the lines of, “Yoga saved my life,”“Yoga helped me heal an injury,”“Yoga supported me through grief, loss, divorce, etc.,” or “Yoga has connected me to an amazing community.” As everyone shared their reasons, I observed a screen full of little video squares with kind, smiling faces nodding in agreement.
There was something incredibly moving about that moment. The answers were different, but the feeling underneath them was familiar. Everyone had their own doorway into the practice, but everyone seemed to understand that yoga had given them something they did not even fully know they were looking for.
Yoga speaks to something universal. People may come to yoga for different reasons: movement, healing, strength, stress relief, curiosity, spirituality, community, or the desire to teach. But underneath those reasons, there is often a shared human longing.
We want to feel steady. We want to understand ourselves. We want tools to help us move through change, stress, uncertainty, and transition. We want to feel connected to something deeper than the noise of everyday life.
It doesn’t matter if you prefer to practice vinyasa, hatha, yin, hot yoga, Iyengar, or restorative. It doesn’t matter if you’re brand new to yoga or have been teaching yoga for decades. This is how I think yoga acts as a common language, not because we practice in the same way, but because the practice meets us inside the very human experiences we all navigate.
How this practice has impacted me
When I was first introduced to yoga, I really had no idea that it was going to become such a big part of my life. Like most people, I was mostly interested in the physical benefits of the practice and, to be honest, I wanted to learn how to do a headstand. I had witnessed my aunt steadily holding Sirsasana A on a family vacation, and I thought it was the coolest party trick. When I got back to New York City, I stumbled into a high-energy vinyasa class and got seriously hooked on the practice. I found the chanting a little weird at first, but I loved the sweat and the movement so much that I very quickly began to come to class every day.
At that time, my attitude toward my yoga practice was centered on physical achievement:
I wanted to get stronger.
I wanted to become more flexible.
I wanted to understand how people made these beautiful, impossible looking shapes with their bodies.
I loved the feeling of progress, the discipline of showing up, and the way the practice challenged me. I still remember the first time I was able to flow through a vinyasa! Chaturanga, check!
Then my dad passed away…
Suddenly, my yoga mat became the only place I felt like I could breathe. I couldn’t wait to chant and om and pray. I remember rolling out of Savasana and feeling like everything was going to be okay, even if only for a few minutes. This was where my yoga practice shifted from a workout to the most important part of my day. It is when the spiritual aspects of the practice showed me their sparkle.
I began sneaking away from my corporate job to take class in the middle of the day. Lunch break yoga class, I was there. Happy hour yoga class, count me in. I signed up for every single workshop the studio offered. I wanted to be around the practice as much as possible, not because I had a clear plan, but because yoga made me feel more connected to myself at a time when I felt very untethered. I just needed to be in the room.
Soon, I had enough saved to invest in a teacher training, even though I didn’t really care to teach. I was one of those students there just to “deepen my personal practice.” I remember something my teacher, Dana Flynn, said in that training that still resonates with me to this day, more than a decade later. She said,
“Most people come to yoga thinking they’ll learn to stand on their head, but what they really learn is how to stand on their own two feet.”
I found this to be so incredibly impactful because it truly was the spectacle of a headstand that got me interested in yoga in the first place. And oh my, has my yoga practice repeatedly put me back up on my heartbroken, confused, self-doubting two feet.
Practicing then preaching
When I began my yoga teacher training, my intention was only to more deeply understand the tools of a practice that had helped me navigate the complexities of being human. My yoga practice has supported me through some of the most difficult moments of my life, and it continues to support me now. It has been my anchor point to heal, untangle, cry, dance, grieve, grow, even celebrate.
To my surprise, when I completed my teacher training, I felt strongly called to share my experience of yoga practice. I wanted to tell people that yoga possesses incredible healing abilities. I wanted to tell them that it might help you touch your toes and chill out too, but what it will really do is direct you to the best and brightest parts of yourself.
That is still what I believe.
Yoga does not require us to all arrive in the same way. It does not ask us to have the same bodies, the same backgrounds, the same beliefs, or the same goals. It gives us a place to begin from where we are. It gives us tools for attention, breath, compassion, resilience, and reflection. It gives us a way to practice being with ourselves honestly, and then, hopefully, a way to be with one another more honestly too.
And now, having the chance to help more teachers from all over the world develop the skills and confidence to go and share these tools further out into the world is an incredible privilege. Every time I teach a group of future yoga teachers, I think about the ripple effect of this practice. One person studies. One person teaches. One person creates a space where someone else can breathe, soften, strengthen, grieve, heal, laugh, or feel less alone.
That is not a small thing.
Celebrating, with deep appreciation & affection
This International Day of Yoga, I am reflecting on the fact that yoga is both deeply personal and beautifully collective. It belongs to the person rolling out a mat in their bedroom, the student finding their first steady breath in Savasana, the teacher learning how to guide with more clarity and care, and the global community of practitioners who continue to return to this path in so many different ways.
I feel like we are all doing our little part in making the world a better place. Not because we are all enlightened. Not because we have mastered the practice. Not because we can all stand on our heads.
But because, little by little, yoga teaches us how to stand more fully on our own two feet.
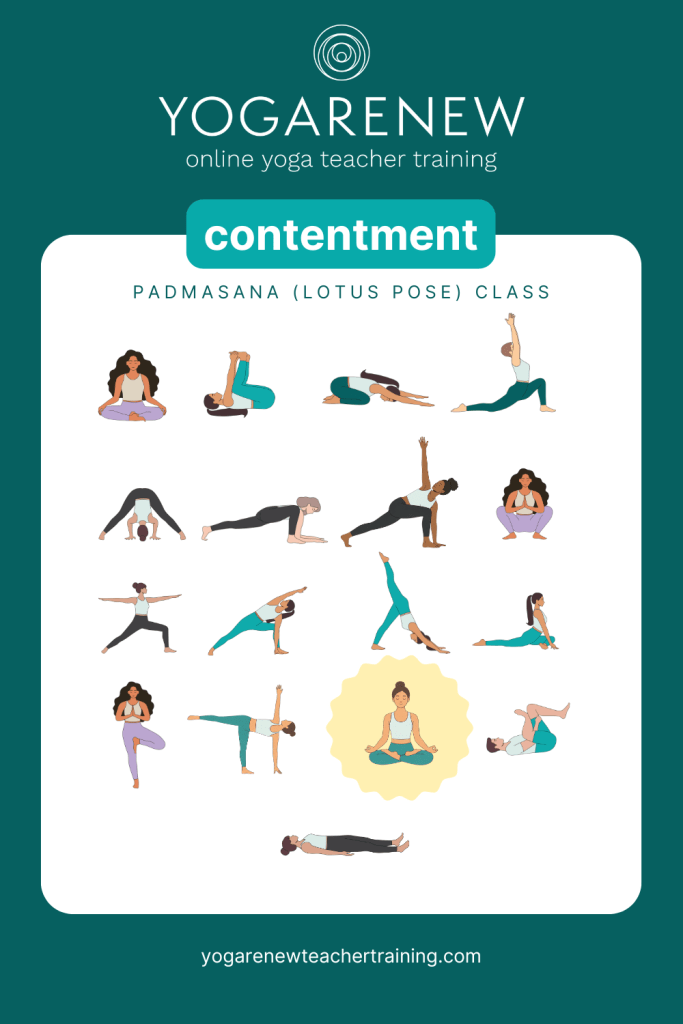
The iconic yoga posture Lotus Pose (Padmasana) is a sacred pose. A perfectly still posture allowing the spine to sit up straight and the heart to be open while the seat is steady and balanced — it’s a great pose to practice when you need a little extra tranquility.
Much like a lotus flower, Lotus Pose invites the body to find stillness and only truly bloom when ready. Patience and contentment must be practiced along the way if you are to truly embody the power of the pose. Lotus pose is a great posture to work towards when practicing contentment because there are many stops along the journey that help you get closer and closer to the full expression of the pose.
As you move freely throughout this sequence, pay attention to where your body feels content, trusting yourself enough to know when to relinquish control and when to keep trying. Through this carefully crafted sequence, you’ll move through asanas that support and open the hips, stretch the inner thighs and ankles and allow you to maintain the integrity of your seat through balance, stillness and acceptance— all through the lens of contentment (Santosha).
Puttering (Warm Up):
Sukhasana
Happy Baby
Child’s Pose
Crescent Lunge
Prasarita Padottanasana
Lizard Lunge
Crescent Twist
Standing Poses:
Warrior II
Extended Side Angle
Three Legged Dog
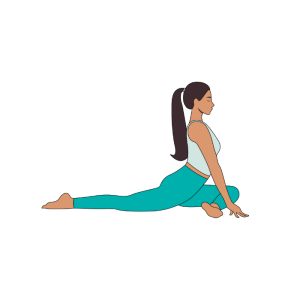
Pigeon Pose
Balance & Twist Section:
Tree Pose
Revolved Half Moon
Peak Pose: Padmasana (Lotus Pose)
This week’s class theme was centered around the beauty and awe of Padmasana. To fully experience the benefits of this pose, listening to your body in the steps along the way is crucial, as true contentment can only be felt when in alignment with your own body & mind.
How to get into Lotus pose (Padmasana):
Start seated
Grab one of your legs, resting your knee on the elbow of the same foot and foot of the lifted leg in the elbow crease of your opposite arm
Cradle your leg back & forth to stretch the hips, knees, and ankles
Do the same with the other leg
Come to Sukhasana and then grab one of your feet and navigate it towards your pelvis, top of the foot against your thigh
Grab your other foot and draw it towards the opposite hip crease
Plant your hands behind you to lengthen your spine and sit up tall
Rest your hands gently on your thighs, palms facing upwards or in a Mudra of your choice, find a full criss-cross of your arms behind your back, or use a strap to bring your hands to your feet
Wind Down Portion:
Reclined Figure 4
Savasana
There is so much to be explored with this pose, and you really can approach it from many different angles. As depicted as one of the later postures in Light on Yoga by BKS Iyengar, it’s advanced shape tends to lend itself to be an intermediate to advanced posture but it is not impossible to attain and work towards. Even the effort needed to embody the full pose is allowing you to feel the benefits of the pose without having your arms fully bound around behind your back. Each step of the journey for the flower to unfurl is equally as important and significant. Your patience and practice in contentment will guide you along the way!
Since becoming a yoga teacher, I have noticed that there are certain poses teachers gravitate towards when teaching and will teach them time and time again. I have also picked up on the poses people love to get into (and choose to skip entirely) and how they’ll spend a little extra time in a certain pose in class just so they could play around with the expression of it.
The poses people show enjoyment in teaching or practicing in class say a lot about them I feel. Almost like a secret knowing of how they exist in the world or how they choose to move through life. This is all just silly little observations but it’s fun to see the life of a pose expressed through certain characteristics.
Let’s see what your favorite yoga pose says about you! If we didn’t cover your favorite pose, leave us a comment and let us know what it is along with why it’s your favorite pose and what you think it says about you.
Warrior 1
Warrior 1 is a pose of strength & stability. You stick to that routine!
A consistent practitioner. You like what you like and there’s no changing it. You enjoy the slight challenge but also the integrity of the pose being a staple in Surya Namaskar B and in many varieties of yoga classes. If you love Warrior 1, you probably have waken up to get your workout in at the same time everyday, doing the same motions that feel good in your body. Warrior 1 being your favorite yoga pose says you aren’t bored by the basics and have the stretch in your quads and hamstrings to make the pose happen, so it feels good in your body. You’ve probably approached life mostly level-headed, with consistent tenacity and the fortitude to keep at the things you love but also things you consider ‘work’. People who love Warrior 1 as their favorite yoga pose are dependable and hard-working. They know they’ll get the same benefit from doing the thing, every single time.
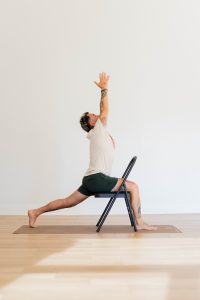
Fun ways to practice Warrior 1:
Place a rolled up blanket behind your back foot
Practice Warrior 1 with your front knee facing a wall with a block lodged between your knee and the wall
Take a yoga chair and set up your Warrior 1 over the chair, like this:
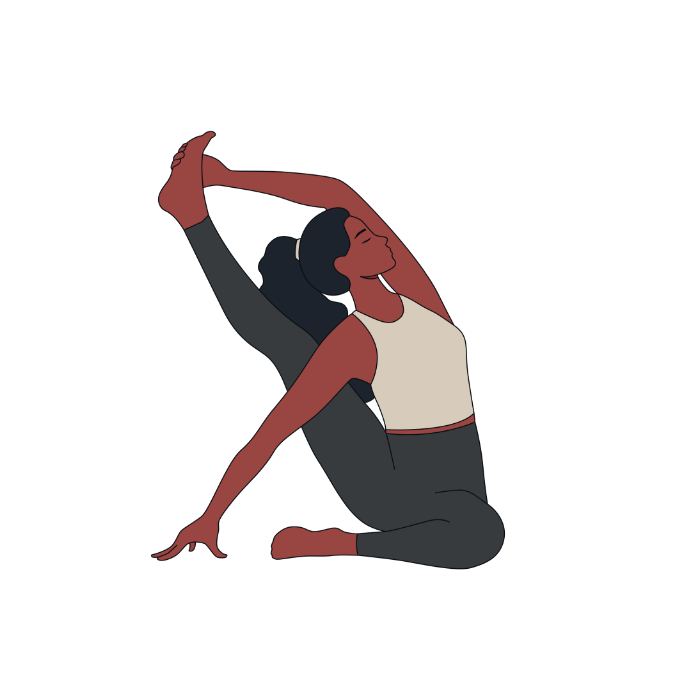
Compass Pose
Spice it up, yogi! Go for that Compass!
You loooove variety. You enjoy a challenge, just like the Warrior 1 yogis, but you want to add a bit of fun in there! (That’s not to say Warrior 1 isn’t fun). Compass pose is a pose of flexibility and openness of the side body. You might enjoy stretching your body physically and enjoy the mental stimulation of putting all the actions together to get into the full expression of the pose. You are probably creative, eager, playful and clever. You can piece all the motions together to prep yourself for this pose and you have a dang good time once you’re in it! Compass pose is a pose that requires a lot of warm-up to different parts of the body, so preparing a well-rounded class to build towards it is key.
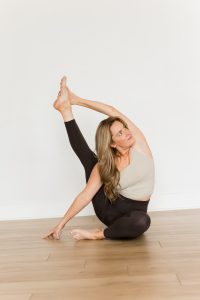
Fun ways to practice Compass pose:
Take yourself to a wall and lift up the leg facing the wall with your opposite arm extended up & over, reaching toward the lifted leg against the wall
Sit on the ground and use a strap around the foot of your lifted leg then extend your opposite arm up & over, grabbing the strap hooked around your foot
Just go for it, bestie! It’s Kate Lombardo’s favorite pose, as you can see:
Handstand
Handstand is the perfect blend of adventure & peace.
Ohhhhhhh boy, do you crave adventure?! Handstand is for thrill-seekers and risk-takers alike. They are usually experienced yogis, gymnasts or acrobats. They appreciate the more vigorous and fast-paced parts of a yoga class and they are always, ALWAYS up for the challenge. If you’re favorite pose is Handstand, you probably craaaave going upside down and love to play with your strength and abilities. You find it fun. Handstand can be extremely challenging but once you come to know your own body well enough and have stayed consistent in practicing it, it can feel like you’re floating. A popular inversion, Handstand has all the benefits to get your satisfaction of a challenge with the blissful, peace-of-mind that comes afterward. Cheers to you, Handstand yogi!
Fun ways to practice Handstand:
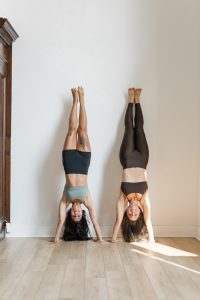
Face the wall, set yourself up about one palm print away from the wall and kick your feet up at the wall
Lie on the ground and place a block underneath your sacrum and your shoulderblades then practice reaching your arms and legs out long so they both lift up off the ground and your back-body presses into the blocks
L-shape Handstand (often harder than actual Handstand)
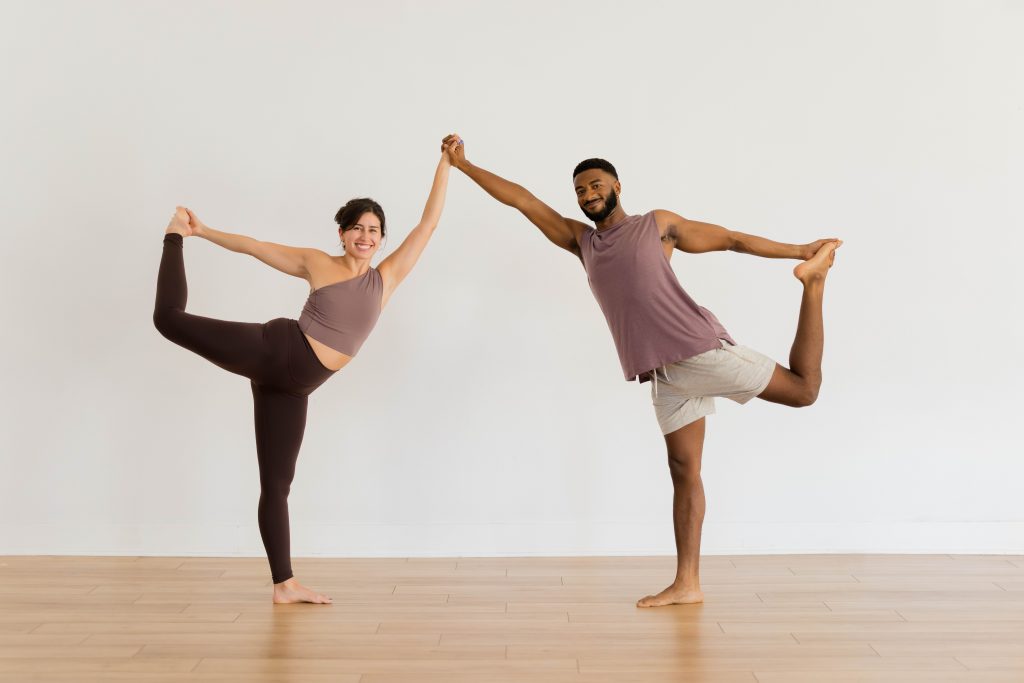
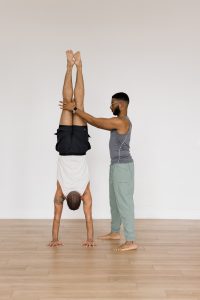
Practice with a bestie, like this:
Wheel Pose
Yogis who prefer Wheel love trying new things!
You’re ambitious. You loooove trying something new and you’ll convince your fellow yogis to try it, too! Wheel pose is for those who are ambitious and up for anything. It’s a pose of integrity and resilience and once practiced can ignite a sort of vibrancy in someone. The pose helps people feel invigorated, which is what yogis seek when they are looking for something new. You’re probably fun, exuberant and encouraging. Your excitement for life inspires others to take the leap into something new! You are probably very curious yourself and love the rush of feeling like you accomplished a ‘new thing’. Try that wheel! Get your friend to try a wheel! We can all be doing wheels!!!
Fun ways to try Wheel pose:
Have a bolster or two folded blankets beneath you so you’re lifting up from a higher position
Place two blocks at the wall and use them for extra height when lifting up
Loop a strap around the middle of your thighs
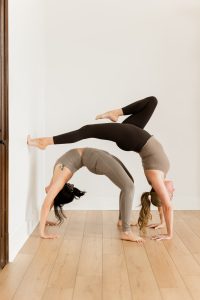
Bonus: Bestie Double Wheel at the Wall!
Child’s Pose
Ahhhh Child’s pose — a chance to tune inward.
You prefer playing it safe and tuning inward and that, my friends, is the whole point of yoga!!! You’re not afraid to listen to your body for you know it holds the very specific wisdom you seek. Child’s pose is such an important and substantial pose — allowing the hip creases to get a nice, deep stretch, the arms to extend out long (at least how we teach it at YogaRenew), the abdomen is soft and forehead rests against the mat, gently. This is one of those poses where, if it’s your favorite, it probably means even though there’s an instructor guiding the class, you are following the teacher in your heart and are regularly nourishing yourself in ways you know best. Child’s pose teaches us all that we were all once a child, and sometimes the best thing we can do for ourselves is tap into that inner child and let them curl up into a little ball on the floor!
Fun ways to practice Child’s pose:
Place blocks under the palms of the hands
Place a bolster underneath the abdomen
Place a blanket (or stacks of blankets) underneath the seat
Reach your arms back behind you
Stretch from side to side (Child’s Pose Piano)
Get suuuuper comfy with blankets AND bolsters, (and maybe even a dreamy assist) like so:
Pigeon Pose
Feel it all, yogi!
If Pigeon pose is your favorite yoga pose, you’re probably someone who feels things fully. You appreciate the opportunity to slow down, breathe deeply, and sit with whatever is coming up. You know that growth doesn’t always happen in the flashy moments—it often happens when you’re quietly holding space for yourself. Pigeon Pose lovers tend to be introspective, compassionate, and emotionally intelligent. You may cry during Savasana and honestly? We love that for you. You aren’t afraid of vulnerability, even when it feels uncomfortable. In fact, you know that’s usually where the good stuff lives.
Fun ways to practice Pigeon pose:
Place a block under the seat of the leg that’s bent
Place a blanket under back foot
Lower your abdomen down onto a block
Set yourself up with allllll the props: Blankets under your seat and back foot, a block under your torso, a block for your forehead, blankets supporting your arms, etc.
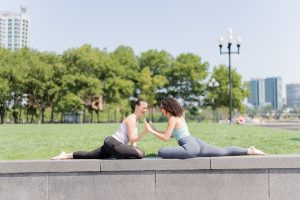
Or… another bestie pose: 😉
They are touching hands!!! How cute.
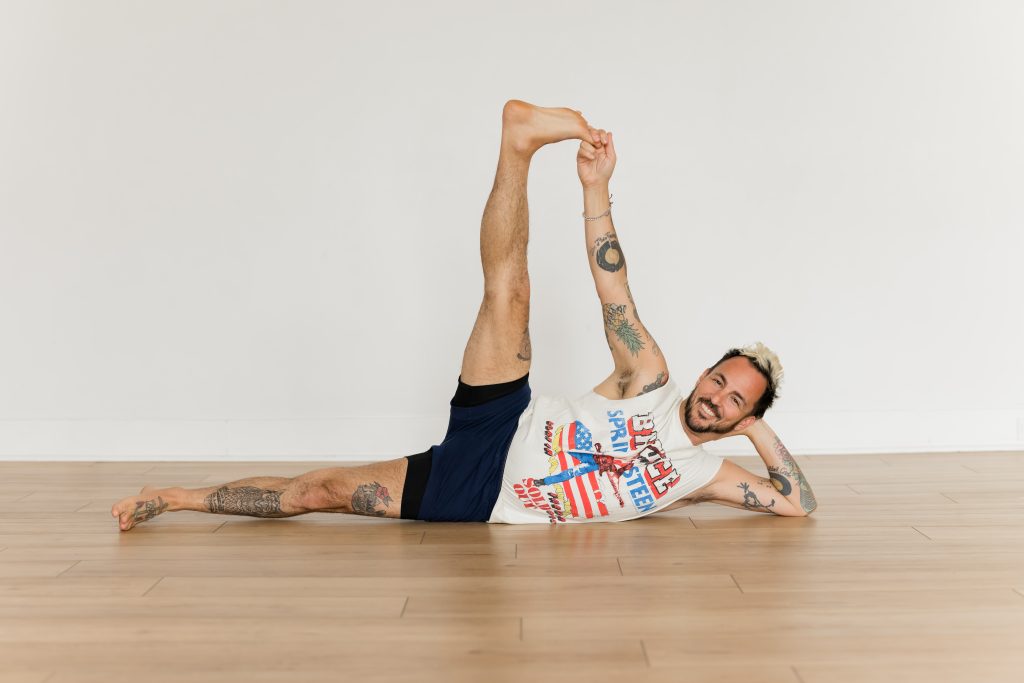
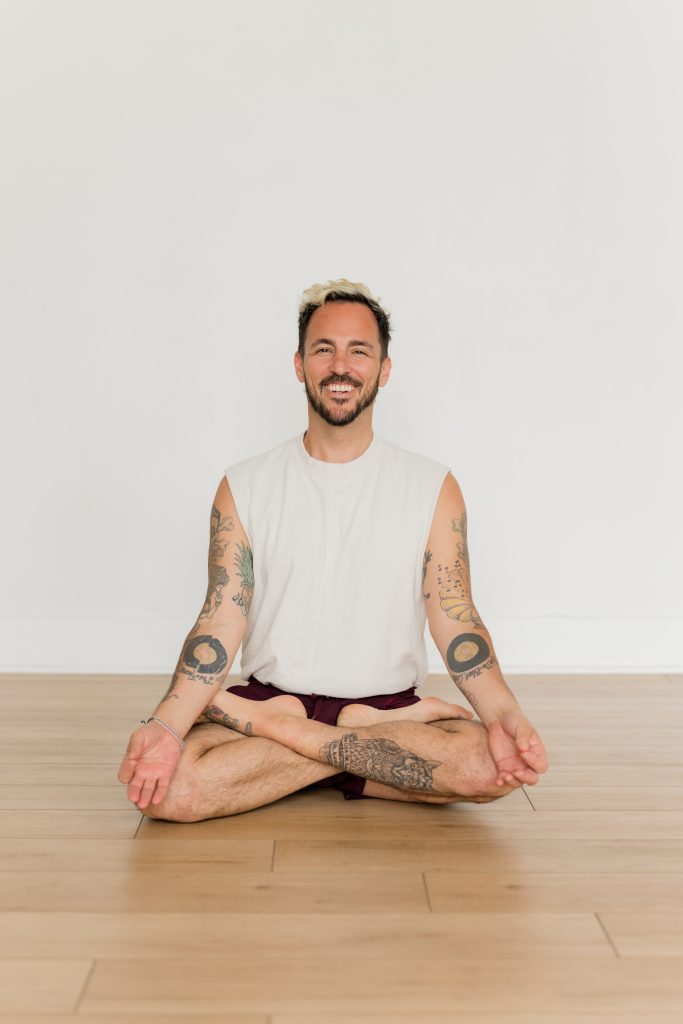
Lotus Pose
Oh baby. It’s the grand finale. The pose of all poses — Padmasana! If this is your favorite pose, you LOVE to shine!!! You’ve worked hard and you want to see something for it. While it takes great dedication and perseverance to get into Lotus pose, there’s also a quiet stillness that accompanies the great fortitude it took to get there. And while you want to show it off, you also find great comfort in its therapeutic effects. Padmasana lovers are willing to put in the work, even when the payoff isn’t immediate. You understand that mastery takes time, whether that’s in yoga or in other facets of your life. There may be a little performer in you. Not in an attention-seeking way, but in a “Wow, I really did the thing!” kind of way. You enjoy celebrating accomplishments and encouraging others to do the same. You’ve learned that confidence isn’t something you’re born with—it’s something you build through practice, consistency, and showing up for yourself again and again.
Patrick very happy in Lotus pose.
That’s all we have (for now)… We’ll cover more fun yoga poses in the weeks to come, so stay tuned!
There are so many unique ways to create an inclusive, supportive and dynamic yoga class… but the at the root of it all mostly sits the concept of mindfulness. You must first foster a sense of authenticity through being present and tuning into the room (whether in person or giving a class virtually). The energy and intention you set for your students comes from you, and they’ll likely carry it with them long after the class takes place.
Here is a short yoga sequence towards a peak pose that centers around the general theme of mindfulness. Being more mindful throughout your everyday life has numerous benefits, including enhanced awareness and appreciation. We hope that this yoga class sequence fosters that for you!
Puttering & Dharma Talk
In this mini sequence, you are invited to explore what the concept of “mindfulness” means to you or how you incorporate it into your life. Try to keep the discussion pretty neutral and broad, with a general explanation of a way mindfulness has made its way into your life or someone you know. From there, you can tie that into the yoga practice. How does being mindful relate to the practice as a whole and what are some ways to embody mindfulness? A good place to start is the first of the Yoga Sutras, “Atha Yoga Anushasanam.”
Atha Yoga Anushasanam translates to, “Now, the practice of yoga,” meaning right in this moment, being mindful that we came to our mats to practice. This is a great starting point for a dharma talk because not only is it explaining the concept of being mindful, but the students (and you as a teacher) are actively experiencing mindfulness in this exact moment. Encouraging the class to sit down and tune in is a great way to introduce them to the concept of mindfulness.
Have your students start seated, taking a few mindful breaths. Start with neck rolls, tucking their ear to one shoulder and rolling their head around clockwise and then switch directions. Have them make their way to table top and run through a few rounds of cat/cow. From there, they can walk their palms out in front of them, widen their knees, and come to sit back on their heels for child’s pose, tuck their toes under, send their hips up and back and make their way to downward facing dog. From downward facing dog, here’s the poses they can move through:
3 legged dog, bend the knee, stack the hips
Step through to crescent lunge twist (with an arm lifted)
Parallel their feet and fold over their legs for Prasarita Padottansana (have them walk their arms out like downward facing dog arms)
Stay low and crawl themselves to the back of their mat for a pigeon pose
Send their front leg back, tuck their toes under and send their hips up and back for downward facing dog
Roll forward to plank
Lower all the way down
Press up any amount for cobra pose
Downward facing dog
Walk to the top of your spot for sun salutations
They can stop there after sun salutations, or feel free to flow them through some standing poses that will make them feel totally present.
Standing poses:
Warrior II
Triangle
Extended side angle
Half Moon
Warrior I
Tree
Chair
Revolved side angle or chair twist
Revolved triangle
You can then direct them to a peak pose that is a twist or seated, twisting pose, allowing them to tune inward. After you’ve demonstrated the peak pose (a twist or seated twist pose), have them take supported bridge with a block under their seat, or legs up the wall and then happy baby… and don’t forget a well-thought-out Savasana! At least 6 minutes. This will give your class a well-rounded, mindful feeling. As they lie in Savasana, you can circle back on your dharma talk about mindfulness and invite them to utilize the feelings they cultivated in today’s class to practice mindfulness in their daily lives.
Mindfulness practices to try at home
There are so many ways to practice mindfulness at home, including:
Meditation — Meditating, whether in the mornings or at night, can help to clear and calm the mind. Consistent meditation allows the mind to distill down to pure consciousness.
A joyful project — Finding a hobby you love and immersing yourself fully in it is a great way to stay present and be mindful in the moment. Knitting, scrapbooking, painting, reading, writing, singing, playing an instrument, cleaning are some of the many ways to explore a new endeavor that could potentially unlock a lot of joy!
Journaling — Journaling has become such a popular way of processing feelings and emotions throughout the days, thus leading to a deeper understanding of stress and how to relieve it.
Movement — Whether you love lifting weights, going walking or running, enjoy practicing yoga, or just dancing in your living room, movement has been proven to not only enhance your mood, but help you cultivate a sense of body awareness that in turn leads to you being more mindful about yourself. Carving out time to move, in whatever way feels good to you, even in a chair, wheelchair, etc. will greatly benefit your soul and help your brain be more present.
If you are interested in learning more about mindfulness or wish to educate your employees, co-workers, yoga students or other people in your life in mindfulness, consider our online course! Inside this course, Rajaa Azouqa, (Qualified MB-EAT & MBSR Instructor), guides you through a detailed curriculum centered around the psychological and physiological aspects of incorporating mindfulness into your everyday life and teachings. The course is completely online and self-paced and features live Zoom sessions with Rajaa!
With the growing conversation around weight loss, many people find themselves navigating between dieting, newer medications such as GLP-1 agonists, and alternative approaches like mindful eating. It can be difficult to know what truly supports long-term health and what may only offer temporary results.
This article is designed to help you better understand what mindful eating is, why traditional diets often fail to create sustainable change, and what GLP-1 medications are, including how they work and who they may be appropriate for.
Dieting has long been one of the most common approaches to weight loss, yet research continues to show that many diets are difficult to maintain and often lead to weight regain over time. At the same time, medications such as Ozempic and Mounjaro have gained significant attention for their ability to support weight loss and improve metabolic health. While these medications can be highly beneficial, particularly for individuals living with type 2 diabetes or obesity, they are not a complete solution on their own.
Both obesity and Type 2 Diabetes are complex conditions that often require a comprehensive approach, including medical care, lifestyle changes, movement, and support in building a healthier relationship with food. Medication may be an important part of treatment for some individuals, but lasting well-being often requires more than appetite suppression or temporary food restriction.
It is also important to acknowledge that while GLP-1 medications were developed primarily to treat type 2 diabetes and obesity, they are increasingly being used by individuals seeking modest weight loss, sometimes for reasons that may not be medically necessary. This raises important questions about how we define health, our relationship with body weight, and whether we are addressing the root causes of our eating struggles.
There is no single “best” way to manage weight, diabetes, or overall health. Every person is unique, and so is each treatment path. My hope is that this article offers a balanced perspective, one that helps you better understand your options and highlights the role that mindful eating can play in supporting sustainable, compassionate, and long-term change.
Please note:This article is for educational purposes only and is not intended to provide medical advice or replace guidance from your healthcare provider. If you are considering GLP-1 medications or making changes to your treatment plan, speak with your healthcare professional to determine what is appropriate for your individual needs.
Before exploring diets and newer medical approaches such as GLP-1 medications, it is important to understand the foundation of a healthy relationship with food. Mindful eating offers a different lens, one that shifts the focus from control and restriction toward awareness, self-trust, and long-term well-being.
Mindful eating
Mindful eating has become a popular topic in recent years, especially as more people seek alternatives to dieting and quick-fix approaches to weight management. But mindful eating is not a modern trend. Its roots lie in Buddhist teachings, where eating with awareness is considered an essential practice for reducing unnecessary harm and cultivating care for both body and mind.
In the West, mindfulness was introduced about 40 years ago, and over the past two decades, mindful eating has emerged as a well-studied mindfulness-based approach to improving our relationship with food. Research has shown that mindful eating can support both physical and emotional well-being, with benefits including:
Improved eating behaviors and patterns
Reduction in binge eating episodes and emotional eating
Improved quality of diet
Greater body satisfaction and pleasure in eating
Improved metabolic health
Enhanced psychological well-being
Better emotional regulation
Increased self-compassion
Greater distress tolerance
A deeper sense of meaning and connection
To understand mindful eating, it helps to first understand mindfulness itself.
What is the practice of mindfulness?
Mindfulness is the practice of paying attention to the present moment with openness, curiosity, and without judgment. It means becoming aware of our thoughts, emotions, bodily sensations, and surroundings as they are, even if they are uncomfortable, without reacting to them or labeling them as good or bad.
A key skill of mindfulness is learning to place our attention where we choose, rather than where it is automatically pulled. This skill is cultivated through practices such as mindfulness meditation, where we intentionally tune into the breath, body sensations, thoughts, and emotions.
As we strengthen this capacity, we also become better able to notice subtle internal signals, such as hunger, fullness, cravings, and satisfaction, which are essential to mindful eating.
How mindfulness relates to eating
Mindfulness helps bring awareness to the many factors that influence our eating:
Difficult emotions: Sadness, stress, boredom, loneliness, or fear can all trigger us to eat. Mindfulness helps us recognize emotional discomfort and develop healthier ways to respond, rather than automatically turning to food.
Challenging thoughts: Critical thoughts about ourselves, our bodies, or our worth can strongly influence eating behaviors. Through mindfulness, we learn to notice these thoughts with compassion, rather than reacting to them with punishment, guilt, or shame.
Body signals: Mindfulness helps us reconnect with physical cues such as hunger, fullness, satiety, taste preferences, and satisfaction, signals that are often ignored in the rush of daily life or overridden by diet rules.
Our true needs: Sometimes what we think is hunger may actually be a need for rest, comfort, connection, or emotional support. Mindfulness helps us pause and ask: What do I truly need right now?
How food affects us: We become more aware of how different foods make us feel, what energizes us, what leaves us feeling sluggish, and what genuinely nourishes our body and mind.
Mindful eating helps you reconnect with your body
Mindful eating invites you to listen to your body’s wisdom: when to eat, when to stop, what sounds appealing, and when enjoyment begins to fade. It also helps you distinguish physical hunger from other urges to eat, such as stress or boredom.
It helps you understand and manage food triggers and cravings
Mindful eating involves identifying the emotions, situations, and habits that influence your eating patterns. Rather than reacting automatically, you learn to respond with awareness and intention utilizing the tools and skills of mindfulness.
It is NOT a diet
Mindful eating is not based on restriction, deprivation, or rigid food rules. No one else can determine exactly what or how much will feel satisfying and nourishing for your body, only you can decide that by tuning in.
It encourages flexibility
Life includes holidays, dinners out, celebrations, vacations, and moments when food is meant to be enjoyed socially. Mindful eating teaches you how to navigate all of these experiences with balance and freedom, rather than guilt or anxiety.
It helps free you from diet mentality
Mindful eating can be deeply liberating. It shifts your energy away from constant thoughts about food, weight, and body image, creating space for what truly matters in your life.
It supports balance, not perfection
Mindful eating is about balance, not rigid control. It does not mean you only eat when physically hungry or that every food choice must be “healthy.” Sometimes we eat for comfort, celebration, or pure enjoyment, and that can be part of a balanced relationship with food when done with awareness.
It’s not just about what you eat, it’s about how you eat
Mindful eating includes all foods, even those often labeled “unhealthy.” The difference is that you learn how to savor them, enjoy them fully, and choose amounts that feel nourishing rather than harmful.
It helps cultivate a healthier relationship with food
At its core, mindful eating is about healing your relationship with food, and with yourself. It invites qualities of compassion, patience, acceptance, and non-judgment, allowing food to become a source of nourishment and enjoyment rather than stress, guilt, or shame.
Mindful eating is not a quick fix. It is a lifelong practice of learning to trust your body, care for your mind, and relate to food with greater awareness and kindness.
To better understand why mindful eating can be so transformative, it helps to first look at the limitations of the approach many people know best: dieting. While diets are often pursued with good intentions, they may not always support sustainable or lasting change.
Diets
The word diet originally refers to the kinds of food that a person, animal, or community habitually eats. Today, however, it is more commonly used to describe a structured plan for weight loss. We often hear people say, “I’m on a diet” or “I’m dieting,” which usually means they are following some form of food restriction, whether to lose weight or to address health concerns.
Despite their popularity, research suggests that diets often fail to create lasting change. The Center for Weight and Eating Disorders reports that 65% of dieters return to their pre-diet weight within three years. A meta-analysis of 29 long-term weight-loss studies found that more than half of the weight lost was regained within two years, and over 80% was regained after five years (2019). Another 5-year study found that adolescents who dieted, particularly those using weight-loss medications, laxatives, or diuretics, were more likely to struggle with weight issues in adulthood compared to those who did not diet (2006).
Why diets often don’t work
They don’t address habits and behaviours
Diets may focus on what to eat, but they rarely help people understand why they eat the way they do. Without identifying and working with our habits and behaviours, sustainable change becomes difficult. The ability to shift patterns is often key to long-term well-being and weight regulation.
They don’t teach us how to manage eating triggers and cravings
Emotions like stress, boredom, and environmental cues often influence our eating. Diets rarely provide tools for navigating these triggers or for responding skillfully in challenging situations.
They disconnect us from our body’s internal wisdom
Strict food rules can pull us away from important internal signals such as hunger, fullness, satiety and taste satisfaction. Over time, this can weaken our ability to self-regulate and trust our body’s natural cues.
Restriction often leads to overeating
Many diets eliminate or tightly restrict certain foods. Research shows that when we feel deprived, we often become more preoccupied with those foods and may overeat them later. In contrast, mindful eating encourages moderation and the inclusion of foods that are often labeled “off-limits,” helping reduce feelings of deprivation and binge-like eating.
They may not support overall health and well-being
Many restrictive diets may further dysregulate the body’s physiology rather than support it. They can also increase stress around food, and health is not only about weight, it also includes emotional well-being, flexibility, and a balanced relationship with eating.
They can interfere with social connection
Food is deeply tied to culture, celebration, and connection. Avoiding gatherings with family, friends, or colleagues because of dietary rules is often unsustainable and can create unnecessary isolation.
Rather than focusing solely on restriction, mindful eating invites a more sustainable and compassionate approach, one that supports awareness, flexibility, and a healthier relationship with food.
As many people move away from traditional dieting, others are turning to newer medical options for support. GLP-1 medications have become increasingly popular for weight management and metabolic health, but like any treatment, they are best understood within the broader context of long-term care and overall well-being.
GLP-1 Agonists (e.g., Ozempic, Wegovy, Mounjaro)
GLP-1 agonists such as Ozempic, Wegovy, and Mounjaro, have become increasingly popular as treatments for weight management and metabolic health. While they are often discussed as “weight-loss medications,” they are primarily medical tools designed to support individuals whose health may be significantly impacted by excess weight, type 2 diabetes, insulin resistance, or related conditions.
Understanding what they are, how they work, and what they can, and cannot, do can help us approach them with greater clarity and less stigma.
GLP-1 stands for Glucagon-Like Peptide-1, a naturally occurring hormone produced in the gut after we eat. This hormone plays an important role in regulating blood sugar, appetite, and digestion. GLP-1 receptor agonists are medications that mimic the effects of this natural hormone, helping the body better manage hunger signals and glucose metabolism. Common examples include: Ozempic, Wegovy, and Mounjaro.
How do GLP-1s work?
GLP-1 agonists work by influencing several processes in the body that affect appetite and metabolism:
They slow stomach emptying, which helps you feel fuller for longer after eating.
They reduce appetite and food cravings by acting on areas of the brain involved in hunger regulation.
They increase feelings of satiety, making it easier to eat smaller portions.
They help regulate blood sugar levels by stimulating insulin release when needed and reducing excess glucose production by the liver.
Together, these effects can lead to reduced food intake and, for many people, meaningful weight loss.
Who are GLP-1s intended for?
GLP-1 medications are typically prescribed for individuals who may benefit medically from weight reduction or improved metabolic health, including those with:
Type 2 diabetes
Obesity or overweight, particularly when accompanied by health risks such as high blood pressure, sleep apnea, or cardiovascular concerns
Insulin resistance or prediabetes
Difficulty achieving weight loss through lifestyle changes alone
Potential benefits may include:
Significant and sustained weight loss
Improved blood sugar regulation
Improved cholesterol and blood pressure markers
Lower risk of obesity-related health complications
Reduced food cravings and less “food noise”
For some people, a sense of relief from the constant mental struggle around food
For individuals who have spent years feeling trapped in cycles of hunger, cravings, and weight regain, GLP-1 medications can offer meaningful support and create space for healthier habits to develop.
Side effects
Like all medications, GLP-1 agonists can cause side effects, especially when first starting treatment or increasing dosage. Common side effects include:
Nausea
Vomiting
Diarrhea or constipation
Bloating or stomach discomfort
Fatigue
Reduced appetite that may sometimes feel excessive
In some cases, people may also experience:
Difficulty consuming enough nutrients due to reduced hunger
Loss of muscle mass if protein intake and strength training are not prioritized
Emotional adjustment, especially if food has long served as a source of comfort or coping
While these medications can be powerful tools, they do not address the emotional, behavioural, or relational aspects of eating on their own.
This is where mindful eating can play an important complementary role. Whether someone chooses to use GLP-1 medications or not, learning to reconnect with hunger and fullness cues, understand emotional eating patterns, and build trust with food remains essential for long-term well-being.
Whether the path involves dieting, medication, or a combination of approaches, an important question remains: what truly helps us sustain health and well-being over time?
Long-term considerations
Whether someone chooses dieting, GLP-1 medications, or another approach to weight loss, one important question remains: What happens when the plan ends?
Many approaches can help reduce weight in the short term. Diets may create temporary structure, and GLP-1 medications may significantly reduce appetite and support weight loss while they are being taken. But neither necessarily teaches the skills needed to maintain those changes long term.
Without learning how to understand eating habits, manage emotional triggers, reconnect with hunger and fullness cues, and build a more balanced relationship with food, weight regain is common, whether after stopping a diet or discontinuing medication.
For individuals using GLP-1 medications specifically for weight loss, this may mean that maintaining the benefits could require ongoing use of the medication, sometimes indefinitely. This does not mean the medication has failed; rather, it highlights that appetite suppression alone is often not enough to support lasting change.
Sustainable well-being often requires something deeper: developing awareness, flexibility, and self-trust around food and eating.
This is where mindful eating can offer something uniquely valuable. It helps address the emotional, behavioural, and relational aspects of eating, skills that can support long-term health whether someone is taking medication, transitioning off it, or simply looking for a more compassionate alternative to dieting.
If long-term health requires more than temporary solutions, what might a more sustainable path look like? The answer may lie not in controlling food more strictly, but in learning to relate to it differently.
A more sustainable path forward through mindfulness
There is no one-size-fits-all approach to health or weight management. For some, medications like GLP-1 agonists can be an important and supportive medical tool. For others, stepping away from the cycle of dieting may be the first step toward healing.
Whatever path you choose, lasting change is often not just about what you eat or how much weight you lose, it is about learning how to reconnect with your body, understand your relationship with food, and care for yourself in a more sustainable way.
Mindful eating offers a path toward that deeper transformation: one rooted in awareness, balance, flexibility, and compassion.
Building a healthier relationship with food and with yourself is a process, one that takes practice, patience, and support. If you’re ready to deepen this work, I invite you to continue your journey through mindfulness and mindful eating.
If you’re ready to build a healthier and more peaceful relationship with food—and with yourself—I invite you to explore my courses:
Mindfulness Training
Learn the foundational skills of mindfulness to better understand your thoughts, emotions, and body signals, and to cultivate greater calm, clarity, and self-awareness.
Mindful Eating Training
A practical and compassionate approach to healing your relationship with food, managing emotional eating, reconnecting with hunger and fullness cues, and moving beyond the diet mentality.
Both trainings are designed to help you develop lifelong skills that support well-being far beyond temporary solutions, so you can feel more grounded, empowered, and at ease in your body and your life. Whether for your own personal journey or to share with others; clients, patients, or communities you support, these trainings offer practical and compassionate tools for cultivating a healthier relationship with food, body, and self.
“Perfection in asana is achieved when the effort to perform it becomes effortless.” — Yoga Sutra 2.47
Arm balances require strength, agility, coordination, and concentration in both body and mind. Physically they tone the arms, wrists, shoulders, back, and abdomen. They also require flexibility and mobility of the hips and shoulder joints.
Ultimately, as we continue to practice these physically challenging poses we begin to develop lightness, equanimity, and poise. The effort to maintain the pose remains, yet tension and strain is released and left behind.
Arm balances undoubtedly require a fair amount of effort, especially at first, but as we refine our practice we can start to find strength as integration, not hardness, which is relaxation is action or effortless effort.
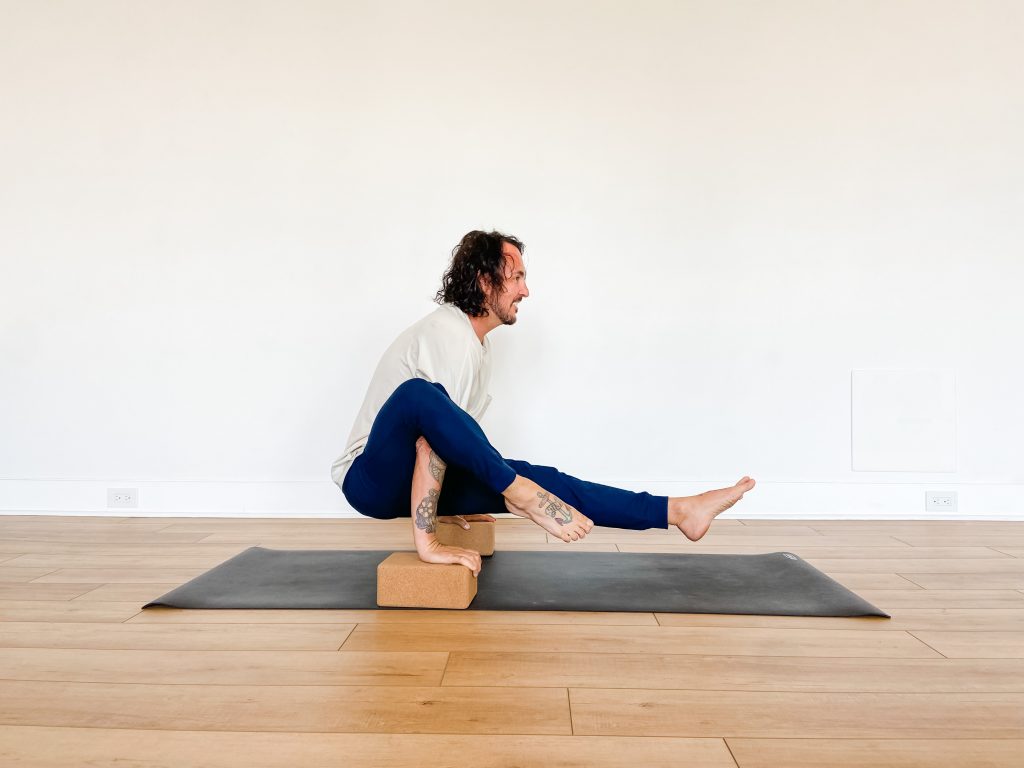
Peak Pose: Eka Hasta Bhujasana
Eka means “one,” Hasta means “hand” and Bhuja means “arm.” This pose is translated as one hand and arm pose but often referred to as “Elephant Trunk Pose” as the shape resembles the trunk of an elephant. This arm balance is in the family of poses with the leg over the upper arm (above elbow) and is a great place to start before moving onto poses such as Koundinyasana II, Tittibhasana, Bhujapidasana, and Astavakrasana.
Lizard Pose is a great pose to incorporate into a sequence when practicing arm balances, but especially arm balances with the leg over the upper arm. It’s a deep hip opener that also opens the groins, hamstrings, and hip flexor muscles. It also opens the upper back, shoulders, and neck.
How to get into Lizard Pose:
Start in Downward Facing Dog.
Lift your right leg and step it outside your right hand.
Bend your knee until its over your heel.
Bring your back knee to your mat to start.
You can keep your arms straight with your palms under your shoulders or bring your forearms to the mat with your elbows under your shoulders.
Option to curl your back toes and lift your back knee making your back leg straight.
Breathe into your upper back and let your head relax.
Stay for 5 to 10 breaths.
Repeat on the other side.
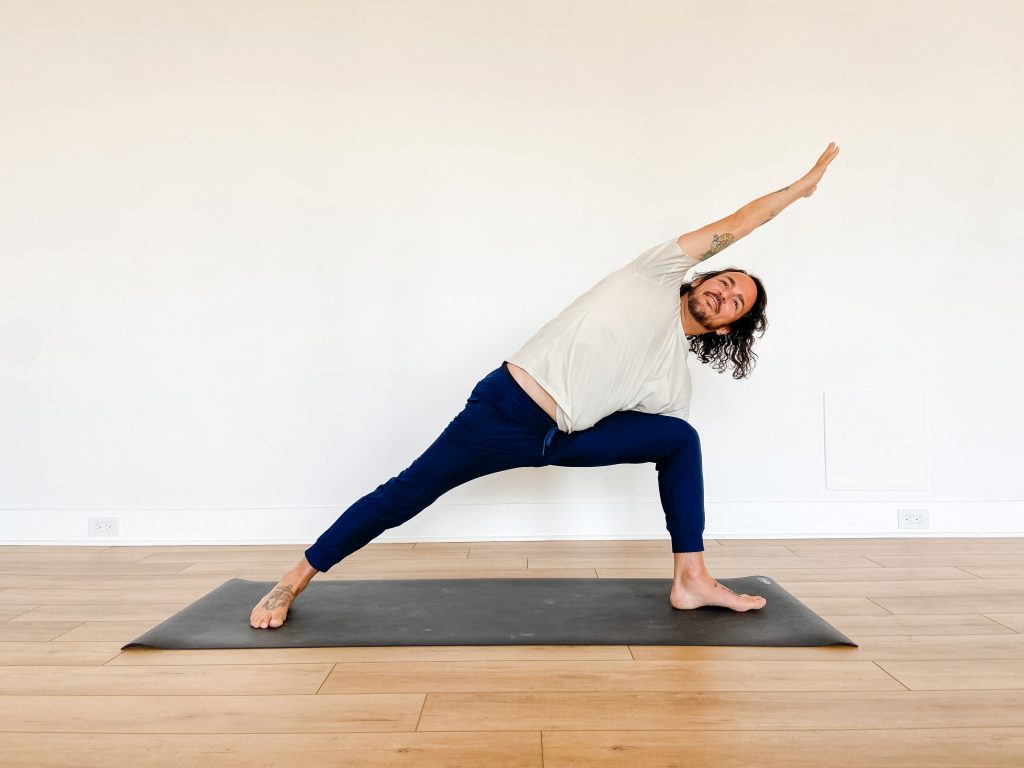
Supporting Pose 2: Utthita Parsvakonasana (Extended Side Angle)
Extended Side Angle is a standing pose that extends the trunk laterally over a bent front leg. It does precisely what its name suggests, extending the sides of the trunk. It creates a single line of lengthening from the back foot to the extended fingertips.
How to get into Extended Side Angle:
Stand in Tadasana and step your feet 3 ½ to 4 feet wide.
Turn your right leg and foot out to 90 degrees and the left leg and foot inward 15 degrees.
Bend your right leg until the knee is over the ankle forming a right angle.
Keep your back leg straight.
Extend your torso laterally alongside your right leg and bring your right hand outside your right foot. Your outer right knee and inner right armpit should be sealed together.
Extend your left arm overhead alongside your left ear. Your palm should face the floor and fingers outstretched.
Turn your gaze upwards towards your inner left bicep.
Stay for 5 breaths.
Repeat on the other side.
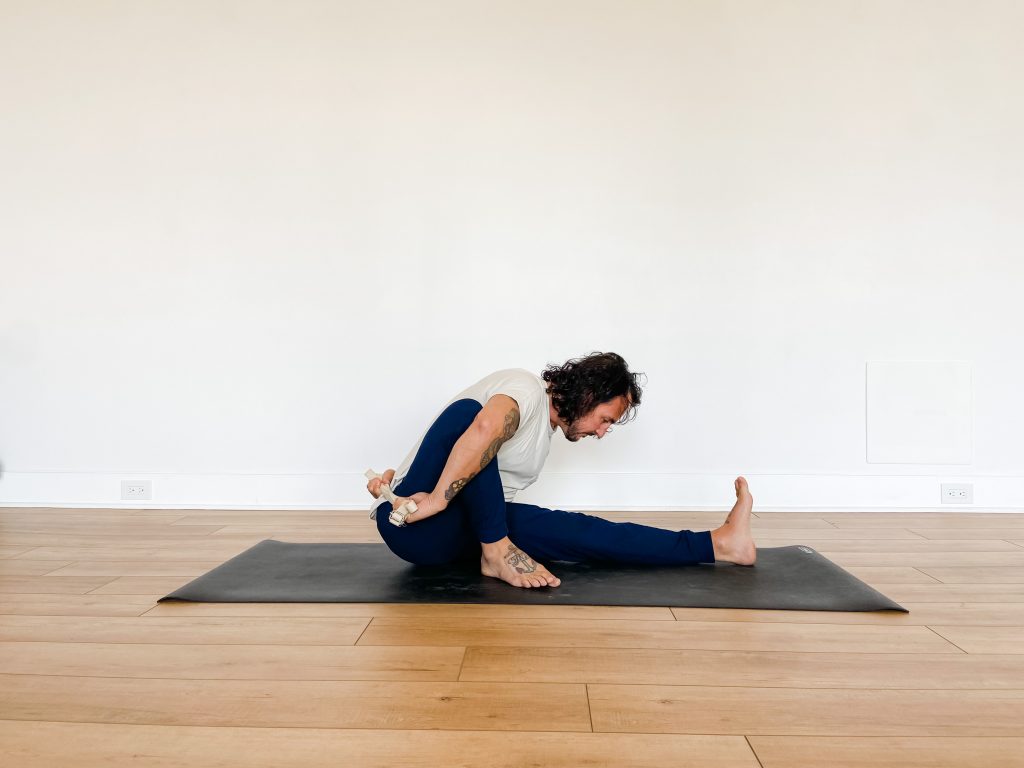
Supporting Pose 3: Marichyasana 1 (Sage Pose)
This complex seated forward fold binds the hands together behind the back and around a bent leg. This pose stimulates the abdominal muscles and kidneys and opens the muscles of the back, shoulders and neck.
How to get into Sage Pose:
Start seated on the floor with your legs extended straight in front of you. You can sit up on a blanket to help lift.
Bend your right leg, bringing your heel towards your sit bone.
Lift your right arm and reach forward inside your right thigh towards your left big toe.
Turn your arm, bringing your thumb to face the floor, and then bend your elbow, wrapping your arm around your bent leg. Your armpit and shin should be sealed together.
Take your left arm and wrap it behind your back, clasping your hands together. If your hands don’t reach you can use a strap.
Inhale lift your chest, exhale extend your torso over your straight left leg.
Stay for 5 breaths.
Repeat on the other side.
Peak Pose: Eka Hasta Bhujasana (Elephant Trunk Pose)
How to get into Elephant Trunk Pose:
Start seated on the floor with your legs extended straight in front of you.
Bend your right leg and place it over your right upper arm. Keep the inner right thigh and knee pressing into the torso and shoulder. Keep your left leg straight.
Plant your hands alongside your hips. You can use blocks under your hands to help lift.
Inhale and as you exhale, press your palms down and lift your buttocks, torso, and straight (left) leg off the floor.
Pull your abdomen back towards your kidneys, round your upper back and lean forward.
Stay for 5 to 10 breaths.
Repeat on the other side.
Don't miss a beat! Sign up for our weekly newsletter.