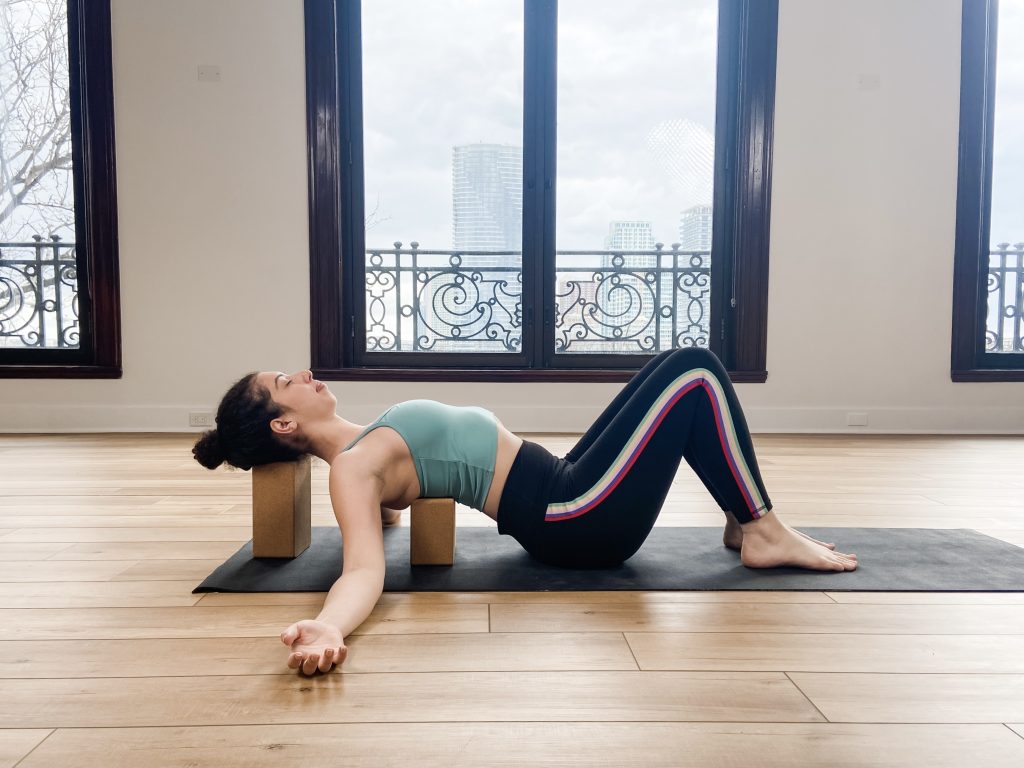
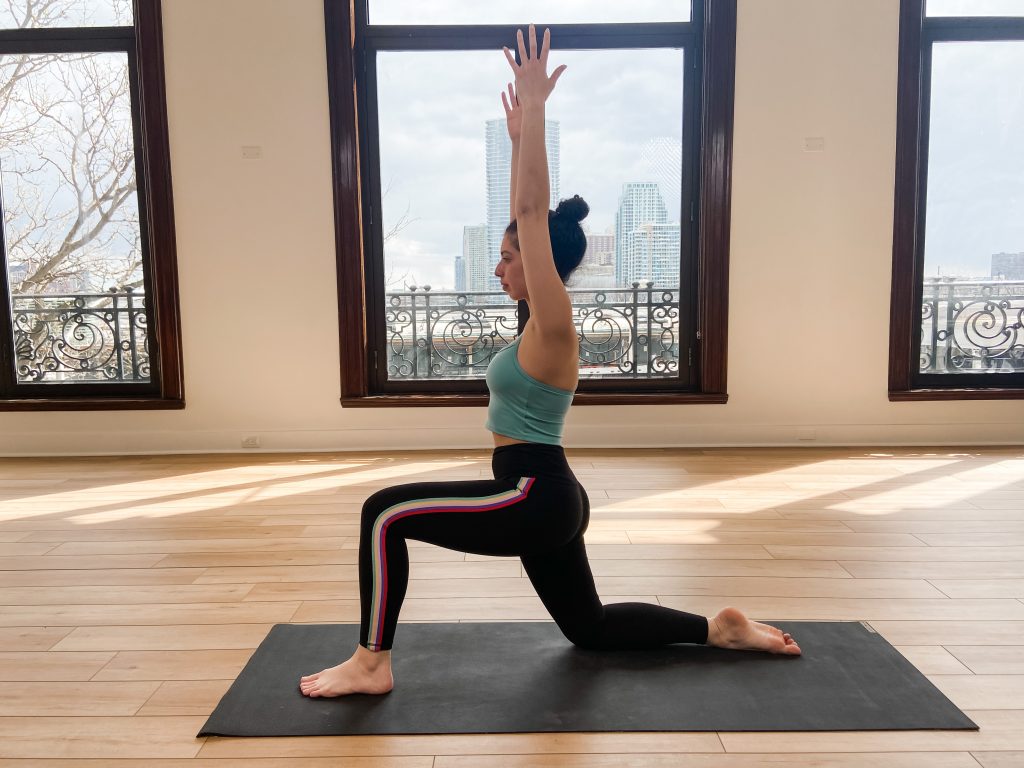
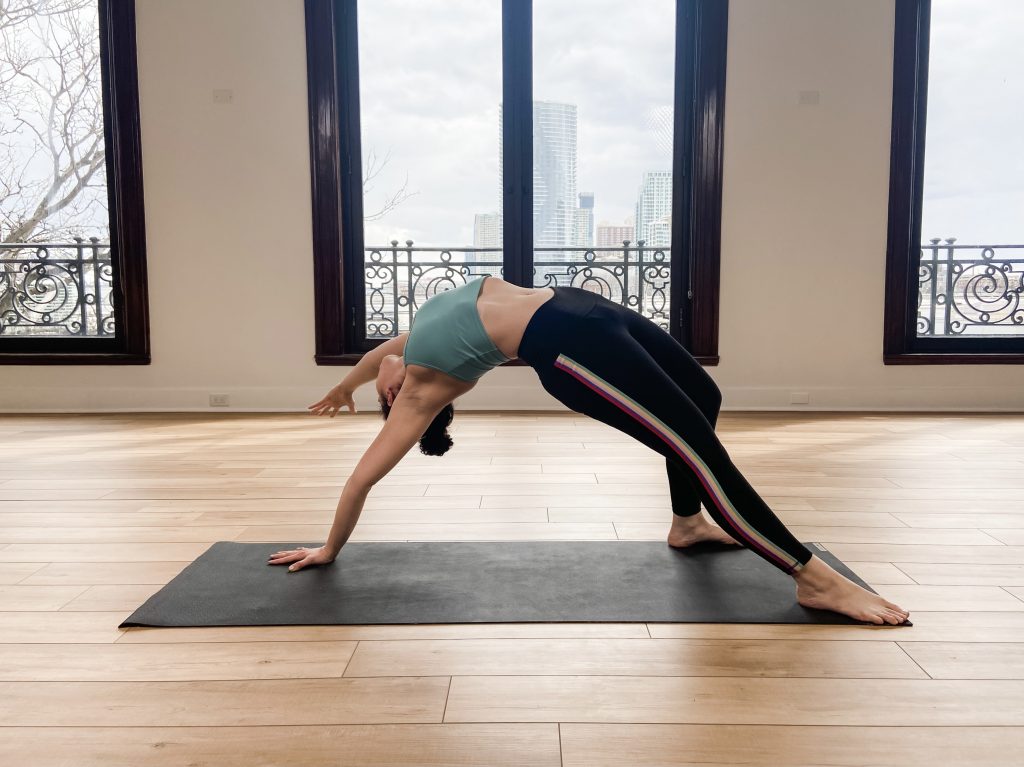
Attractive woman practicing yoga, relaxing after training, lying face down

The Benefits of a Yin Yoga Teacher Training

By Yoga Asana

Most students who step onto a yoga mat learn quickly the many benefits of yin yoga: flexibility, strength, a calm mind, better sleep, better digestion, and the list goes on and on. But with so many styles of yoga, how do you know which is right for you? Many students like to try a few different styles, to get a sense of the benefits of each.

In this article we’re going to dive into yin yoga, a style of yoga that works deeply into our body with passive, longer-held poses. There are many benefits to this style of yoga and injuries are less common thanks to the slow movement, which helps students become aware of sensation before it can become an injury.

What is Yin Yoga?

group doin yoga on beach knowing the benefits of yin yogaYin yoga is different from many other types of yoga because there is no flow from pose to pose. Each yin pose is held for several minutes at a time, from 2.5 minutes up to 7 minutes, depending on the pose and the experience level of the students. Most poses are done seated or lying on your back or stomach, which makes it possible to stay in the posture for a few minutes. Unlike restorative yoga which is about total relaxation, yin yoga should cause some sensation, a mix of compression and tension, rather than deep relaxation.

Yin yoga also has different names for poses you might have previously practiced in a vinyasa yoga class. This is because yin poses have different rules: the alignment and overall focus is quite different than how you might practice it in a flow class.

Using Your Breath in Yin Yoga

We use the breath in yin yoga to help sustain the poses when they become uncomfortable. It’s the uncomfortable moments and sensations that help the body release deeply held tension and also create lasting change. By allowing the breath to flow freely, we keep our mind calm and our body continues to relax into the sensations we’re feeling. While other types of yoga utilize the breath to build heat and help with focus, yin yoga uses the breath as an aid. Think of it as a silent friend supporting you during an uncomfortable moment.

Yin Yoga Helps Release Tension, Stress, and Anxiety

Yin yoga has a lengthening and releasing effect which allows us to dig deeper into the connective tissues that surround the joints and release tension. It also helps to free up energy within the body. Specifically, it helps free up emotional energy that may be causing anxiety, stress, or tension.

It is very countercultural to be allowed to “simply be”. The act of slowing down might be all you need to calm your mind. Do your best to breathe and to sink heavily into each asana with the time you’re given.

If you’re unsure if your physical stress has an emotional link, try to identify the area of the body needing attention. Very often, the stress in the body manifests itself in the major joint systems. Our major joint systems carry the heaviest burden while supporting the body, therefore, making them more susceptible to emotional pressures. They include the spine, shoulders, and hips.

Postures in yin yoga support the joints through a process of detoxification. While the poses are being held, the joint system being worked on is starved of vital nutrients and prana. Once the pose is released, a rebounding pose is introduced to encourage the rushing back of nutrients into the joint. This flooding cleanses the joint of toxins and lowers levels of inflammation. This cleanse can also be felt in the emotional body as a sense of release.

Yin Yoga Compliments Other Workouts

class working on the benefits of yin yogaThe ancient Chinese concept of yin and yang relates to the idea that within two opposing forces, there is balance. Certain styles of exercise can be categorized as either yin or yang according to their qualities. Workouts such as running, HIIT, and heat building yoga classes are considered yang because they are active, sweat-inducing, dynamic, and repetitive. The principles of yang relate to masculinity, heat, and movement. Yin is the feminine force and is related to stillness, rest, balance, cooling, and release. Exercises that are based in stretching and relaxation are yin in nature. If yang-style workouts are overused without the balance of yin, there is the potential for the body to become overworked, injured, or fatigued. Bringing yin yoga to your movement routine will help with improved flexibility and relaxation.

Yin Yoga Balances Your Chi

According to traditional Chinese medicine, our bodies are powered by a vital force called ‘chi’. Chi runs through specific energetic channels in the body, called meridians. While all yoga styles could have an effect on the meridian pathways, yin yoga has a more profound and extreme effect. All of the meridians flow through the back and legs and many yin postures will touch on several meridians at once. Yin classes are usually structured to allow students to work on all of the meridians.

Yin Yoga Can Help Build Fortitude and Perseverance

When life is feeling a bit difficult or situations are making it hard to focus, you can turn to yin yoga to help rebalance energy. Yin teaches us that staying still and dealing with whatever thoughts, feelings, emotions, or sensations come up will actually help you grow. Learning to take each moment as it comes will help you become more proficient in managing the discomforts that come up in life off the mat. As time passes in each posture, it gets harder to ignore the ‘monkey’ mind and students sometimes have the desire to leave or modify the pose. Yin teaches us to find a place of comfort in a not-so-comfortable place and observe our thoughts and reactions from a place of calmness.

Yin Yoga is for All Ages and Abilities

As a practice, Yin Yoga is safe for people of all ages and physical abilities. It’s a great addition to a current yoga practice or workout, and can be adapted for those with injury or limitation. Always make sure to let your teacher know if you are pregnant, have a new or old injury, or are feeling any sharp, shooting pains while in a pose. There are modifications available to make each pose better suited for your body and specific needs.

Become A Yin Yoga Instructor

Interested in becoming a yin yoga teacher and teaching the benefits of yin yoga? Learn about our Yin Yoga Teacher Training and contact us to learn more!

Learn If Yin Yoga Is Right For You

By Miscellaneous

Yoga has been in the spotlight as a healthy and natural way to work out, destress, and quiet the mind, but one style has recently become more popular and is attracting all types of people. Yin yoga offers the opportunity to relax, ground, and release. With our daily lives already very active, stressful, and constantly on-the-go, more people are being drawn to this practice that teaches us how to surrender.

Yin yoga is a simple and quiet practice, but it’s not always easy or comfortable. It can take you beyond your normal comfort zone, and this is where many of the benefits live.

While yin yoga is great for the physical body, many of the benefits stem from its effects on the mind and emotions. This practice allows the body to drop down into the parasympathetic nervous system, offering a grounding, calming, and revitalizing practice that can have profound energetic and emotional outcomes. This makes it a great practice for practically everyone.

Yin Yoga for Athletes

Yin yoga is one of the most effective styles of yoga that athletes can incorporate into their workouts. It’s great for increasing flexibility, relieving tightness, and deeply relaxing both the body and mind. It’s not generally comfortable and does require a good amount of time to be set aside, but the benefits are worth the effort.

Yin and yang is an ancient Taoist concept that describes the interdependency of oppositional forces. Day relies on night to exist, just as hot relies on cold, and so on. Neither aspect is good or bad, but are understood as two sides of the same coin.

When applied to sports, yang activities are typically hot, fast, dynamic, stimulating, and energetic. Yin activities are passive, cooling, relaxing, and therapeutic. Committing to both types of training aids in healthy recovery. Too much of one and not enough of the other can lead to falling short or burning out.

Some of the benefits athletes experience when committing to a yin yoga practice are:

  • Increased flexibility
  • Improved range of motion
  • Eases in aches and pains
  • Improved posture
  • Sped up recovery
  • Reduced injuries
  • Improved focus and concentration
  • Reduced anxiety
  • Relaxation and better sleep

Yin Yoga for Injuries

There is no right or wrong, good or bad, or even a certain way the yin postures are supposed to look. The reason for this is because everyone’s body is unique. Ideally, each yoga student gives themself permission to feel and experience whatever is happening in that moment, without expectations or judgment. This is a safe, non-competitive environment where we can allow ourselves to just be in our bodies without specific goals.

From healing injured shoulders to safely rehabbing a new knee, yin yoga can help. Yin yoga is based on passively-held yoga postures, usually seated or lying down, held for anywhere between 3-10 minutes. These asanas unblock your chi flow through the meridians of your body, which happen to run through the connective tissue. Connective tissue is worked, nourished, and hydrated by yin yoga. It’s where injuries can be healed through the action of fibroblasts and your immune system.

Yin Yoga for Beginners

Yoga classes are usually planned out based on levels — new students start with beginner or fundamental classes and work their way to Level 1, 2, 3, and beyond. There’s all types of creative names for yoga classes that help designate what kind of yoga flow you can expect. But yin yoga doesn’t have levels, and that’s because it’s appropriate for students of all levels, from the very new beginner to the handstanding expert.

One of the benefits of yin yoga practice is the ability to pay close attention to how we’re feeling. Yin yoga gives us a chance to learn what sensations are, where they are, and whether they are healthy or too intense. In yang styles of yoga, beginners can be worried and overwhelmed with all the details of the poses: the alignment, muscle engagements, the teacher’s directions, the breath, and on and on. But in yin yoga we have time to learn how to pay attention to each sensation and breath.

Students learn to develop their own awareness of what they need, including when to go deeper and when to back off. This helps students become well equipped for the faster-paced styles of yoga.

Become A Yin Yoga Instructor

Interested in becoming a yin yoga teacher? Learn about our Yin Yoga Teacher Training and contact us to learn more!

​Why Prioritizing Stress Management is Important

By Lifestyle & Wellness

As we enter a new era where adaptation and often sheer survival instincts are essential, how can we possibly make time for stress management? In an ideal world, we would have all tested and practiced various stress management techniques to find out what worked for us before self-isolation and social distancing was recommended or required, but that simply wasn’t the case for most of us. We’re now dealing with more stressors than ever before, from learning how to co-work in a little studio with our partner or figuring out the best home-based learning solutions for our children.

How Stress Management Can Be Beneficial

couple finding stress management in yogaStress management isn’t a luxury. It’s part of our inherent and very necessary survival skill sets as human beings. We have no choice but to adapt in many situations, including the one we’re in right now. There are countless avenues to alleviating stress and anxiety, and not all of them are healthy. If we don’t take a conscious effort to explore and identify healthy relief that works for us, we’re likely to reach for vices that provide temporary but dangerous and harmful results. Smoking, drinking, or spending hours bingeing on Netflix are all very common “stress relievers” that don’t do us any favors in the long run—or even in the short run.

Start Simple: Short, Easy and Accessible

You’ve probably heard that yoga and meditation are fantastic avenues to relieve stress and anxiety, and they are! However, many of us—particularly in western countries—have been conditioned to think there’s a “right way” or “best way” to practice both. For instance, maybe you’ve heard that a proper yoga session should be 90 minutes, and you can certainly find studies to back up just about any claim. Rest assured, 90 isn’t a magic number. The reality is that any time you can spend on the mat is beneficial.

I personally have a daily 30-minute yoga practice. Admittedly, this began before the COVID-19 issues, and I started practicing at home in November. It worked for me then, and it works for me now, because as a small business owner I simply don’t have the time to get ready to go to a studio, commuting 20 – 30 minutes each way. It would honestly be more stressful to watch the clock all day to see what else I have to squeeze in before I had to go.

I “graduated” from using free YouTube yoga classes to simply writing down key asanas I wanted to practice every day and creating my own new daily flow. Granted, I had the benefit of 600 hours of yoga teacher training to help me with this, but that isn’t a requirement either. If you’ve practiced yoga before, you can start experimenting with creating your own flows. There are countless flows online you can use and tweak.

Plus, know that 30 minutes also isn’t the magic number for everyone. It’s simply what works for me and my schedule. You can amplify that time by selecting background ambiance if that helps you deepen your practice. Ever the multi-tasker, I have taken to listening to 30 minutes of classical music as my yoga practice background. Classical music isn’t something I was able to indulge in on a daily basis before a home practice, so there’s the added benefit of imbuing that joy into my daily life, which you can add to your practice as well. I also burn incense in my little office-cum-studio and face my mat towards the window that overlooks my front yard. Any little thing you can do to enhance whatever length practice you have at home is beneficial. The important thing is to make this your time to get on the mat. And if you have kids with no other adult in the house to watch them during this time? It might be time to start exploring yoga videos to practice with children.

Making Time for Meditation

women posing to help with stress managementOne of the pillars of meditation is concentrating on living in the present. It’s extremely difficult to do, so simply trying not to get flustered is a big part of the practice. My personal meditation practice usually follows my yoga practice or takes place first thing in the morning. I’ve tried out several types of meditation in my life, and I’ve found that candle meditation (staring at the base or tip of a flame in the dark) and mala beads work best for me.

It’s been said that you can practice meditation anywhere, and to an extent, that’s true. However, it can be difficult to really live in the present and focus solely on your breath if you’re trying to multi-task and meditate while you wash dishes. I adopted a ten-minute meditation because—at this point in my life—that’s what my body and mind can handle. Yours may be longer or shorter, in the dark like me (honestly, it’s my closet) or in the daylight.

Final Throughs from the Author

Be kind to yourself. Be realistic. And remember that what your yoga teacher said was true—the toughest part usually is just getting to the mat (even when it’s in your living room).

​A Home Yoga Flow for Balancing and Soothing

By Yoga Teacher Training

There are countless yoga videos available to download or stream, and unsurprisingly many of them are focused on stress relief. These challenging, unprecedented times have yogis scrambling for a “quick fix” or a way to infuse their practice with more stress-busting approaches. However, there’s no getting around the fact that screen time alone can sometimes increase anxiety and stress. Since so many of us are working from home and staring at screens more than ever before, it’s worthwhile to dedicate at least one yoga flow a week to zero screens.

If you’ve been practicing for a while, have been thinking about pursuing your yoga teacher training certification, or are even in the middle of training, it’s especially important to learn how to create and adapt various flows of your own. For those who haven’t taught before, here’s a secret: there are a lot of yoga teachers out there (very good ones, too!) that don’t memorize and map out every single asana before every class. Intuition is a big part of being a good teacher—even when you’re your only student.

My home practice evolves around a daily flow that I create the day before. These are asanas that I especially want to focus on the next day, but they are by no means written in stone. It’s also a way to ensure that I don’t overlook some particular asanas for too long of a stretch. Left to our own devices, it’s very common to seek out the path of least resistance. Most of us like poses that we’re good at (as if there is such a thing) or that feel the best. We might not seek out the poses we find more challenging or uncomfortable if we don’t write down key asanas in advance. (Bear in mind, there’s a big difference between pain and discomfort.)

Creating Your Unique Flow

There is no perfect flow for balance and soothing. However, incorporating some restorative asanas into your usual flow and carving out time strictly for meditation post-savasana is a good start. Restorative yoga is often known for having ample props, but there’s no need to head straight to your favorite online yoga retailer to stock up. Props like bolsters and straps can easily be created through makeshift items in your home.

When soothing balance is the kind of flow you want to focus on, slow down. If you’re used to the uber-popular Vinyasa-style in the west, it might be time to incorporate more Iyengar-style yoga into your practice and hold poses longer.

Here’s a sample flow that I’ve practiced myself. When lockdown came into place, I transitioned to holding poses for one minute each (which means this flow will probably look a lot shorter than you imagine):

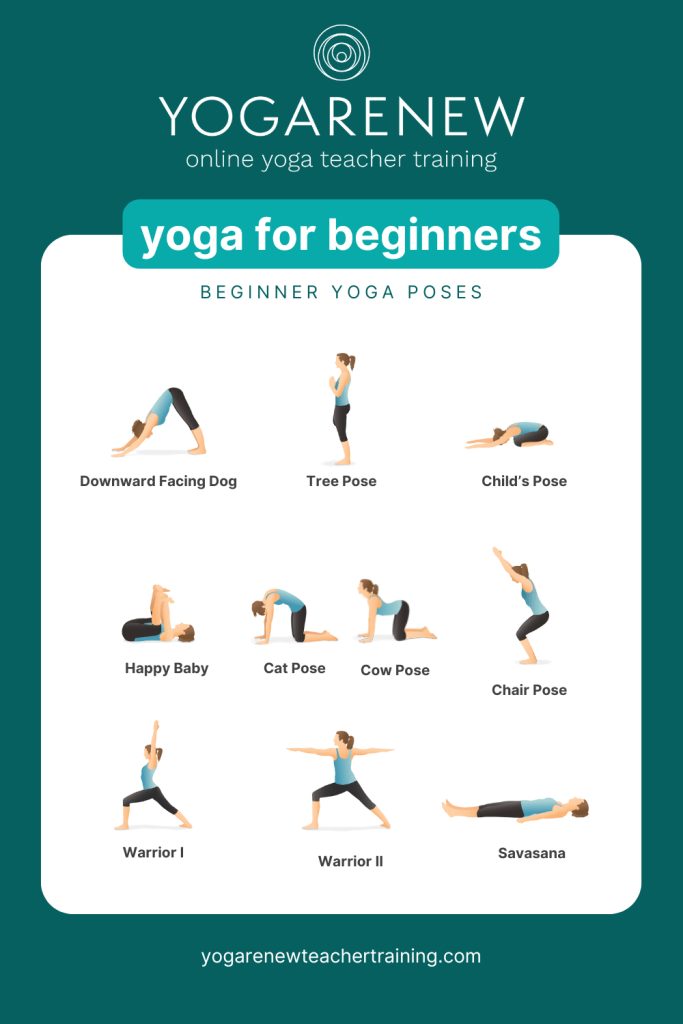
    • Child:

Transition from resting forearms to hands extended with fingers spread wide. Roll the forehead along the mat as you finger-walk from the left to the right, holding each side for one minute. As you stay in Child, take time to explore with your breath. You deepen your inhales and exhales as you surrender further into this pose.

    • Table Top To Cat/Cow Flow:

This is a great flow to warm up your spine. Feel free to explore barrel rolls, move side to side, or anything else that feels good in these two poses.

    • Thread The Needle:

Be sure to do both sides for this pose. You have the option to keep your free arm on the mat for support or in a half-bind behind the back. Stay in this pose for as long as you feel you need to.

    • Downward Facing Dog:

When doing this pose, try to pedal your heels towards the ground slowly to stretch your hamstrings. You can experiment with this pose further by bending your knees or perhaps bending one knee at a time. Find what works best for you in your own body as you explore this pose.

    • Extended Leg To Big Toe:

We already don’t extend our toes in our regular lives or really pay much attention to them. Our toes take a huge burden every day by helping to carry our body weight and balance us as we walk.  I incorporate this pose into every practice every day.

    • Downward Facing Dog:

If you’ve taken up running as a means to get outside (while still keeping your six-feet distance), experiment with extending one sole flat to the mat with the opposite knee bent as much as necessary for one minute, then switch. Tight muscles in the legs are notorious for runners and yoga can help counteract that.

    • Forward Fold To Mountain:

Any modifications in this transition are welcome, such as ragdoll.

    • Warrior 1 to Warrior 2:

Option of elevating arms or not (depending on energy levels). The first couplet in the warrior series has become synonymous with yoga for many westerners, and incorporating it into your practice can be a welcome familiarity for those new to a home practice.

    • Tree:

Modifications are welcome, including slow blinks or prayer hands behind the back.

    • Chaturanga Dandasana:

Similar to the warrior series, this vinyasa flow can help provide comfort if you’re missing your usual studio practice. Take it slower for now, and practice one long breath per movement. Opt for full belly resting on the floor instead of hovering in a tricep pushup. Cobra breaths (rise with an inhale, lower with an exhale) can take the place of up-dog to downward facing dog.

    • Legs Up The Wall:

You can do this pose for a minimum of two minutes or longer depending on how you need it.

    • Meditation:

Follow with ten minutes of meditation of your choice. You could choose a simple breathing meditation, mindfulness meditation, gratitude meditation, or guided meditation! There’s no right or wrong way to meditate to feel free to modify, tweak, or expand as you like. Remember to always listen to your body during the flow as well. Even if you’re the one who writes the flow, that doesn’t mean you have to follow it to the letter—or at all. Some days you might find you have less energy than others and that’s totally fine. Just be sure to tune into your body and listen to what’s it is saying to you.

women at her own home doing yoga training courses online

​Relaxation in One Yoga Pose: A Step-by-Step Guide

By Yoga Teacher Training

A few summers ago, I suffered from terrible anxiety. To cope, I’d often sit outside under the trees noticing the light pouring through the branches and listening to the sound of my breath mingling with the tune of fluttering leaves. It would bring me tranquility and it was time just for me. I had faith in this practice to restore me, if I gave the trees my full attention. Yoga requires a similar faith. If we practice with sincere effort, equanimity and trust, over time the process of yoga will bring us back to ourselves. And like the shelter of the trees, one pose can also be a place of refuge. The āsanas are not simply things we do. They are places we go.

The current global health crisis is a moment of emotional, physical, and spiritual depletion. We may not have the time or energy for lengthy āsana practices or extended meditations right now. But if we’re tired and anxious there are simple, time-efficient ways to restore with yoga.

Reclining Bound Angle Pose (Supta Baddha Koṇāsana), accompanied by breath-work and focused awareness, can be a complete practice for deep relaxation. Do the best you can to find a quiet space to do this exercise. If it feels impossible to calm down, don’t be dissuaded. Regardless of how long you have available to rest in this posture, it will benefit your mind and body. Proceed without attachment to the outcomes, but with willingness and curiosity.

Step 1: Reclining Bound Angle Pose (Supta Baddha Koṇāsana)

Start in Corpse Pose (Śavāsana) and take a few breaths there. With each exhale loosen the muscles of your back, melting into the support of the floor. Bring the soles of your feet together at a comfortable distance from your pelvis, opening your knees wide. Place a block, cushion or rolled up towel under each knee. Allow these supports to bear the full weight of your legs, facilitating a release in your hips. Draw your tailbone down the mat, rolling your pelvis up towards your navel, creating space in your lower back. Tuck the chin slightly to lengthen the back of your neck and adjust as needed to ensure your spine is not compressed. Lay your head on a pillow and drape a blanket over your body. Close your eyes or soften your gaze, relax the muscles of your face, and position the hands in any way that feels best to you. Breathe naturally for several minutes. Remain in this posture for the duration of the practice, or for as long as it feels comfortable.

Step 2: Three Part Breath (Dčrgha Pranāyāma)

Place one hand on your abdomen and the other on your heart. Prop up your elbows with rolled towels if desired. Inhale from the space below your navel and send the breath seamlessly through your rib cage, extending the sides of your body, and then up into your chest until your lungs are full. Draw your shoulders towards the mat as your heart space opens. Exhale completely and with control. Allow your chest to fall, your ribs to reform and your navel to gently drop back towards the spine. With each breath cycle use the placement of your hands to feel the breath dance in your body.

Step 3: Withdraw the Senses (Pratyāhāra)

Disengage your senses from the world beyond your mat. Focus on your inward experience, rather than ambient noise, anxious thoughts, or unrelenting laundry lists. When your mind starts to wander, refocus on your breathing. If the thoughts persist, don’t be discouraged. Use your breath awareness as a shield from material distractions, as well as a guide for exploring the stillness and stability of your inner self. Pay attention to your breathing, but abandon all effort in your body. Be at ease in the unknown, the mystery of the self, an uncharted holy place.

May this practice bring you solace and peace, quell worry and fear, and serve as a place of refuge protected by the unassuming presence of your own breath. May it reveal the subtle complexities of your body, the transformative power of the āsanas, and the grace of praṇa. Above all, may it revitalize your spirit in times of great uncertainty.

​A Home Yoga Practice for Respiratory Wellness

By Yoga Teacher Training

A holistic health practitioner once told me: “The body is designed to heal.” I found her words very comforting. In yogic terms, the body’s dharma, or purpose, is to repair itself so it can remain a healthy vehicle for the soul. We may feel particularly vulnerable right now due to widespread illness, but we can support the body’s healing abilities with yoga.

Home Yoga Practice For Respiratory Wellness

In response to the coronavirus pandemic, here is a home practice that promotes respiratory wellness by exercising the lungs, opening the chest, and improving posture.

1. Three Part Breath and Alternate Nostril Breathing

With repeated practice Three Part Breath (Dīrgha Prāṇāyāma) teaches us to use our full lung capacity. Sit in Easy Pose (Sukhāsana) with your hips elevated on a block or blanket. Place one hand on your abdomen and one on your heart to feel the rhythm of your breath. Inhale deeply from your belly, send the breath up through your rib cage, and then into your chest until your lungs are full. Exhale from your chest, deflate your ribs, and draw your navel back towards your spine to completely empty your lungs.

Alternate Nostril Breathing (Nāḍī Śodhana Prāṇāyāma) purifies the nāḍīs, which are channels for energy flow in the body, and it’s very calming. Place the pointer and middle fingers of your dominant hand on the bridge of your nose or curled into your palm. Inhale fully through both nostrils. If you’re right handed, press your right nostril closed with your thumb and exhale through your left nostril. With your right nostril blocked, inhale fully through your left. Close your left nostril with your ring finger. Then release your thumb and exhale out your right nostril. With your left nostril blocked, inhale fully through your right. Close your right nostril and then exhale out your left. If breathing through the nose is difficult due to sinus congestion, practice Three Part Breath through the mouth and avoid Alternate Nostril Breathing until the airways clear. Take long, full breaths for the remainder of the practice.

2. Bound Angle Pose

Bound Angle Pose (Baddha Koṇāsana) opens the abdomen for deep breathing. Sit upright and bring the soles of your feet together in front of you with your knees wide. Place a prop under each knee for support. Inhale from below your navel and fill your lungs completely. Take several rounds of deep breaths in this posture.

3. Locust Pose

Locust Pose (Śalabhāsana) improves our posture which promotes lung efficiency. Lay face down and interlace your hands behind your back, drawing them towards your feet. Bring your feet together, and on an inhale, lift your feet and chest off the mat. Press your hips down as you stretch from your waist, opening your chest from below your shoulder blades, rather than bending at your lumbar spine. Incorporate this pose into a few rounds of Classical Sun Salutations (Classical Sūrya Namaskar). Practice it in place of Cobra Pose (Bhujaṅgāsana). Classical Sun Salutations prepare the body for other āsanas by loosening the shoulders and hips.

4. Cow Face Pose

Cow Face Pose (Gomukhāsana) opens the chest and shoulders. Start on your hands and knees. Cross your left shin over your right calf behind you. Sit upright so your right knee stacks on top of your left and your feet land by your sides. Alternatively, practice the upper body portion of this pose in a comfortable seated position. Reach your right arm out to the side and bring your right hand to your low back, palm facing out. Extend your left hand to the ceiling, bend the elbow and reach your left hand down your back. Gently move your hands towards each other along your spine until your fingers clasp. If your hands don’t meet, don’t force it. Hold the ends of a towel or piece of clothing to bridge the gap between your hands. Repeat on the opposite side.

5. Bridge Pose

Bridge Pose (Setu Bandhāsana) opens the chest while strengthening the lower back and legs. In a reclined position, lift your hips off the mat, position your feet under your knees, and relax your arms by your sides. For support, position a block under your sacrum (triangular bone at the base of your spine). Send nourishing prāṇa into the heart-space with Three Part Breath.

6. Corpse Pose

Conclude in Corpse Pose (Śavāsana) or in another restful posture like supported Reclining Bound Angle Pose (Supta Baddha Koṇāsana). Cease breath control and relax the body. Withdraw your senses from the external world and focus on the natural rhythm of your inhales and exhales. Meditate on an affirmation like The body is designed to heal or My body is the home of my spirit. Your own inner wisdom may surface during this relaxation period

​3 Restful Practices to Support Immunity

By Lifestyle & Wellness

Fatigue and stress wreck havoc on the immune system. Whenever I get sick, it’s usually because work and worry have depleted my emotional, mental, and physical reserves. Rest is essential to our well-being. Taking breaks, slowing down, and sleeping well allow the body to do what it does best, which is defend and repair itself. Without the energy it needs to function, our immune system simply can’t keep up.

Practices To Help With Restfulness

Incorporating rest into our busy lives can be quite challenging, but doing so trains our bodies and minds to relax when the world around us is moving very fast. I’m a big fan of personal practices that restore my sense of self. Carving out time for reflection, designing my space, and being creative, even for brief periods of time, nourish me physically and spiritually. Here are a few ideas for replenishing throughout the day, and I hope they inspire others.

1. Mindful Meals

I worked in food service for several years, and due to the demands of my job, I often ate standing up, while working, and at erratic times. My health suffered, particularly my digestion. If we eat on the go our digestive system doesn’t have the energy it needs to process our food and absorb nutrients because our body is busy doing something else. Without proper nourishment from our food our immune system doesn’t have the fuel it needs to fight illness.

Preparing and enjoying wholesome food is a method of self-healing. Mindfulness is practicing full awareness in the present moment, without reaction or judgement. Sitting at a table, enjoying the taste of our food, noticing the colors on our plates, chewing slowly, and pausing in between bites is a mindful practice that supports the body’s life-giving functions. Start the day with a slow breakfast. Set the table, remove clutter and light a candle. Whatever foods you have available, prepare them with care. Eat slowly and patiently, and sit for a while after you’ve finished. Doing so signals your body to focus on processing nutrients into energy.

2. Observing Nature

Walking is wonderful exercise and can be quite meditative if practiced with full awareness. Due to the coronavirus threat, walking outside may not feel safe right now, especially if you live in a crowded place. If that’s the case, there are other ways to slow down and notice your surroundings.

Observing our environment focuses the mind on the present moment, rather than our thoughts, which often exist in the past or future. When the mind slows down the body can rest. Spend a few minutes by an open window, on your front stoop, or in your backyard. Walk barefoot through the grass or sit with your eyes closed to soak up the sun. Notice the various sights and sounds, whether it’s lawn mowers or children playing, traffic noise or bird songs. If you see something beautiful, take time to delight in that experience. Slow down your movements or sit still, and disregard thoughts that pull you from the present moment.

3. Evening Rituals

To me sleep is a sacred time of renewal in order to greet the new day ahead with fresh eyes and a vibrant spirit. It’s the body’s optimal time to repair. A quick internet search will yield numerous articles linking the blue light emitted from digital screens to poor sleep. News and other information absorbed prior to bed can be over-stimulating and agitating. Establish a cut-off for screen time. Make yourself a calming cup of tea or soothing golden milk, and sit for a few moments to enjoy it. If you have time, silently meditate in a comfortable position. While lying in bed place one hand on your belly and the other on your heart. Take long, full breaths, feeling your chest and abdomen rise and fall with each inhale and exhale. Meditation and mindful breathing activate our parasympathetic nervous system, the one responsible for rest and renewal.

Rest is a form of nourishment. It’s essential to our health and will benefit us in even small doses. Deep sleep and mindful moments replenish our energy reserves so we don’t run out of what the body needs to stay well. Times of relaxation and quiet awareness are opportunities to learn about ourselves and relate to our bodies, which can foster trust in their resiliency, wholeness, and innate capacity to heal.

Black Moong Dahl

​Two Vegan Indian Recipes from my Gujarati Mother in Law

By Lifestyle & Wellness

The first thing my in-laws asked my husband after he’d put them into near-cardiac arrest telling them that I was 1) American and 2) not of Indian descent was, “Is she vegetarian?” As Gujarati Jains, ahimsa (non-harm) is at the core of their faith, life—and diet.

Fortunately, this other kind of Indian is vegetarian (and vegan in the US). Vegetarianism flew in the face of my upbringing as a citizen of the Cherokee Nation where hunting is imbued into culture, but as we grow, increase our knowledge and expand our experiences, we are consistently re-aligning our values.

However, vegetarianism in authentic Indian households is worlds apart from what many of us westerners experience on a daily basis. Both my mother-in-law and my husband are phenomenal cooks. Here are two of my favorite vegetarian recipes including a savory and sweet option.

Both recipes are surprisingly simple, although for some the ingredients might seem unfamiliar, overwhelming, or difficult to get. If you’re lucky enough to live in an area with an Indian store, they will have everything you need (if not, ordering online is always an option). When it comes to spices, it’s always simplest and most affordable to trust Indian stores in my experience.

SPICY MOONG DAHL

Black Moong Dahl

INGREDIENTS

1 cup split moong dahl (presara pappu)
3 Cups Water
1/4 tsp canola oil
1 tsp cumin seeds
2 green chilis
2 dry red chilis
1 tsp ginger, grated
10 curry leaves
big pinch asafetida (also known as ting)
to taste salt
1/2 lemon
1/4 tsp turmeric
1 onion

DIRECTIONS

1. Pre-soak dahl in water as long as possible (2 hours is ideal).
2. Cook dahl in water in pressure cooker until soft.
3. Heat oil in pot and add cumin seeds; cook until brown but do not burn.
4. Shred red chilis and add to pot (you can leave seeds or de-seed depending on how much spice you want).
5. Dice and add green chilis, curry leaves, ginger.
6. Add turmeric and diced onion, asafetida.
7. Stir and immediately add to dahl.
8. Check to be sure there is enough water in dahl throughout process. Dahl can be made either thick (like yogurt) or more watered down (like a soup). This depends on your preference. Water can always be added to taste.
9. Add salt to taste. This recipe is from my friend who is Gujarati Jain in Mumbai. I was told this recipe is meant to be a bit bland and they often add a good amount of salt.
10. Simmer for 10 minutes. Right before serving add squeezed lemon.

NOTES:

I’ve found that pressure cookers have different “personalities” and it’s best to just watch the dahl to see when it’s soft and to monitor water levels.

As noted in the directions, I’ve found most people like a good amount of salt added to this dahl, but that is up to taste and health.

It is best served with white rice.

HALWA/SHEERA* INDIAN DESSERT

Halwa or Sheera

*This dessert dish is called different things in different parts of India, but it’s delicious and very easy to make.

INGREDIENTS

1 cup Semolina
1 Cup Sugar
1/2 Cup Ghee (or unsalted butter)
2 Cups Water
1/2 Cup Cashew halves/pieces
1/4 Cup Raisins
4 Pods Cardamom
4 Sticks Cloves
2 Sticks Cinnamon

DIRECTIONS

1. Melt the ghee or butter in a flat-bottomed pan and add the cardamom, cloves, and cinnamon. I’ve been able to find most ingredients at stores like Whole Foods/Trader Joes but you may have to go to an Indian grocer. I have substituted cardamom powder in lieu of pods and it has tasted fine.
2. Fry cashew nuts and raisins along with spices in the ghee/butter until light brown.
3. Add the semolina and stir until there are no dry spots in the semolina.
4. Add water and mix well.
5. Cover the pan and keep on low flame for 2 minutes or until the water is absorbed and semolina is cooked.
6. Add the sugar and stir well on low flame until bubbles start popping through semolina.
7. Cover pan and keep on low flame one more minute.
8. Serve while warm.

Try these vegetarian-friendly recipes today!

Many Indian foods and entire cuisines (depending on the community) are inherently vegetarian. Anthony Bourdain once said that Indian food was the one food where he didn’t have issues eating vegetarian. By adopting more vegetarian recipes and dishes into your diet, you can enjoy a more varied experience and the ayurvedic benefits that often come with it. For instance, turmeric is an excellent immunity booster and can be added to virtually any savory Indian dish. Most importantly, have fun, experiment, and play—cooking and food should be joyful.

class posing in Vinyasa

​Re-Visiting the “Basics” of Vinyasa: Chaturanga and Breath

By Yoga Teacher Training

Chaturanga Dandasana is a staple of Vinyasa and many other types of yoga, but a lot of practitioners make little mistakes. And once you start doing something in a not so great way, that tends to stick. Hopefully, you’ve had teachers that stop and break down Chaturanga. It’s not something that’s easy to “get” just like that. Many people who have been practicing for years can benefit from a little tune up from time to time.

What is Chaturanga?

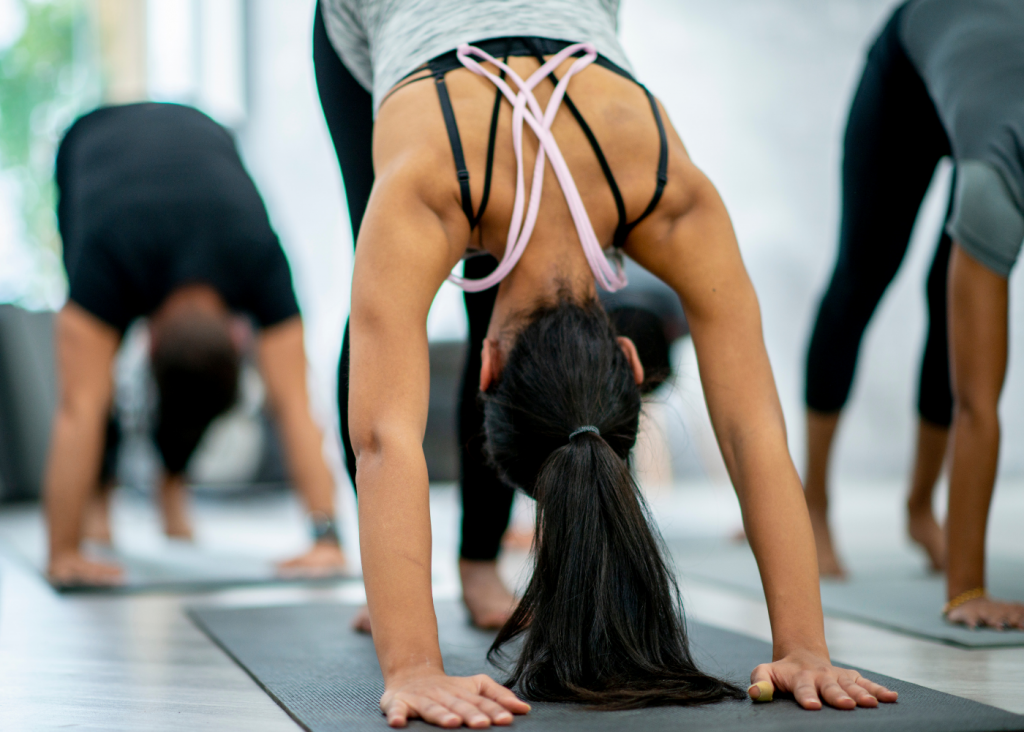
class doing vinyasaChaturanga begins in plank pose. However, you can train your body and mind to shift into Chaturanga from plank simply by moving forward about one inch. Your wrists should be directly under your shoulders while in plank, but prep for Chaturanga requires you to be slightly forward.

It’s probably been drilled into your head that your elbows need to be in when you lower halfway. Make sure you can feel your elbows brush against your ribs.

The biggest issue many people have is their definition of “half-way.” This is where a mirror can come in very handy. Some people don’t go far enough, and others are making things harder on themselves (and their joints) by just barely hovering above their mat. Many people droop in the middle at this point, which gives your back zero support.

It’s often helpful to exaggerate your hips when learning (or re-learning) Chaturanga. It might feel like your hips are way up in the air, but if you check int he mirror, they’re actually right where they should be. And yes, this will require more work from your muscles. Simply holding at the half-way point, properly, is enough for many people.

Even after practicing for several years, I prefer to start out my Chaturangas with a baby cobra. It stretches in a different way than the full Upward Facing Dog. It also helps my body get into the Chaturanga rhythm.

I encourage my students to mix and match baby cobra with Cobra and Upward Facing Dog. Listen to your body. Feel what these different poses can give you. Remember that yoga isn’t about getting to the next crazy looking asana, but about exploring your body and getting the full benefits from every breath and pose.

Yoga Breathing Explained

Any woman who’s given birth can tell you that breath makes a huge difference in pain management. What you might not realize is that the breathing you learn in yoga can help you in many facets of your life. Some people faithfully go to their class of choice and wait impatiently to “get into things.” They’re there for the strengthening and flexibility that the asanas offer, and that’s fine for them. However, these types of practitioners are missing out on a very important half of yoga.

class doing vinyasaLinking breath with movement is one definition of yoga. It’s not just “movement.” If you’re not practicing the breathing half of things, you’re only doing half of yoga.

Yogic breathing has helped me in every complementary facet of my life from my years as an amateur boxer to marathon running and my HIIT training. It’s a critical training aspect of every sport, whether you’re in an intramural league or a professional. However, it’s also a crucial part of other, less active parts of my life. Recently, I had a fairly large cover up tattoo done on my spine. Notoriously a painful part of the body for ink work, I was 12 years overdue to cover up two tattoos that I got on a whim.

Even as a practicing yogi, I was surprised by how quickly I naturally went to my breathing to manage the pain. It gave me something to focus on. Breathing out the pain helped move me from dealing with the pain, to managing the pain, to finally accepting the pain so much that I managed to drift in and out of sleep during the last two hours in the chair.

This is just one example of how your practice might positively influence other aspects of your life. It’s often said the biggest challenge is just getting to the mat. But what are you going to use with what you’ve learned there?

​3 Tips For Improving Verbal Cues For Yoga Teachers

By Yoga Teachers

Yoga teachers are essentially communicators. Improving our ​verbal cues is key to teaching supportive, well-rounded and impactful yoga classes. More often than not, we’re leading a varied group of students with a range of learning styles, knowledge, expectations and emotional states. It’s important that every student feels accepted, guided and safe. Determining the most effective way to deliver our cues so everyone understands is tough, meaningful and essential work.

​Verbal cues For Yoga Teachers

girl in white doing yoga practicing her ​verbal cuesThink of ​verbal cues as a practice of connecting with people through language. Our words will likely fall flat from time to time, but we’ll always have the opportunity to try again. If a cue results in confusion or students move in a way we didn’t intend, that’s helpful information. In that situation, try a different approach instead of moving on. Self-correcting in the moment reveals our leadership and care. Our students’ responses to our cues are feedback on the cue itself and are not judgements on our value as yoga teachers. Here are some tips for improving our communication skills in class:

1. Take A Breath Before Speaking

People take class to be led through an experience. They expect us to tell them what to do and when to do it. Improving the delivery of our cues through breathing keeps our classes running smoothly and with everyone on the same page.

Breathing mindfully calms our nerves so we can focus on what we’re saying. Even more, inhaling before we speak enables us to annunciate clearly and project our words so our students can hear and understand us. The physical mechanics of this make sense if we consider our own vocal experiences. Full lungs allow us to vocalize from our cores as opposed to speaking while taking shallow breaths, which results in timid or superficial sounds. With control of our breath, we can vary our tone to motivate our students, show excitement and express joy, which makes our cues even more effective.

2. Use Clear And Concise Language

Simple directions are easy to follow and that’s exactly what we need our students to do – follow our cues. Naming the body part and how or where it should move next is a solid formula for giving clear directions. Hands on the mat, hips back and relax shoulders away from the ears are good examples of this. Imagery, poetic language and a thought-provoking dharma talk are essential to serving our students well. However, think of these other elements as decorations, adorning the base cues to illuminate all the depth and wonder yoga has to offer.

class posing while teacher working on her ​verbal cuesWhen it comes to ​verbal cues, less is more. We don’t want to muddy our key message with a lot of words and it’s important to give our students time in the poses without us talking so they can turn inward and listen to whatever surfaces. Keep it clear and concise, and allow the combination of breath and asana to work its magic.

3. Avoid Abstract Phrases And Anatomical Terms

Cueing effectively means speaking the language of our students. We, the teachers, might be accustomed to certain terms or figures of speech, but these words may sound foreign to our students since everyone arrives with a different degree of familiarity with yoga.

We may have heard cues such as shine the heart forward or connect to the earth, and then use them in our classes. While these phrases may serve a purpose at times, they’re also abstract concepts that do not explicitly tell our students what to do. Saying open the chest or press the soles of your feet into the mat convey how we want our students to move or engage their muscles.

Using anatomical terms as opposed to common names when referencing body parts may throw students off as well. Most of us are unfamiliar with scientific terminology, nor do we think about our bodies in these terms. For example, using shoulder blade instead of scapula in a cue will be clearer for the majority of the people in the room.

Improving Your Communication Skills With YogaRenew

It’s worth improving our communication skills since language is a bridge for connecting with our students. The more effectively we communicate, the more successful we’ll be at creating opportunities for people to develop body awareness, physical strength and calm, steady minds. Work with YogaRenew to become a yoga instructor.