Strength Training + Yoga

Strength Training & Yoga: How to incorporate both

By Lifestyle & Wellness, Yoga Asana

When considering how you can incorporate a yoga practice into your regular fitness routine, it can seem complicated… but it doesn’t have to be. A lot of people like to engage in different physical fitness activities, and sometimes that can mean a multitude of vastly different modalities with varying intensities.

Here is an example of how I like to work out weekly:

  • Monday: 60 Min. Cycle Class
  • Tuesday: 60 Min. Strength Training
  • Wednesday: 60 Min. Yoga Class
  • Thursday: 5K Run (3 Miles)
  • Friday: 45 min High Intensity Strength + Conditioning Session
  • Saturday: 75 minute Yoga Class
  • Sunday: Rest

This is an example of how I may spend one week of working out, but it is based on what I could potentially do in a single week according to the activities that I currently participate in. What I am trying to demonstrate is that when it comes to our health and fitness, there are so many options and varying ways to piece them together.

A question that might come up is, “How do we approach fitting in multiple fitness modalities into our lives? How do we get better within each mode if we’re constantly spreading ourselves out?”

Your body, like anything else, has a particular tolerance for capacity. This capacity can be increased given that we dedicate time, effort and energy to do so. When it comes to the example I gave above of my hypothesized week in fitness, I’m spreading myself out a lot. My time, effort, and energy are going towards many activities as opposed to being focused on one particular activity.

Assuming you are paying attention to your body, breath, and form within each class, it’s said to be healthy to fully embrace whatever means of physical movement you enjoy. If nothing else, it is perfectly safe and effective in getting you to just simply move and feel your body; to find what resonates most with you.

However, when it comes to optimizing your body, and optimizing your performance the method of trying to fit it all in most likely won’t yield the greatest results.

In order to get stronger, we must work on lifting/moving heavy loads. If we wish to get faster, we must perform exercises which allow us to work on our speed. If we wish to generate more power, we must lift/move heavy loads at high speeds. If we wish to increase our flexibility and mobility, we must perform movements and exercises geared towards those specific components.

If you are someone who feels like you’re at a plateau and you want to see progress in particular areas or if you want to work on performance and optimization in particular areas, then this article is for you…

How does yoga fit in with strength training?

Let’s say we want to do all of the above while simultaneously deepening our yoga practice — Keep in mind, yoga postures can take us to our extreme ranges of motion, positions that are typically not our strongest. Meaning, you might have a strength goal, which is in opposition to the yoga postures you’re aiming to get better at.

How you approach your health and fitness is heavily based upon your goals at any given time.

Your goals determine what takes priority. How you train will determine what your body is capable of achieving. If you want to lift heavy weights (think about working towards your 1 rep maximum for a back squat), you must lift heavy weights regularly, focusing solely on increasing the amount of pounds each time. If you want to work on deep back-bending (think poses like full King Dancer and King Pigeon), you must work on poses and positions that support such a shape. These two things can feel like they are on opposite ends of the spectrum when it comes to the specific physical fitness goal trying to be attained.

Using back squats and king pigeon as an example, I generally would not recommend for someone to be working on both at full capacity at the same time. Why? The muscular actions needed for each are different. Working on a 1RM (1 rep maximum) back squat requires muscular shortening in places where yoga postures like King Pigeon requires lengthening.

This isn’t to say that if you’re currently working on lifting heavy loads and King Pigeon comes up in class that you should avoid it, but this is to say that your King Pigeon will most likely not feel the best it could if you’re currently working on lifting near max loads in the gym.

Now, I don’t want this to feel limiting. Actually, I want the opposite for you. You can work on all of your goals and expand what your body is capable of in all the ways you wish in a way that is safe, effective, and efficient. It might just take a little bit more time and planning than you initially intended.

Steps towards working on strength + yoga goals:

  1. Identify and acknowledge the activities you enjoy and want to spend time doing: This can be general because we’re going to get into specific goals in a second. You can approach this like, “I want to participate in yoga, strength training, running, rock climbing, swimming, etc.”
  2. Determine your goals for the next 6 months to a year: Write them all down. Be more specific here. Approach this like “I want to be able to do a handstand, I want to run a 5K, I want to increase the weight I can deadlift, etc.” If there’s an event you want to participate in like a particular race or competition, this is a good place to write it down. Is time a factor for any of your goals? Perhaps there is a particular race or competition you want to participate in. These generally occur on specific dates. Maybe you are preparing for a trip or life event. Things like going on a trip with a lot of walking or preparing to have kids might be events that you want to think about in preparing your body’s strength and/or conditioning.
  3. Prioritize your goals: Which goal is most important for you to work towards first? This could be determined by need, time, and/or desire. For example, you might be recently recovered from an injury and now you need to rebuild strength. You might want to compete in a CrossFit Murph workout (occurs every Memorial Day). Depending on the time you have until the intended event, you can determine the priority level for your training efforts. You might have a desire to land in and hold a scorpion handstand. This will create an “ordered list” of what goals take precedence. I want to emphasize that you can work on all your goals at the same time, but this will limit the capacity you reach in each modality. This doesn’t mean your performance will be bad, but it just means you might not be optimizing your performance.
  4. Acknowledge your goals can change: You might start your strength training journey after injury and discover other strength training goals. You might change your mind and not want to do Murph anymore. You might decide that arm balances and deep backbending are not places you want to deepen your Yoga practice at this time. Nothing is set in stone. If this happens, just reevaluate and tweak.

Plan it out & try to stick to your routine

Get to work! Create a training plan with your goals and intentions in mind, giving each goal the space and time it deserves and follow your plan. Still honor all the activities you enjoy and want to participate in, but focus on your top priority goals with the most effort and intention and be aware that what you train at you will get better at. And remember that if you notice your performance declining in other areas, that it is OK!

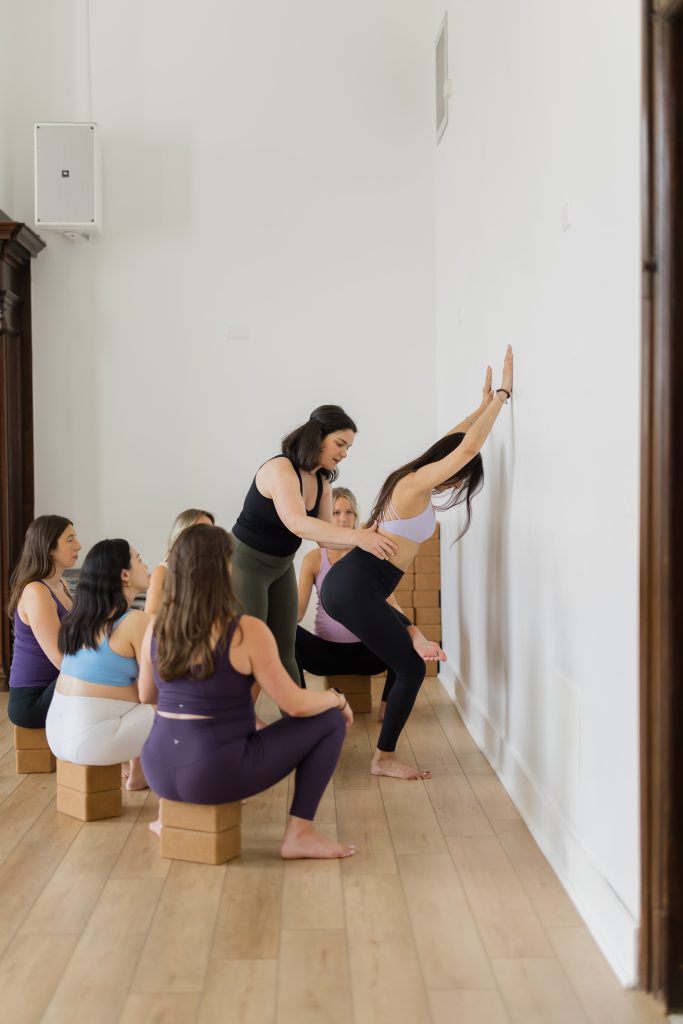
And if you need help, know that there are people who are suited just for this kind of thing. Reach out to any instructors, trainers, or coaches whose goal is to help YOU succeed at whatever it is you want to do.

Join our mailing list for incredible weekly content!

Person in Camel Pose

Weekly Class Theme: Love Yourself ❤️

By Yoga Asana, Yoga Teachers

Love is a word that when you see or hear you can immediately relate to in some way. You might think about how much you “love” something, someone, or somewhere. You might think about a display of love between people, a hug or a kiss. You might think about a feeling within yourself…perhaps a warmth spreading through your body or a brightness which brings a smile to your face.

However you relate to love, one thing is for certain is that it is a transcendent feeling. It is something that has the ability to be felt and shared by all beings. Love, in its truest form, can act as a binding agent closing the gap between even the seemingly largest of enemies. When love is felt and is given room to blossom, hate and other lower frequency emotions have no room to grow.

But how can such a powerful thing be cultivated? How does one experience love? And if love is so transcendent, why is there so much hate in the world?

The ability to love another only goes as deep as the love one has of themselves.

The thing with love is that while we all have a right to love and to be loved, it does not exist outside of us waiting to be packaged and delivered to us to buy or ingest. And while companies continuously try to sell us on this idea (and we continue to buy in thinking this emotion originates from another being or entity other than ourselves), love in its purest form can only be created from within and for within. The love that makes the world go round begins with the love we have for ourselves. For when we truly fall in love with ourselves, as we are and for who we are, we have the capacity to fall in love with everything and everyone around us.

Some people may read the above paragraph and think it’s a little bit too “woo-woo,” but doesn’t that sound like a magical world to live in? One where people truly love themselves? And because of that, they love one another? I don’t know about you, but it sounds pretty magical to me. I actually think that the term “woo-woo” was created for things in this world and life experience that are in-fact wonderful and magical, but almost seem too good to be real. Therefore, people don’t want to believe they are real or achievable. I, though, fully believe in the magic and something tells me you do as well.

Why not give it a go? Why not just try to fall in love with yourself? You might just love the outcome. It does require that you open yourself and your heart up to the world and to this life. It requires trust, and it also doesn’t mean you won’t get hurt. But opening yourself up, and allowing yourself to be receptive is what is required for you to have the opportunity to not only receive love, but to share love.

Supporting Pose 1: Goddess with Groin Stretch (Utkata Konasana)

Person doing Goddess Pose with their groin stretched

Getting into the hip groins can assist in opening up the connective tissues which run from the inner thigh/pelvis to the lower spine. It’s often we overlook stretching the inner thigh as a way of approaching backbends, which is why I’ve decided to add it into this sequence for Camel.

How to:

  1. Turn towards the side wall with the feet about 2-3 feet apart from one another.
  2. Turn the heels in and toes out to widen the inner thighs and turn the legs out at the hips.
  3. Bend the knees to about 90 degrees and with the knees stacked over the ankles. For less intensity, bring the feet closer together and bend the knees to a less degree.
  4. Take the hands to the legs and turn the torso towards the left while widening the right hip groin. Hold for 3-5 breaths and then go the other way.

Supporting Pose 2: High Lunge

Person doing High Lunge on a yoga mat with arms up overhead beside the ears

High lunge is a great prep pose for Camel for a variety of reasons. Reaching the arms up encourages length along the spine and torso. You can also interlace the hands behind the lower back to mimic the actions of the arms in Camel. This particular variation with the back knee slightly bent lends a bit more access to the pelvis to lift the frontal hip point towards the belly button, aka take the pelvis towards a posterior pelvic tilt, which is helpful for our peak pose.

How to:

  1. From a Downward Facing Dog, step the right foot in between the hands.
  2. Keeping the back heel lifted, rise up so the torso is upright and the crown of the heading is aiming towards the ceiling.
  3. Reach the arms up alongside the ears. Imagine each rib was lifting off the lower rib. It is okay if the shoulders reach up a little bit so long as they are not scrunched up by the ears.
  4. Slightly bend the left knee and firm the left buttocks forward. This should encourage a lengthening of the lower spine and a slight lift of the frontal hip points. Don’t overdo this. It should not feel like you are “tucking the tail” or rounding the back. It should just be enough to note the action of the sacrum going slightly forward to prepare for a backbend.

Supporting Pose 3: Revolved Chair with Arms Spread (Parivrtta Utkatasana)

Revolved Chair with Arms Spread Pose

Twisting is generally a good idea to prep for backbending as it helps to invite movement into the spine and torso. I like this particular twist because it has both legs going in the same direction and bent, as we see in Camel. The arms spreading helps to teach the action of the shoulder blades moving towards one another to invite in a widening of the collarbones.

How to:

  1. Start in a Mountain Pose.
  2. Bend the knees and press the sit bones back in space to come into a chair pose.
  3. Turn the torso to the right and hook the left elbow to the outside of the right thigh.
  4. Take the shoulder blades towards one another and spread the arms so the left hand reaches towards the floor and the right hand reaches towards the ceiling.
  5. Reach the center of the chest and crown of the head forward.

Peak Pose: Camel (Ustrasana)

Girl in Camel Pose

Camel is not only a heart opener, literally opening up your heart to the space around you, but it is a pose that requires conscious effort, patience, and practice. Because of the way the body is positioned in relation to the earth, it is easy for this pose to feel a little (or a lotta) uncomfortable in the lower back region. We might think we can just drop back into the pose, but this pose takes a lot of time to do with good alignment so that it actually feels good in the body.

How to:

  1. Come into a high kneeling position on the floor with the tops of the feet pressing down into the mat.
  2. Bring your hands to the sides of your pelvis with your shoulder blades coming towards one another and the collarbones spread.
  3. Press the pelvis forward and reach up through the spine and the sides of the body. Reach up so much that your body begins to backbend.
  4. Keep lifting the center of the chest forward and up and walk your hands down your legs towards your feet. You can use blocks on either side of your feet if the feet are too far away.
  5. Connect the palms of your hands to the soles of your feet and use that connection as an anchor to continue to backbend.
  6. The head can relax back if it feels okay for the neck. Breathing should feel even and steady.

Weekly Class Theme: Forward Folds

By Yoga Asana, Yoga Teachers

“After acting, reflect on what you have done.
If you do not reflect, there is confused action.
Pause between each movement.
The self has to find out whether the posture has been done well or not.”
— B.K.S. Iyengar

Seated Forward Fold poses are calming, introspective, and soothing to the nervous system. They turn off the brain, reduce fatigue and promote healthy sleep. These poses can be done with props such as blankets, bolsters, straps, etc to enhance their therapeutic effects.

Physically they stretch the abdomen, lengthen the spine, lengthen the hamstrings, and open the groins. They help prepare the body and mind for Savasana.

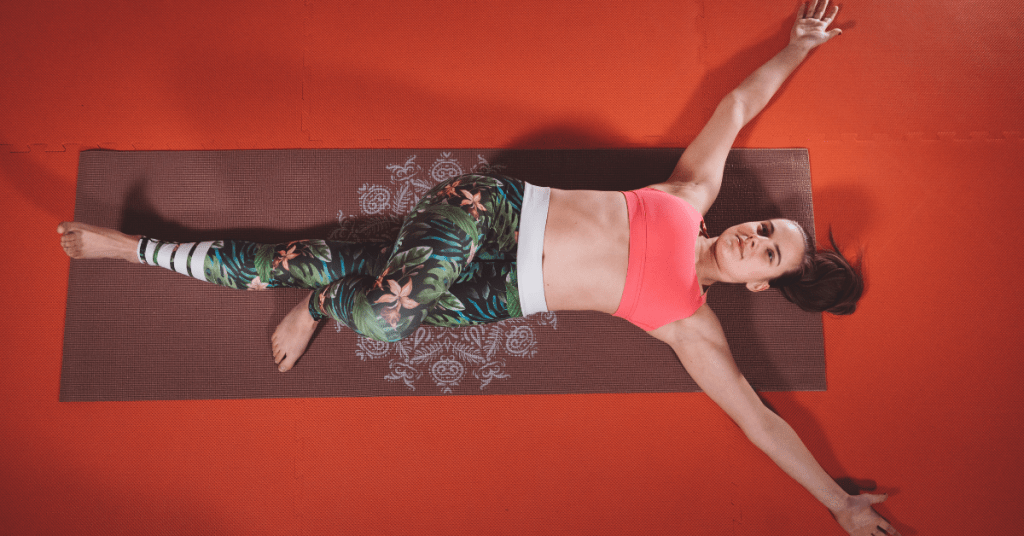
Supporting Pose 1: Supta Padagusthasana B (Reclined Hand to Foot Pose)

Practicing Supta Padagusthasana is a great way to work on opening the legs while keeping the spine in a neutral position. Using a blanket under the head for support and a strap for your leg are also useful in making the pose more accessible.

How to:

  1. Lie on your back with a blanket folded under your head and your legs straight.
  2. Bend your right leg towards your chest and place a strap around the ball of your right foot. Keep your left leg completely straight on the floor.
  3. Inhale and straighten your right leg by pressing your right foot towards the ceiling. Let your left hand rest on your left thigh.
  4. Exhale and swing your straight right leg out to the right side. Lengthen your inner right thigh towards your foot while maintaining a straight left leg. The trunk should remain neutral.
  5. Stay for 5 to 10 breaths before lifting your leg back to the ceiling and then to the floor. Repeat on the other side.

Supporting Pose 2: Trikonasana (Triangle Pose)

Triangle Pose extends the torso and limbs in multiple directions forming triangles with the body. It’s a spacious standing pose that helps tone the arms and legs while expanding the chest and torso.

How to:

  1. Stand in Tadasana and step your feet 3 ½ to 4 feet wide.
  2. Turn your right leg and foot out to 90 degrees and the left leg and foot inward 15 degrees. Keep both legs straight
  3. Extend your torso laterally over your right leg and bring your right hand to your shin or ankle. Extend your left arm upward towards the ceiling directly above your bottom arm.
  4. Turn your gaze towards your top hand.
  5. Stay for 5 breaths and repeat on the other side.

Supporting Pose 3: Prasarita Padottanasana (Extended Wide Leg Pose)

This standing wide leg forward fold strengthens and tones the legs and opens the hamstrings. Energetically it helps quiet the mind and nervous system as the head is releasing towards the floor.

How to:

  1. Stand in Tadasana and step your feet 3 ½ to 4 feet wide. Make sure the outer edges of your feet are parallel to the edges of your mat.
  2. Bring your hands to your hips, inhale and lift your torso. As you exhale, bring your chest parallel to the floor, placing your hands under your shoulders.
  3. Keeping your legs straight, bring your hands and fingers in line with your feet and toes. Bend your elbows back forming a right angle and place the crown of your head on the floor. If your head does not reach the floor use a blanket or bolster to fill the space.
  4. Gently lift your shoulders away from your ears to elongate the cervical spine.
  5. Stay for 5 to 10 breaths.

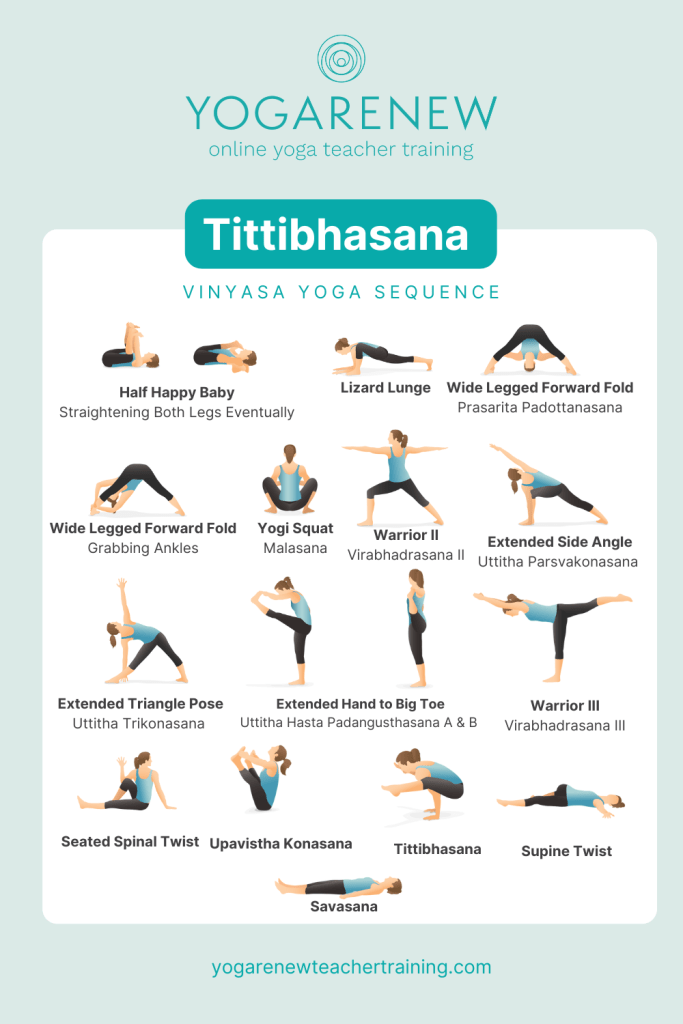
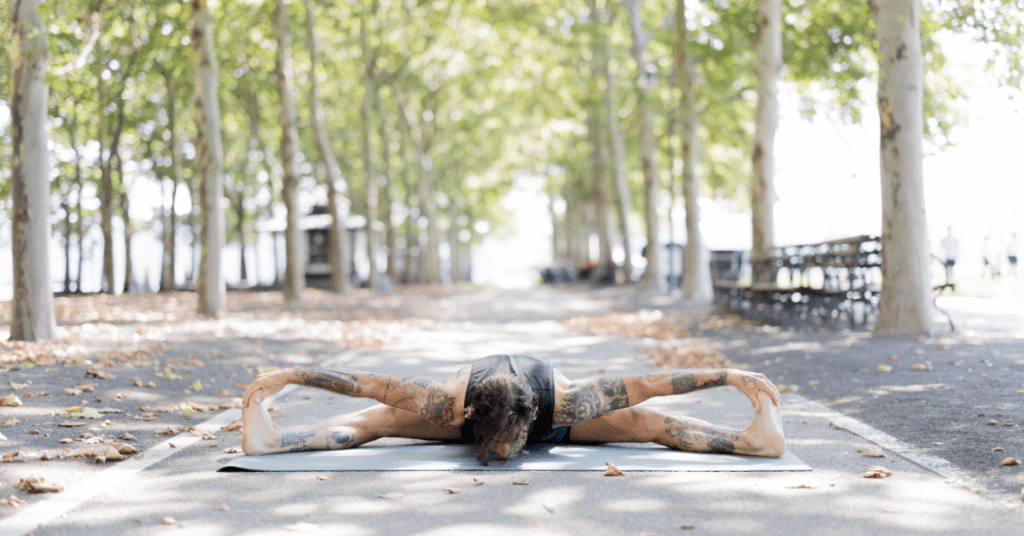
Peak Pose: Upavistha Konasana

Upavishta is translated as “seated” and Konas is translated as “angle.” This seated forward fold stretches the hamstrings and opens the pelvic region. When done with the right mindset and quiet breathing, its practice induces a meditative state.

How to:

  1. Start seated on the floor with your legs extended straight in front of you. You can sit up on a blanket to help lift
  2. Extend your legs out wide, keeping the legs straight and the toes facing the ceiling.
  3. Inhale, grab the big toes and lift the chest.
  4. Exhale, extend the torso forward and bring your forehead towards the floor. If you head doesn’t reach the floor place a blanket or block under your forehead.
  5. Stay for 5 to 10 breaths.
Patrick in warrior 1 pose on a yoga mat

Weekly Class Theme: Standing Poses

By Yoga Asana, Yoga Teachers

“We must learn to stand on our feet before we stand on our head.” ~ B.K.S. Iyengar

I love this quote from Yoga Master B.K.S. Iyengar because it’s a great reminder of the importance of Standing Poses in the practice of asana. The fundamental movements and precision we learn in standing poses directly relates to how the human body moves in everyday life as we sit, stand, walk, and run. These

Although they may seem simple, they provide a strong foundation for many yoga practitioners. Standing poses provide strength and mobility in the feet, ankles, legs, hips, torso, arms, shoulders, and neck. In essence, standing poses work the entire body and much of the alignment and movement necessary to practice advanced postures are learned in the standing poses.

Supporting Pose 1: Supported Fish with arms overhead (Matsyasana)

Firming in the upper back, aka the thoracic spine, is a key component when we want to lift our chest. Using the blocks in this posture helps make an impression in the upper back that is needed later when we practice Warrior 1. The arms extending overhead alongside the ears is also a key component in Warrior 1

Patrick in supported fish pose with arms overhead

How to get into supported fish pose:

  1. Set up your blocks with one block on the horizontal medium height and the next block on the vertical high height.
  2. Use your hands to hold the horizontal block in place as you lie back, starting with your knees bent. The horizontal block should be positioned at the bottom tips of your shoulder blades which helps firm in the upper back.
  3. Now lift your arms up and hold the vertical block as you place the back of your head on it. Your face should be parallel to the ceiling with your chin slightly tucked towards your chest.
  4. Lift your arms to the ceiling, palms facing each other, and extend your arms over your head right next to your ears. Imagine you are holding a block between your hands and you extend your arms fully.
  5. Reach the legs long towards the front of the mat, no wider than hip distance and stay for 1 to 2 minutes.

Supporting Pose 2: Crescent Lunge (Anjaneyasana)

Crescent lunge is a great pose to help open up the psoas muscle (think back leg in Warrior 1). Lifting the arms alongside the ears with the head back and gaze upward is also the same action needed in Warrior 1

Patrick in crescent lunge pose with arms and hands overhead

How to get into crescent lunge:

  1. Bring your back knee to the floor and uncurl your toes.
  2. Have your front knee deeply bent and placed over your front heel.
  3. The back of your pelvis should move down (away from your low back) and your sacrum and tailbone should move inward. This provides space and stability to your lumbar spine.
  4. Lift your arms up alongside your ears. Take your head back and bring your palms together. Use your arms to help lift your chest up off your pelvis.

Supporting Pose 3: Tree Pose (Vrksasana)

Tree pose is a great standing balance that teaches strength and flexibility in the foot, ankle, and lower leg. WIth the arms lifted overhead it also helps lengthen and lift the torso.

Patrick in tree pose on a yoga mat

How to get into tree pose:

  1. Start standing in Mountain Pose.
  2. Lift one leg and bend it. Now rotate it out to the side and place the sole of your foot on your upper inner thigh. If your foot doesn’t lift that high you can place it on your lower leg. Be sure not to place your foot on your knee joint however.
  3. Take your arms upward alongside your ears, bringing your palms together. Look straight ahead.
  4. Stand into your bottom foot and standing leg and dynamically reach up through your palms.

Peak Pose: Warrior 1 (Virabhadrasana 1)

Warrior 1, as its name implies, is a strong and rigorous pose. It’s dynamic and energizing, built from the ground up with a strong foundation. Its an invigorating pose that is great for all levels of students and a foundational posture.

Patrick in warrior 1 pose on a yoga mat

How to get into warrior I:

  1. Start standing in Mountain Pose.
  2. Step one leg back about 3 to 4 feet with your back toes pointed at a 45 degree angle. Press firmly through the outer edge of your back foot and keep your back leg straight
  3. Bend your front knee until it is over your front knee.
  4. Just like in crescent lunge, the back of your pelvis should move down (away from your low back) and your sacrum and tailbone should move inward. This provides space and stability to your lumbar spine.
  5. Lift your arms up alongside your ears. Take your head back and bring your palms together. Use your arms to help lift your chest up off your pelvis.
Woman in lotus, breathing outdoors

Pranayama – An Ancient Breath Practice

By Lifestyle & Wellness, Meditation, Yoga Philosophy

Pranayama is an ancient breath practice, commonly recognized as the fourth limb of yoga. Also utilized in the yoga practice, pranayama has more widely been known to reduce stress, ease anxiety and help alleviate other ailments as well as support healthy lung function.

When we break apart the word pranayama, we find that:

Prana = life force energy
Ayama = expansion, extension, or control
Pranayama = Expansion, extension or control of the life force energy.

There are also various types of pranayama. Some of the types of breath practices include:

  • Nadi Shodhana — Alternate Nostril Breathing
  • Bastrika — Bellow Breath
  • Ujjayi — Oceanic Breath
  • Dirgha — Three Part Breath
  • Bhramari — Bee Breath

While breathwork is an ancient yogic practice originating in India, it has migrated to the Western world and been popularized as a sound healing method. It is also frequently incorporated with the yoga practice here and many yoga teachers incorporate several breathing techniques into their yoga and meditation practices.

Practicing Pranayama

As stated above, there are several different styles of the ancient breathing practice that can be used to bring certain benefits to the mind and body. In this section, we’ll review some of the most popular pranayama techniques and how to practice them.

3 Pranayama Breath Practices for Beginners

1. Alternate Nose Breathing (Nadi Shodhana)

Alternate nose breathing brings balance to the nervous system. In Sanskrit, Nadi means channel and Shodhana means purification; translating to the purification of both channels of the nervous system. These two channels are the parasympathetic (the place where we tap into relaxation) and the sympathetic (our “fight or flight” response). The left side of the body is representative of the parasympathetic and the right side of the body is representative of the sympathetic. Breathing through both channels brings balance and harmony to our nervous system.

How to practice Alternate Nostril Breathing:

  1. Sit in a comfortable seated position. If you’re practicing yoga, this can look like Sukhasana (legs crossed), Virasana (kneeling), or Padmasana (legs cross and lifted onto the opposite thighs).
  2. Use your right hand ring finger over your left nostril and your right thumb to place over your right nostril (with your pointer and middle finger folded into your palm).
  3. Close your right nostril with your thumb and inhale through your left nostril for 5 counts.
  4. Close the left nostril with your ring finger and exhale through the right nostril for 5 counts.
  5. Alternate between the sides, still using a 5 count.
  6. Increase the retention once you find the breathing becomes easier (by increasing the counts).

2. Three Part Breath (Dirgha)

This breathing practice is deeply calming and quieting for the mind. It also works to relax the nervous system to bring you into a state of full relaxation. Three part breath is typically practiced lying down, which makes it suitable for beginners and easier to tune inward and focus on the breath. This is also a great breathing exercise to do on a consistent basis, with the body in an easy position to begin to relax.

How to practice Three Part Breath:

  1. Find a comfortable position lying down, preferably with the use of props such as: a yoga blanket and a bolster.
  2. Lie down with your palms facing the ceiling, collarbone spread, and head also facing the ceiling.
  3. Let your eyes close, breathe in and out through your nose with your natural rhythm of breath.
  4. Breathe in halfway, emptying all the air from your body.
  5. Breathe in through your nose, just into your abdomen. Pause.
  6. Breathe in through your nose, into your side ribs. Pause.
  7. Breathe in through your nose, into your collarbone. Pause.
  8. Take a long exhalation out through your nose, relaxing your abdomen, followed by a few regular cycles of breath.

3. Victorious Breath (Ujjayi)

This breathing technique is purely to bring a strong sense of relaxation to the body. Victorious breath is namely incorporated into the Ashtanga yoga practice. In Ashtanga, each movement is tied to a cycle of breath. When others hear someone engaging in Ujjayi breath, it is usually a gentle reminder to keep breathing, as it signals others in the class to focus on their breathing. In Sanskrit, Ujjayi loosely translates to “victorious” or “one who is victorious.” Ujjayi engages the diaphragm and the pelvic floor, making it a full body breath.

How to practice Victorious Breath:

  1. Sit in a comfortable seat.
  2. Take a few normal breaths, in and out, focusing your mind purely on the breath.
  3. Inhale through your nose and exhale through your nose for 4 counts.
  4. Repeat this a couple times.
  5. Take a slow, deep steady breath through the nose, making the sound of “sa” internally.
  6. Fill up to the top and pause.
  7. Exhale through the nose, slowly deeply and steadily with the sound of, “ha,” until you’re completely empty of air.

Why do breathing exercises help with stress and anxiety?

When we focus on our breathing, we are tapping into our body’s relaxation response. By focusing on the breath and controlling it in a way, we are signaling the nervous system to slow down. With deeper intention placed on the inhalation and exhalation of oxygen in the body, our brain notices we are trying to enter a more calm state. When the breath is slower and longer, the body and brain adapt to this steady flow of oxygen. Usually in states of high anxiety or stress, the breath is short and rapid, in turn increasing our heart rate and oftentimes signaling a “fight, flight or freeze” response. When trying to alleviate that tension, we should initially focus on the breath. Using breathing exercises to reduce stress and anxiety has not only been known to help the body enter a more relaxed state, but it can also help nurture the muscles, enhance respiratory wellness, lower pain levels, and increase overall brain function.

Breathing techniques are an ancient practice that have stood the test of time for many reasons, namely the fact that it is the function we are inherently born with, doing it both subconsciously and consciously (able to be controlled or trained). Since breathing is such a vital function of the human body in order to exist, paying attention to it and nurturing it can provide longterm health benefits that can outweigh most other mechanisms.

How can I learn more about Pranayama?

In YogaRenew’s 200 Hour Yoga Teacher Training program, the basic fundamental of pranayama is introduced. Moving onto the 300 Hour course allows you to dive deeper into applying pranayama to the practice of yoga. Whether you’re a beginning practitioner, or an experienced yogi, our online courses provide you with information you may not have heard before and is broken down in a digestible way.


Join our mailing list for incredible weekly content!

Person in Headstand (a popular inversion)

A Beginner’s Guide to Practicing Inversions

By Yoga Asana

Why do we want to go upside down?

You might remember as a child how easy it was to put yourself upside down. As we get older, we might be a little more hesitant to invert ourselves but there are many benefits to practicing being upside down.

What is an inversion?

Typically an inversion posture in yoga consists of the placement of the heart below the head and the legs above the hips. The foundation, or place in which the body is balancing, can change depending on the posture.

Poses that are inversions:

What are the benefits of inversions?

Generally speaking, inverted postures revitalize the entire body and bring clarity to the mind. By taking the weight off the legs, blood is brought to the brain and other internal organs which improves overall circulation and functioning of the internal systems of the body. In addition, it is believed concentration is improved, better sleep is nurtured, and the nervous system overall can operate more efficiently.

Some inversions are more uplifting and activating, like Handstand and Forearmstand, others like Headstand and Shoulderstand are therapeutic, even though they are physically challenging, and Legs Up the Wall is purely restorative and calming for the nervous system. Basically, there is an inversion that suits all your needs.

What are the precautions for practicing inversions?

Seek guidance from a doctor and an experienced teacher before going upside down.

However, do not go upside down if suffering from:

  • High blood pressure
  • Heart conditions
  • Eye or ear problems
  • Neck or shoulder injuries

What are some popular inversions and the benefits of them?

Sirsasana, aka Headstand

Sirsasana, translated as Headstand, is often referred to as the King of all Poses. Physically, practicing headstand regularly develops strength and vitality in the entire body. It can improve sleep and aid digestion. Energetically, practicing headstand can harness a sense of equanimity of spirit.

Sarvangasana, aka Shoulderstand

Salamba Sarvangasana, translated as Shoulderstand, is often referred to as the Queen of all Poses. Regular practice of Shoulderstand is believed to improve functioning of the brain, thyroid, and parathyroid glands. It improves circulation of blood and lymph which revitalizes the internal organs. Energetically, the regular practice of shoulderstand is believed to help quiet the mind and soothe the nervous system.

Adho Mukha Vrksasana, aka Handstand

Adho Mukha Vrksasana, translated as Downward Facing Tree, is often referred to as Handstand. This is a vigorous and energetic pose in which you are completely balancing on your hands. Physically, the pose develops, tones, and strengthens the shoulders, back, arms, and wrists. Energetically, it requires concentration, coordination, and helps overcome fear.

Pincha Mayurasana, aka Forearm stand

Pincha Mayurasana, translated as Feathered Peacock, is often referred to as Forearmstand. Similar to Handstand, this pose develops, tones, and strengthens the shoulders, back, arms, and wrists. It is a physically challenging posture that is stimulating and energizing. It requires focus and determination.

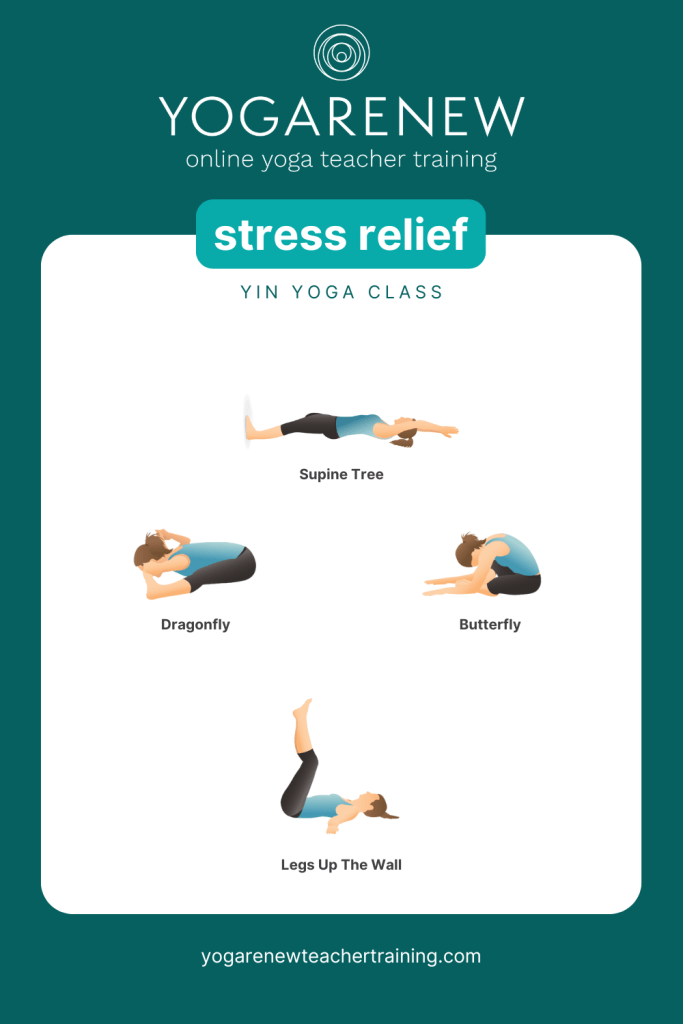
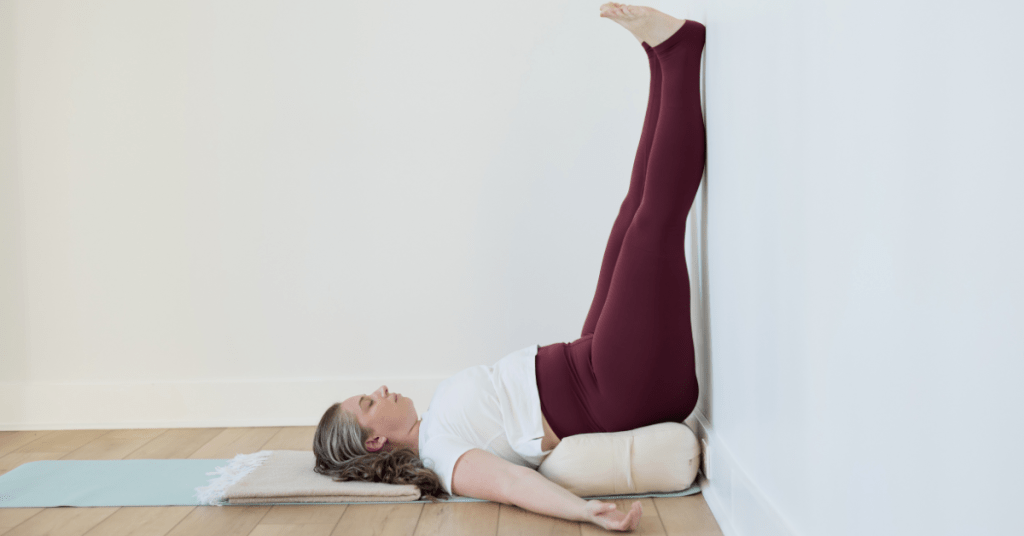
Viparita Karani, aka Legs Up the Wall

Viparita Karani, translated as inverted posture, is often referred to as Legs Up the Wall. The is a restorative posture that places the body in an inverted position without effort or strain. You get the benefits of organ regeneration by being physically inverted as well as an overall sense of peacefulness and quietness of mind. This posture soothes the entire nervous system and is great after long trips or simply as an aid to reduce stress and anxiety.

Join our mailing list for incredible weekly content!

Person in Bow Pose

Weekly Class Theme: Breath

By Yoga Teachers

I think that many people begin practicing yoga because there is this idea that we’ll be able to “control” things in our life. It gives the idea that we’ll find more inner peace, stability, and true happiness if we choose to step on the mat.

As we progress through the practice of yoga, it becomes apparent that control is simply an illusion. And while we cannot control our life, we actually give in to the waves of life. We begin to understand that life has ups, downs, and everything in between and instead of fearing the unknown we start to embrace it.

Now, while this realization comes into play we simultaneously learn that the one thing we can control is our breath. The moment we learn to control the breath is the moment we learn to still the fluctuations of the mind.

The breath is so powerful because it is closely tied to our nervous system. Feelings of agitation, uneasiness, and/or anxiety are symbolic of our nervous system being “lit up.” Let’s take a quick physiology lesson. The nervous system has two main branches: the central nervous system (CNS – brain and spinal cord) and the peripheral nervous system (PNS – everything else). The peripheral nervous system is split up into the somatic nervous system (voluntary movements – muscular contractions and physical movements) and the autonomic nervous system (involuntary actions – heart rate, blood pressure, respiration, digestion, etc.). The autonomic nervous system is even further divided into the sympathetic, parasympathetic, and enteric nervous systems. The sympathetic nervous system is our “fight or flight” system (aka being “lit up”), the parasympathetic is our “rest and digest” system, and our enteric system controls gastrointestinal functions.

Unfortunately in this current day and age, our sympathetic nervous system tends to get ignited more often than it should through self-judgment, self-criticism, worries about the future, and anxiety about the past. When we’re caught up in all thoughts outside of the present, the focus on the breath is lost. However, when we refocus on the breath and deepen the breath to fill the entire lung space everything literally slows down. Our heart rate slows, our blood pressure drops, respiration rate slows down and we start to train our bodies to dip into the rest and digest system. From this state we have the chance of experiencing peace, stability, and ease.

To expand the space where the lungs reside and to exercise full diaphragmatic breathing (another way of saying breathing to expand the diaphragm in all directions as opposed to just emphasizing the frontal portion of the diaphragm and chest) we are going to work in the direction of a backbend.

Supporting Pose 1: Supported Hero Pose (Virasana)

I like starting in this position for most backbends because it goes in the direction of lengthening the front of the thigh which we see in backbending postures. This pose is also great for allowing your students to settle in, sit up tall, and focus on the breath. If this is inaccessible, a great option would be to sit on a chair or to stand so posture is not compromised.

Person in supported Hero pose

How to:

  1. Place a block beneath your sit bones with your legs folded and the heels of the feet gently hugging the outer edges of the block.
  2. Bring the knees towards one another so they are not unconsciously splaying open.
  3. Let your hands gently rest on your lap.
  4. Sit up tall without overemphasizing the forward movement and lift of the chest. Try to reach the crown of the head up and lift the sides of the chest up, not out.
  5. Close the eyes and breathe consciously by extending the breath into the sides of the rib basket and into the back of the rib basket. It could also help to place the hands on the sides of the rib basket just below the breasts or one hand on the belly below the sternum and one hand on the back around the lower ribs.

Supporting Pose 2: Revolved Extended Side Angle (Parivrtta Utthita Parsvakonasana)

This pose does it all! It’s a twist and a side body lengthener, both actions which serve the goal of opening the lung space in preparation for backbends. Furthermore, with the front of the torso against the leg, it lends a similar feedback feeling like in bow with the belly to the floor. Note, the back heel lifted is a variation of revolved extended side angle. The traditional version has the back heel on the floor as in Warrior I.

Revolved Extended Side Angle

How to:

  1. Start in a low lunge.
  2. Bring the right hand to the right thigh and left arm alongside the ear. Hinge forward like you were going to take off into Warrior III.
  3. Use the right hand against the leg as leverage to twist towards the right and hook the left elbow to the outside of the right leg.
  4. Start with the palms together to press the elbows and chest wide and then extend the arms towards the floor and towards the sky. Then, stretch the left arm over the ear to the front of the room.
  5. Exercise diaphragmatic breathing by sending the breath not only into the front compartment of the torso (which is hopefully easily distinguishable), but also into the sides and back compartment of the torso.

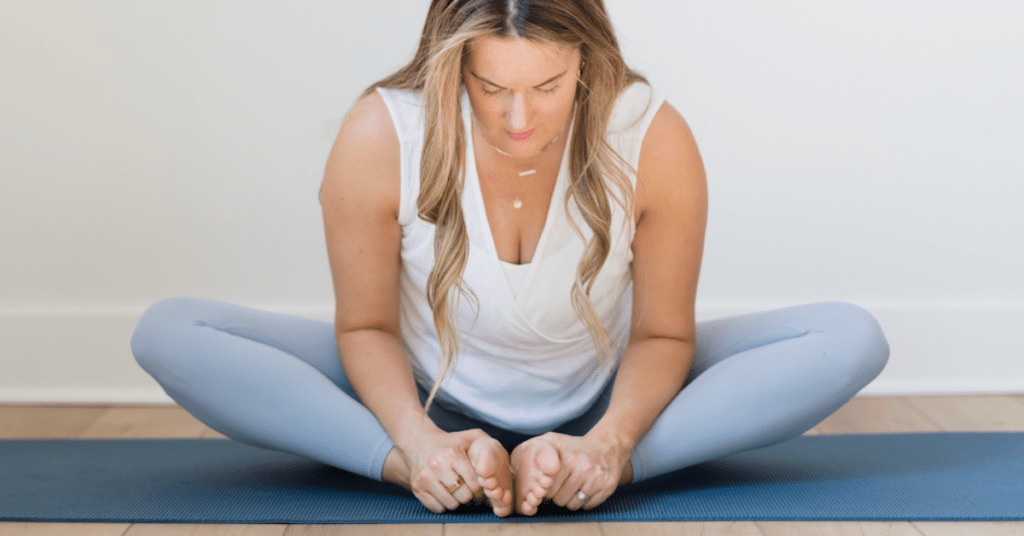
Supporting Pose 3: Supported Fish with Bound Angle Legs (Matsyasana + Baddha Konasana)

This is another optimal position for backbending. This position puts the body into a supported shape to expand the lung space and it allows a widening, and hopefully the opening of the groin muscles. This helps to release any gripping which might prevent the tissues around the lungs to move freely as the breath moves in and out of the body.

Supported fish with bound angle pose

How to:

  1. Prepare to lie down with the thoracic spine and head supported by two blocks. Set the first block to the medium height to go beneath the thoracic spine. Set the second block on the high height to go beneath the head.
  2. Lie down over the blocks. You can adjust the heights if necessary so that you can lie with a sense of ease.
  3. Bring the soles of the feet together and let the knees go wide, placing support under the legs if necessary.
  4. Allow the arms to rest on the ground so the chest can widen.

Peak Pose: Bow (Dhanurasana)

I believe bow is a great option for our topic today because not only is it a backbend, but with proper prep-work it’s a great position to sense the breath moving towards the side and back compartments of the diaphragm.

Person in Bow Pose

How to:

  1. Lie with your belly down on the ground.
  2. Reach the arms behind you and draw the shoulder blades towards one another to widen the chest.
  3. Bend the knees to bring the heels towards the bum and grab hold of the ankles with the hands.
  4. Lift the thighs off the ground as you lift the chest making a bow shape with your body.
  5. Practice diaphragmatic breathing by sending the breath in all directions → front, back, and sides of the rib basket.

How to Come Up with a Yoga Class Theme

By Yoga Asana, Yoga Teachers

1. Pull from Yoga Philosophy

The ancient texts in yoga philosophy cover a wide range of topics and can be applied to most situations in present day life. They are a great foundation for drawing inspiration. As Patrick says in the video above, he began to live his life by the influence of those texts, which has helped him navigate story-telling by applying the ancient meanings to things he’s experienced himself.

2. Talk About Things That Inspire You

Dharma Talks are an integral part of the yoga practice. While students may show up initially for the physical aspect, the spiritual and philosophical element is what gets them to come back and keep coming back. When you touch on things that have inspired you, you may be of inspiration to your students in class.

People can tell when someone is inspired by something. If you approach your class theme from an angle of education (learning something new, something that really stood out to you, etc.), you are adding an element of passion that people will find special. If you show eagerness and passion when talking about it, that will most likely intrigue your students and resonate with them throughout class.

3. Make it Personal

People trust people. People also relate to people. When you are able to put a piece of yourself into your practice, students may find that you’re just like them! Relatable scenarios and everyday situations in life make for great topics to lead a yoga class. It not only shows that you are human, but it gives you an additional opportunity to show them how you apply yoga philosophy to your everyday life dealing with the joys, trials and tribulations. Peppering in personal stories is probably the easiest way to engage your students and get them familiar with the message behind a lot of the information in the ancient, philosophical texts.

If you don’t have any personal stories that day, refer back to hot topics that people find interesting (we’ll list a couple below).

Yoga class theme inspiration:

  • The Five Koshas
  • The Bhagavad Gita
  • Chakras
  • Yoga Sutras

Join our mailing list for incredible weekly content!

What is Karma?

By Yoga Philosophy

What really is karma?

The dictionary defines karma as, “destiny or fate, following as effect from cause.” In Buddhism and Hinduism, karma is referred to the total summation of a person’s actions in this plane of existence, which then acts as their “deciding fate” in existences to come.

However, when we examine the true essence of karma further, we can deduce that karma is not a deciding factor, but rather a set of experiences that we are individually meant to live out instead, regardless of what actions we bring forth by our own doing.

Hinduism also refers to three different types of karma:

  • Sanchita — the summation of all of one’s past karma that follow into the next life.
  • Prarabdha — past karmas that are to be experienced in the present body.
  • Agami — the karma we are creating now in this present moment through the actions and choices we make right now.

What karma actually means…

Basically, all of the definitions of karma refer to one underlying law or principle, and that is that we must live through the consequences, or adverse actions, of past choices, actions, and experiences. This law of karma is said to keep humans intertwined with the natural rhythm of living out life. Everything must be experienced, and that of which that already has been lived can revisit us in the present life in many forms as well as in future lives.

If everything is energy, then thoughts, feelings, and physical actions can be linked to rebirth. Many of what we feel and live through is cycled from a previous life, according to Hinduism. Karma is a natural law of life and can be explored through many different vehicles.

What is the basic belief of karma?

As one article on Uplift explains the law of karma, “At some point in your life, you chose it, by your actions,” which is a pretty powerful statement. It puts an end to the wondering of why or how such inexplainable things could happen, or why we have an urge to trust in the universe that things will sort out the way they’re supposed to.

The law of karma can also almost act as a moral compass for us to navigate life with. Perhaps if we are really struggling and know what it’s like to endure hardship, we may find it easier to show compassion once we are out of that state of living. Or, perhaps we encounter a moment that really questions our threshold for getting angry, whether on our own or someone else choosing to get angry with us. We might take peace in knowing that every situation lived is a piece of karma we must live out.

Things like road rage, (s/o to the new Netflix show Beef) can really put karma into perspective. In this show, two distant neighbors engage in a fit of road rage, really taking it to the next level. The whole show is about neither of them backing down to eventually live out pretty miserable lives (this is NOT a spoiler). Neither one of them wants to apologize or dismiss their pride. We can almost guarantee they are both living out their own karmic cycles and, chances are, they may have to relive them again in the next life until they can find peace in this situation.

Is karma good or bad?

You have probably heard the phrase, “That’s some bad karma.” Try not to see karma as being good or bad. It really simply is what it is and whatever you are faced with will present an opportunity to either learn and move forward or become negative and stay stagnant.

You can’t always control what happens to you or how people treat you. You can’t control the majority of things that happen in this lifetime, but you can control how you react to them. Understanding karma means understanding that this world isn’t out to get you. It means understanding that this life is meant to teach you.

You can stay where you are or you can learn the lesson.

Studying the concept of karma also means studying the way you handle everything that comes into your life. Sometimes, it’s easier to keep doing what you’re doing because maybe you’re a strong person and you can handle anything that comes your way.

Yoga teaches us that we don’t need to suffer. We don’t need to be in a mundane or sad life because it’s easier. Yoga philosophy teaches us that we have the ability to learn from our mistakes, analyze why this life is not blissful, and then make those changes. You are in control.

What to do when karma hits you

I probably don’t need to remind you that life can get hard and, as humans, we go through some really sad experiences. The important thing to remember is that we aren’t being punished and we aren’t being picked on. The bad stuff happens because it’s meant to help us move through those experiences and come out wiser, stronger, and kinder.

You don’t deserve the bad stuff, but you deserve the teachings and realizations that the bad stuff brings up. As humans, we all experience suffering. Some people seem to experience it more than others and some people never seem to experience much of it at all. Don’t worry about other people. Focus on yourself and what you personally need to do to move through experiences.

Does karma always come back?

It can be said that ignoring sadness and avoiding any kind of negative feeling will prevent you from experiencing the total bliss that all of us here on Earth are meant to experience. Yoga teaches that bliss is on the other side of sadness.

Notice that I said it’s on the other side. This means you need to go through whatever is happening in order to reach that bliss. If you go under it, over it, or around it, you probably won’t tackle the actual experience that had been put in your way for a chance at growth.

The bumps in the road are sometimes the best way to learn!

It is very possible that my karma is to have a life filled with bumps on my road because that’s the only way I will learn anything. I personally know that I need some tough lessons before I actually see how I’m supposed to learn from them. Maybe you’re not as stubborn, but if you’re anything like me, it might take some time to travel down a really bumpy road filled with obstacles before you learn the lesson.

The good news is that once the lesson is learned, it’s learned. You got it. You learned what this lifetime was meant to teach you in that moment and you created a path that’s a little more clear for yourself.

Karma is my teacher

via GIPHY

While karma may be Taylor Swift and Ice Spice’s boyfriend, around here it is our teacher. Although it can be difficult at first, eventually you will begin to see everything as your teacher. The bad stuff in life doesn’t happen because you’re a bad person. No one deserves that bad stuff. Unfortunately, it still happens. However, you always have a choice.

You can react in a way that causes more negativity or you can react in a way that helps you grow and move forward. No one ever said that yoga was easy and no one promised that the concept of karma was fun. The good news is that the work always pays off.

“What goes around, comes around,” may not be what you think

You may have heard it before, but it’s always important to remember that this life is happening for you and it’s not happening to you. If you can embody that fact, you will be able to see everything as a blessing and everything as an opportunity to grow rather than dodging inevitable, dooming consequences that come your way.

Most of the difficult people, situations, and experiences that happen in your life will become your favorite lessons. The sooner you can move away from the, “Why me?” attitude, the sooner you will be on the path to bliss and loving this life along with all its gifts.

Anything you experience can be a chance to face your karma and create a positive future. It isn’t always easy and there’s no promise that experiences will become lighter, but the way you handle whatever comes at you is the best way to burn through old karma and live in much more mindful way.

What is karma through the lens of yoga?

When we visit the concept of karma through the yoga lens, karma really just means action. In terms of yoga philosophy, karma deals a lot with the concept of rebirth. If we’re dealing with something really difficult right now, we are essentially burning through karma. If we don’t learn the lessons, we are to repeat them.

Yoga teaches us patience and can act as a vehicle to live out karma. When practicing yoga, intentions can be set to wish well upon yourself and others. As a communal practice, it strengthens the ties you have with people presently in your life, even strangers. Living out our karmic cycle is unavoidable in yoga, and as Julie explains in the video, all karma really is is action. We must coexist with it and realize it is a part of human nature.

Looking to become an expert on karma?

YogaRenew offers a Yoga Philosophy course that features an entire module dedicated to karma. You’ll dive deeper with Julie Pasqual and uncover how karma exists in our world today versus all those years ago. It will debunk myths about karma and teach you how it is relevant to the yoga practice.

Yoga Philosophy Online Course

Join our mailing list for incredible weekly content!

Man in a perfect down dog pose on a yoga mat in front of windows

Tips for a Perfect Down Dog

By Yoga Asana, Yoga Teacher Training

Downward Facing Dog, or Adho Mukha Shvanasana in Sanskrit, is a very common pose in a flowing sequence yoga class. This asana is an integral piece of Surya Namaskar, or Sun Salutations, and is very popular. The pose is technically an inversion, which means your body is tilted in a way so that your heart is elevated over your head.

Down dog is also commonly depicted as the most popular/universal pose representing the yoga practice because of how frequently it is used in a flow.

In this video, Patrick shares a 5 simple tricks that will get you into the perfect down dog, every single time. We’ve summarized the tips below:

Step #1: Lie on your belly

Step #2: Hands under your elbows with feet about one foot apart

Step #3: Curl your toes under without moving your hands and your feet

Step #4: Lift your hips

Step #5: Straighten your legs

What are the benefits of downward facing dog?

The yoga practice has been known to provide multiple benefits to its practitioners on and off the mat. As we look at Downward Facing Dog, we can explore some of the physical aspects of the pose that make it beneficial to the body, but also how those physical aspects play alongside the mental part of our being.

Physical benefits of Downward Facing Dog:

  1. More flexibility in the hamstrings
  2. Increased mobility
  3. Stretching of the low back
  4. Lengthening of the spine
  5. Strengthening of the shoulders

Mental benefits of Downward Facing Dog:

  1. More focus and attention on the breath, which calms the mind
  2. Decrease in stress
  3. Increase in blood flow to the heart, alleviating sluggishness
  4. Energizes the brain
  5. Enhanced focus and concentration

Join our mailing list for incredible weekly content!