Yoga continues to evolve — yet its essence remains timeless. In 2025, yoga is more accessible, diverse, science-supported, and technologically enhanced than ever before.
Commonly Asked Voice Search Questions
“What is yoga in 2025?”
Yoga in 2025 is a blend of traditional mindfulness and modern wellness science. It includes physical postures (yoga asana), breathwork, meditation, and technology-enhanced tools such as AI-guided classes and wearable-assisted alignment feedback.
While the physical, old-school style approach is still relevant, teachers and studios have found ways to morph technology with the physical, in-person practice, making it the best way to enhance the overall quality of life and enjoyment of physical and mental wellness.
“Is yoga still good for beginners in 2025?”
Absolutely. You can try/start yoga at any point in your life. Yoga nowadays is even more beginner-friendly with things like adaptive classes, chair yoga, slow-flow styles of vinyasa yoga, and beginner-focused online classes and series.
We’ve even developed an Online Beginner Series on the YogaRenew app!
“What type of yoga is best for stress?”
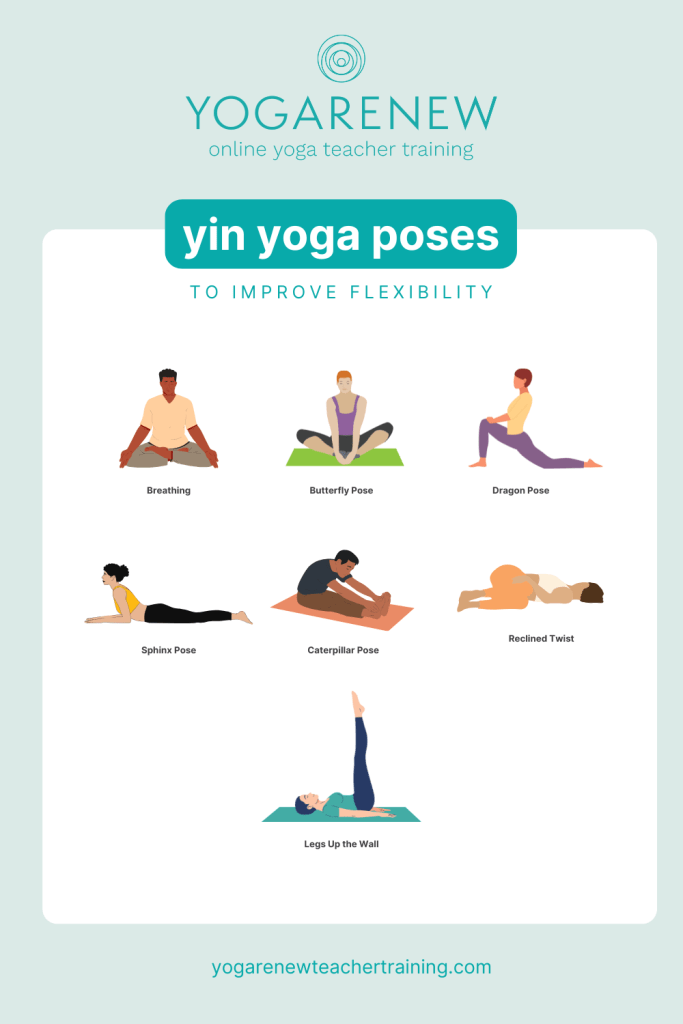
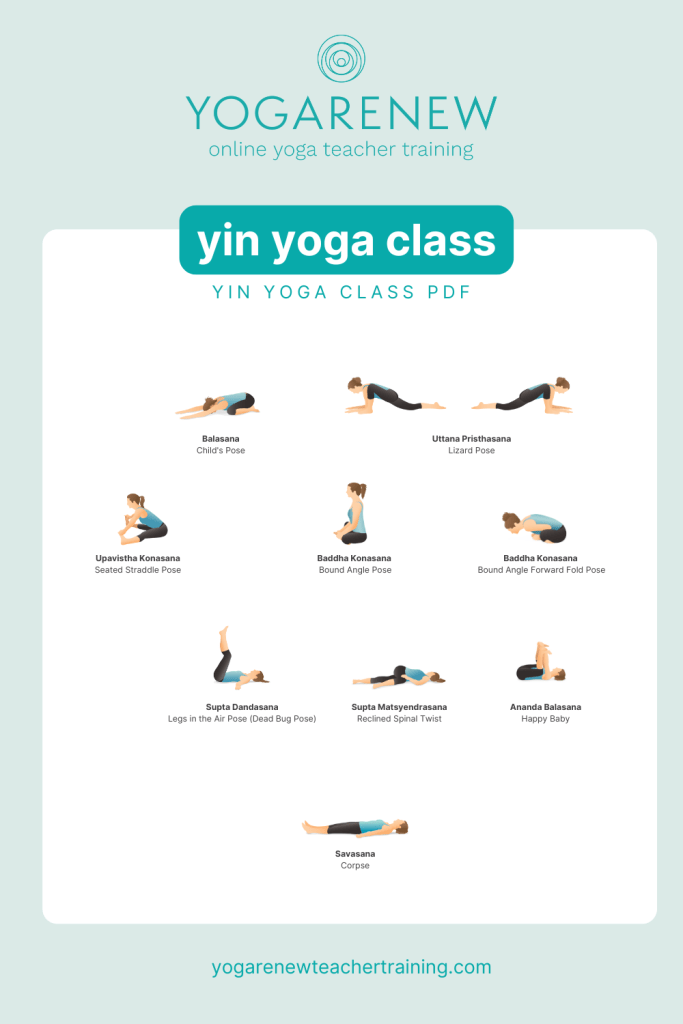
It’s up to the practitioner. Many people have caught on to the trend of yin yoga where postures are held for longer periods of time, making it a very relaxing practice. Some yin yoga teachers have even added a sound meditation to the end of the practice during Savasana, which makes it extra relaxing.
Restorative yoga has also been a favorite stress-relieving style of yoga. Restorative yoga has gained popularity in 2025 and is often coupled with acupuncture to enhance the restorative aspect of the practice. Since postures are supported mostly by props and are done lying down, it makes it a perfect companion to the energy alignment and relaxation of acupuncture.
Major Yoga Trends in 2025
The Benefits of Yoga in 2025
Physical Benefits of Yoga
- Improved flexibility and mobility
- Stronger, more stable joints
- Better posture and alignment
- Increased muscular strength
- Enhanced cardiovascular health
Mental & Emotional Benefits of Yoga
- Reduced anxiety and stress
- Greater mental clarity
- Better emotional regulation
- Lower burnout levels
Holistic Lifestyle Benefits
- Improved sleep quality
- Enhanced mind-body awareness
- Sustainable healthy habits
- A sense of community and belonging
Popular Yoga Styles in 2025
These are the styles people practice most this year:
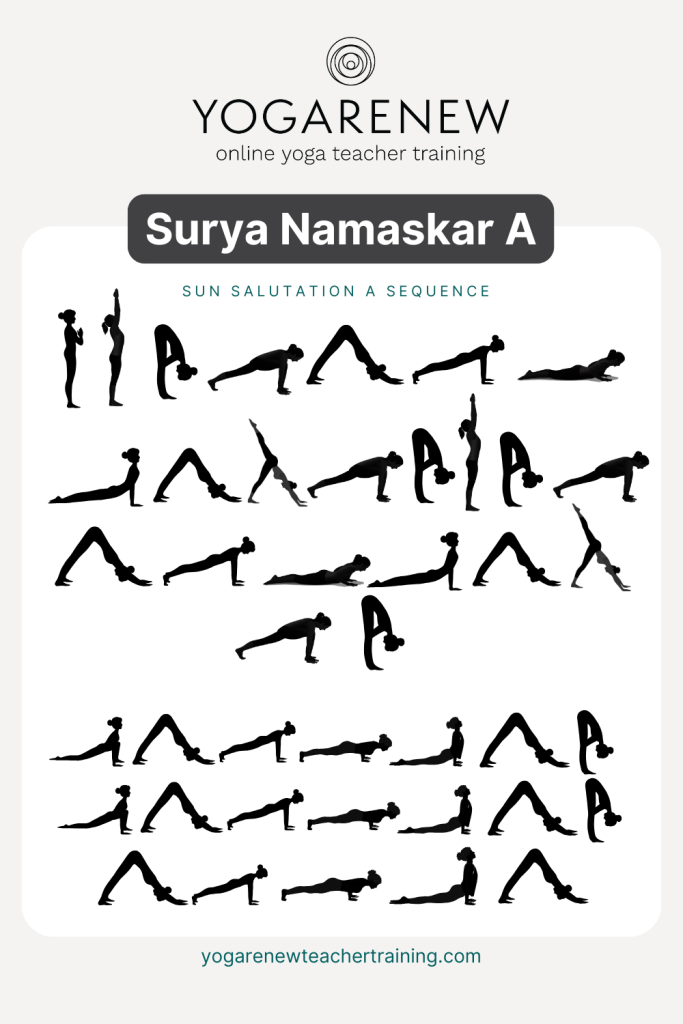
- Vinyasa Yoga – fluid, breath-connected movement
- Hatha Yoga – slower foundational practice
- Yin Yoga – deep tissue release and long holds
- Power Yoga – strength-driven and athletic
- Restorative Yoga – prop-supported relaxation
- Kundalini Yoga – breathwork, Kriyas, and mantra
- Hot Yoga – warm rooms promoting circulation
How to Start Practicing Yoga in 2025
1. Start with beginner-friendly classes: Look for Hatha, gentle Vinyasa, yoga for beginners, or slow-flow classes to build a strong foundation.
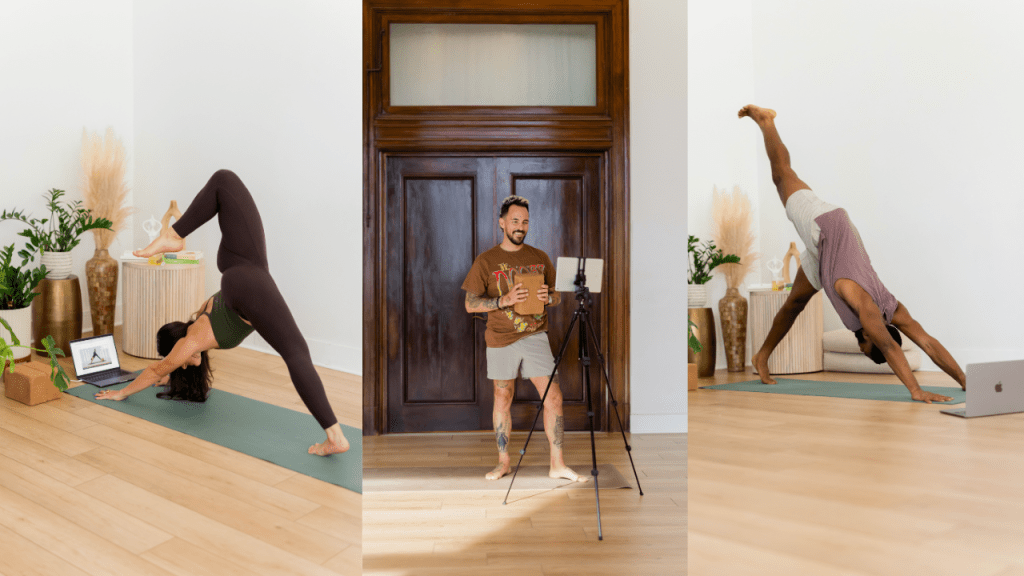
2. Use both online and in-person options: Online classes offer convenience; in-person offers alignment support and community.
3. Practice 10-15 minutes a day: Consistency matters more than intensity.
4. Prioritize breath awareness: The breath is the anchor of every yoga practice.
5. Use props without hesitation: Blocks, straps, chairs, blankets and cushions make poses safer and more accessible.
6. Try multiple styles: Your perfect style may change over time — explore until you find your rhythm.
The Future of Yoga: Mindful, Inclusive & Tech-Supported
Yoga in 2025 proves that an ancient practice can evolve with modern life while maintaining its traditional heart. Whether you practice in-studio, outdoors, or via AI-supported home sessions, yoga continues to promote balance, strength, emotional clarity and overall wellbeing.
The future of yoga is inclusive, mindful, accessible — and open to everyone.