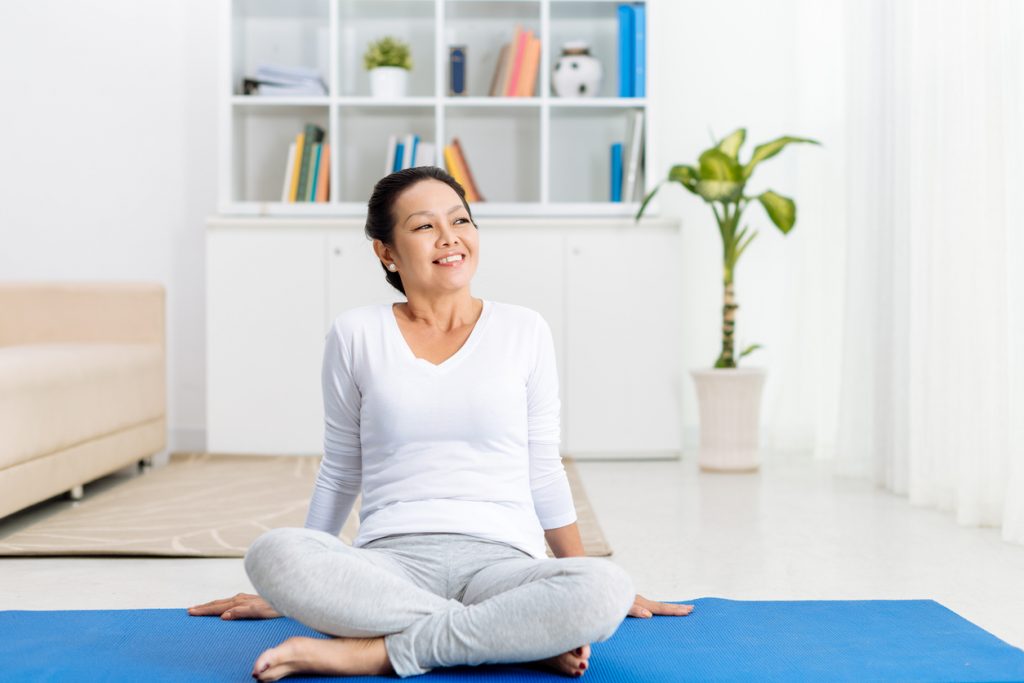
Consider this common scenario. It’s the start of a new day or work week and the anxiety rises up in your chest, settling in like a ton of bricks as you anticipate the scope of what you need to get done. You’re exhausted and your efforts to focus are futile. It feels impossible to slow down and your plate is so full you can’t figure out what needs to go or ways you can try finding balance.
What Can You Do To Help Yourself Gain Balance?
 I’ve been there, too. When we have too much to pay attention to, it’s challenging to focus and establish better rhythms for ourselves. Sometimes too many unexpected changes happen all at once and it’s tough to scale back. But very often we can find some balance by managing our thoughts and changing our perspectives. The Yoga Sūtras offer practical teachings for achieving balance through mental discipline.
You are not your thoughts.
Our minds are like flooded internet browsers with numerous tabs and pop-ups open at any given time. However, we do have the option of clearing any and all irrelevant windows. According to yogic wisdom, our true selves and our minds are two separate things. Let’s consider Yoga Sūtra 1.4, “Otherwise, at other times, [the seer] is absorbed in the changing states [of the mind] (1, p. 24).” Sometimes our thoughts overwhelm us, and at other times we’re able to let them go.
While our minds are very reactive and become easily consumed by what’s happening around us, often leading us off track and distorting reality, we can discern which thoughts warrant our attention. For example, if you think you’ve failed because something didn’t work out, it doesn’t mean you have or that there’s no chance of turning things around. A missed step is not failure, nor is it a reflection of who you are; it’s just another way to move your feet. Keep your mind open, steady on the path forward, and detach from the thoughts that threaten to distract you.
What can you let go of?
When we’re scrambling to meet every demand, it’s hard to know which priorities to keep and which ones to toss. This relates to tasks as well as expectations for what we can accomplish. And that’s where Yoga Sūtra 1.15 comes in, which states: “Renunciation is the practice of detachment from desires (2, p. 64).” Not attaching to our desire for success is a learned skill of keeping the mind steady and clear of distractions. Without attachment to worldly gain, we can work with greater ease, fulfilled by what we’ve accomplished, and unbothered by feelings of failure or lack. When the pressure to do it all feels utterly consuming, take a pause. Step away from the computer or the paperwork. What can you scratch off your list? What expectations of yourself, or desires for achievement can you let go of all together?
Change your thought patterns.
 Disciplining our minds also includes changing our thoughts when they threaten to drag us down. For this one, let’s turn to Yoga Sūtra 2.33, “Upon being harassed by negative thoughts, one should cultivate counteracting thoughts (1, p. 255).” This teaching could mean reversing our outlook from a glass-half-empty mentality to a glass-half-full. But sometimes that can feel like we’re forcing optimism where it doesn’t belong rather than looking at things through a different lens.
Perhaps you can relate this thought, “I’m never going to be able to accomplish X and Y by Z.” Maybe that’s true, but this mindset can be debilitating midst pressure to meet all the demands thrown at you. An example counteracting thought could go something like this, “I won’t be able to accomplish X and Y by Z, but I can get A and B done by C.” When the unfavorable thoughts won’t stop no matter how much you dismiss them, consider this exercise. Write down your negative thoughts on one side of a piece of paper, and then write out the counteracting thoughts right next to them. Cross out the negative and proceed with the opposite thoughts.
Yoga provides some of the very best instruction on how to live life, especially when life is difficult. It’s helpful to apply yogic teachings to our lives in practical ways so that they serve their purpose of helping us transform. Yoga is meant to be lived and experienced; That’s how we experience its gifts. The wisdom of these three sūtras can help us bring a chaotic situation back into balance by enabling us to see things clearly and examine our lives with some fresh perspective.
(1) Bryant, Edwin F., translator. The Yoga Sūtras of Patañjali. North Point Press, 2009.
(2) Iyengar, B.K.S., translator. Light on the Yoga Sūtras of Patañjali. Thorsons, 2002.
 The Sanskrit word sraddha translates to faith or trust. But encased in this word is a deeper, more illuminating meaning. B.K.S. Iyengar describes sraddha as mental and intellectual firmness, which fosters an innate trust (1). Vyasa, an original commentator on the Yoga Sūtras, interprets sraddha as clarity of mind that sustains us as we move along with our yoga practice. When the mind is clear, truth reveals itself; With untainted vision, we can see the way forward and trust it (2).
 As we work to transform ourselves and better the world around us, it’s normal and necessary to fall down from time to time, whether from the weight of doubt and despair, a wave of humility, or just exhaustion. But within spiritual work like yoga runs a river of grace. Each moment is an opportunity to examine ourselves, to course-correct, to try again, to make real change happen. If we give it the time faith will lead us somewhere special, towards authenticity, deeper empathy and compassion, so we truly become caretakers of each other. If we work to still our minds, truth will arise and reveal the next right steps.


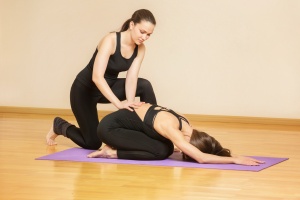
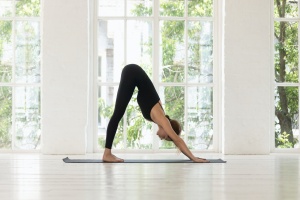 Woman do yoga Downward Facing Dog pose inside of light cozy room through window seen green foliage trees summer landscape morning sun, adho mukha svanasana stronger hands strengthening back exercise[/caption]These postures are also foundational to a more comprehensive āsana practice and worth the extra attention. Practice them often to help counteract the toll sitting takes on your body. And remember to breathe deeply in each shape.
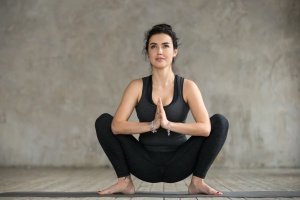 This wide-legged, deep squat stretches the lower back and strengthens the legs. This āsana also opens the hips and exercises the muscles of the ankles and feet. It’s all together a very helpful pose for soothing tension in the lower back and improving posture, which can get thrown off from long hours of desk work.

 By no means are the postures insignificant; Iyengar asserted that, for the average person, practicing āsana and prāṇāyāma are the two most effective disciplines for quieting the mind. But, in reality, the postures are only a piece of a much bigger process of self-discovery and transformation. Teaching āsana is not the only way to share yoga.
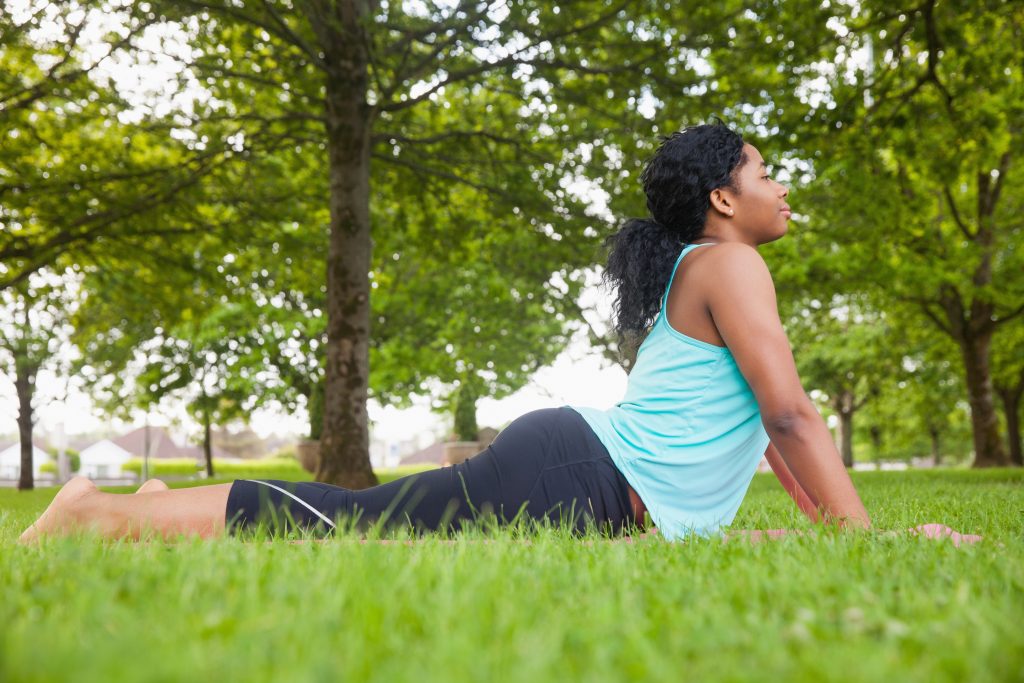
 Vinyasa yoga has its roots in Ashtanga yoga; a style of practice developed by K. Pattabhi Jois in the mid-twentieth century, which is considered to be the backbone of modern Western yoga. Ashtanga yoga’s formulated sequence of poses is preformed in a specific order, whereas vinyasa yoga is a freeform practice with limitless variations. Both styles are energetic, dynamic, and steadily paced. The term vinyasa is a linkage of two Sanskrit words: nyasa, meaning “to place”, and vi, “in sacred accord.” To vinyasa, therefore, is to preform poses in accordance to the breath, each transition synchronized with either an inhalation or exhalation.
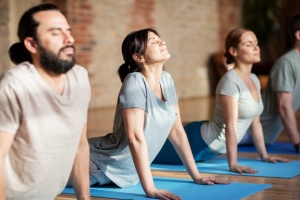
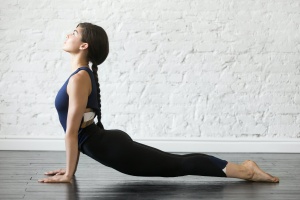 Building from Cobra Pose, Upward Facing Dog
