Yoga, in my life, is not just a physical practice; it’s a holistic journey that intertwines my passions and the profound wisdom of ancient teachings. This unique path includes the fluidity and the precision of alignment-focused yoga asana, the nurturing philosophy of Ayurveda, and philosophical teachings from texts like the Bhagavad Gita. All of this is embedded in everything I love to do, the relationships I navigate, and the ups and downs of this amazing lifetime. Yoga isn’t just a practice. It’s a lifestyle. It’s a way to experience the world with an open heart while also being able to keep it full.
Yoga Asana
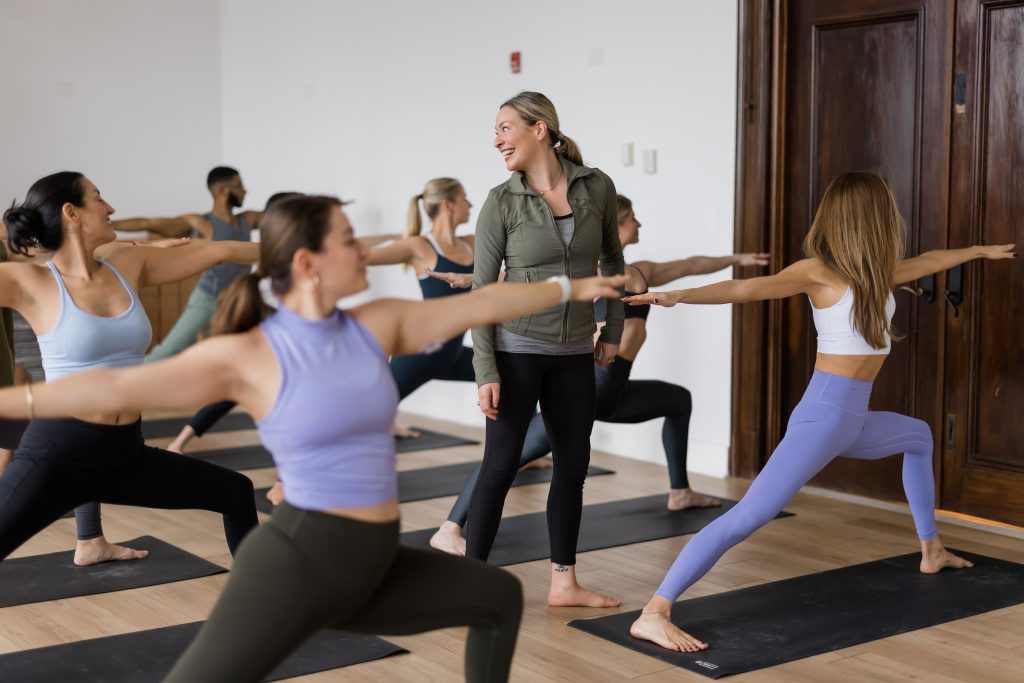
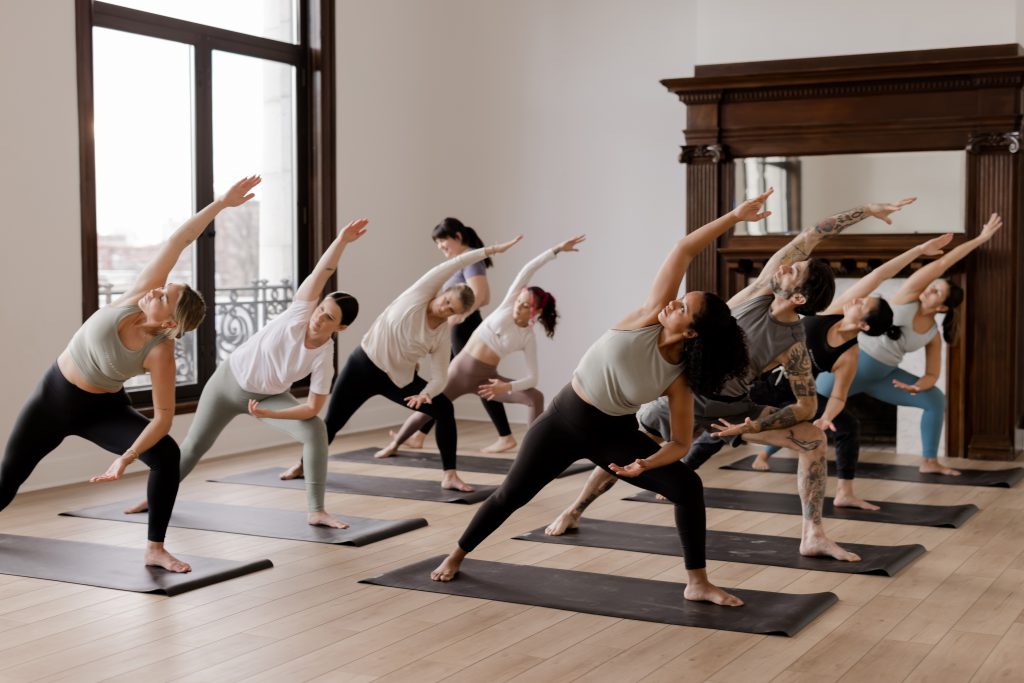
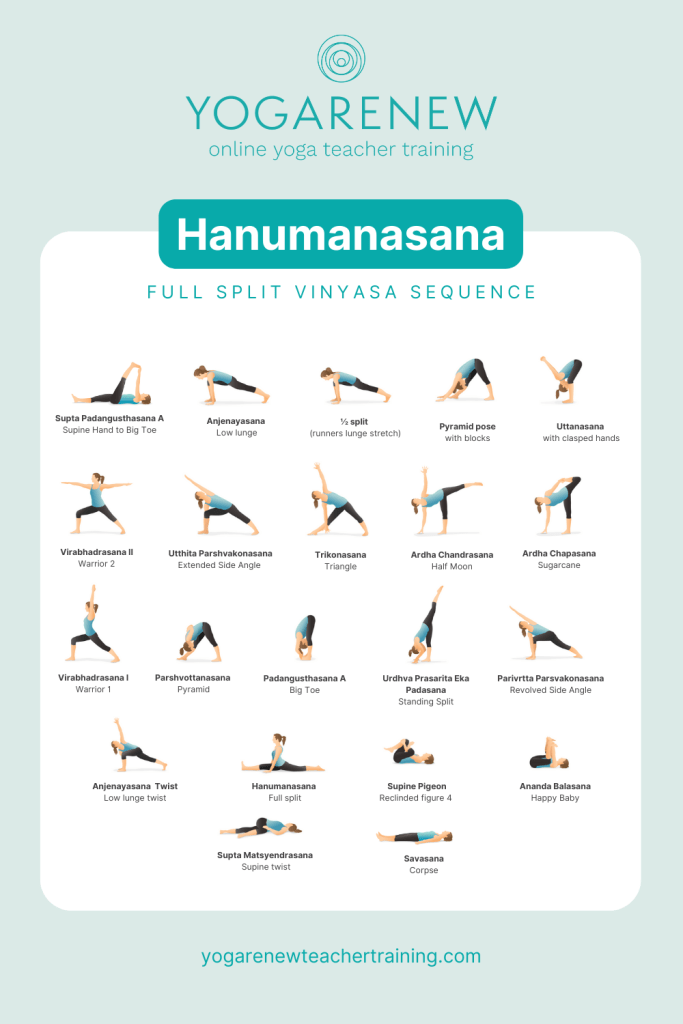
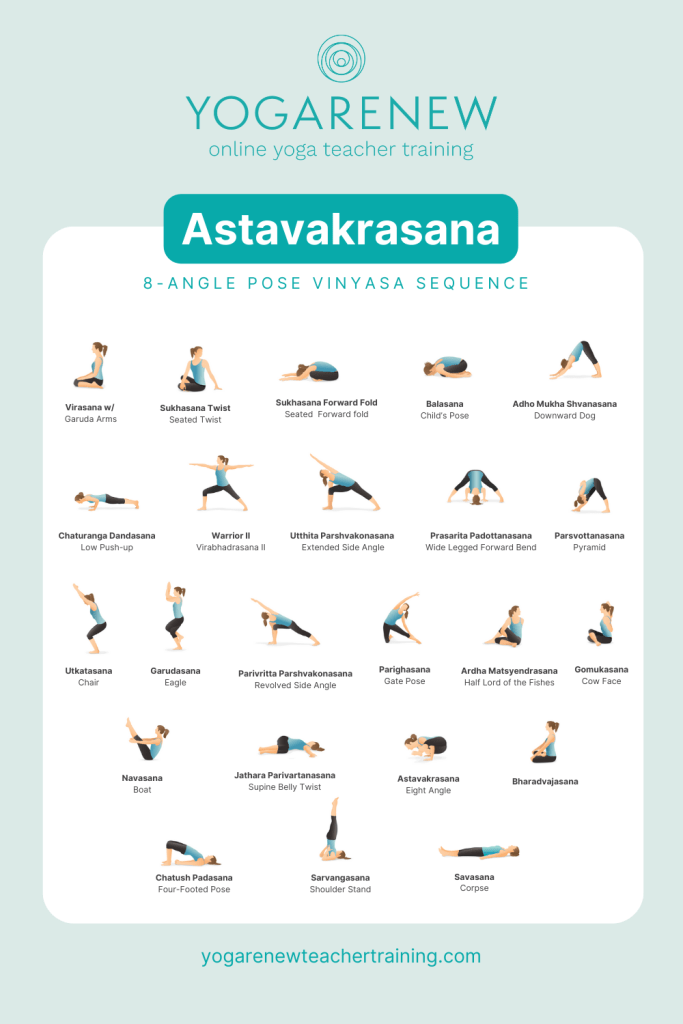
In Vinyasa yoga, I find a reflection of life’s dynamic rhythm. This practice, kind of like a dance choreographed by breath and movement, teaches me resilience and grace. It’s more than a series of asanas; it’s a celebration of life’s fluidity, teaching me to embrace each moment with mindfulness and to remember the joy in all of it.
The focus on the alignment within the asana practice offers a profound exploration of balance and harmony that helps me stay rooted despite the chaos in my mind or in everything going on around me. It teaches me the importance of foundation and structure, not just physically but in all life aspects, reminding me to find stability and ease in everything I do and in every experience I move through.
Ayurveda: The Sister Science of Yoga
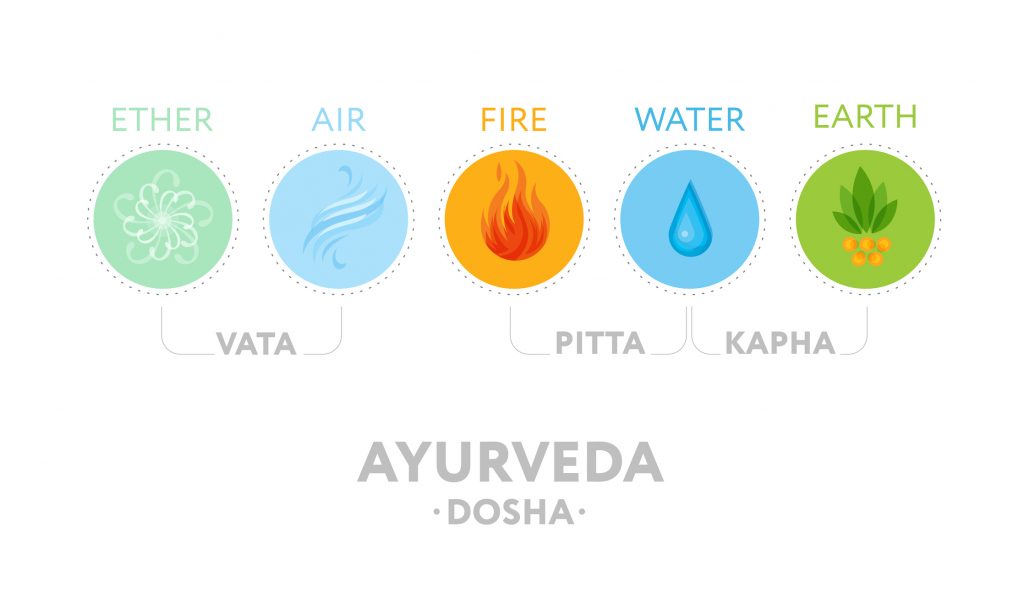
Ayurveda, a key element in my self-care routine and my day to day balance, highlights the importance of nurturing both body and soul. Practices like creating a routine, which is based on ancient texts, emphasize a holistic approach to wellness, aligning with nature’s rhythms to maintain health and vitality. Incorporating Ayurvedic principles into my daily life has been transformative, teaching me the art of living in balance and complementing my yoga practice.
Ayurveda has taught me the importance of listening to my body and respecting its natural rhythms. I’ve learned to nourish my body with the right foods, engage in rejuvenating practices, and maintain a lifestyle that keeps me balanced and grounded. This holistic approach complements my physical yoga practice, ensuring that I take care of myself in a comprehensive manner.
Yoga philosophy, drawn from texts like the Bhagavad Gita and the Yoga Sutras, guides my actions and thoughts. It teaches me to live with purpose, truth, and compassion, infusing every action with mindfulness and intention.
Yoga philosophy extends beyond the mat and into every aspect of my life. I try to live by the principles outlined in these ancient texts, which ultimately conclude that the greatest teachings are to understand how to find ways to love myself and the people around me. This mindful approach transforms everyday activities into acts of yoga, infusing them with deeper meaning and purpose.
Yoga philosophy helps me wake up each day and think about how I can make the world a better, more loving place instead of thinking about what the world can do for me. It’s not just something to study daily. It’s a way to connect with myself and everything around me in a more conscious way.
The Places I Find my True Practice
Nature
I often find my deepest moments of connection and introspection while immersed in nature. Whether it’s practicing asanas on a quiet beach, meditating in a forest, or simply breathing in the fresh mountain air during a hike, nature amplifies my yoga practice, making it more profound and grounding. Being immersed in forests, mountains, and beaches reminds me of yoga’s teachings on harmony with the natural world, making every outdoor experience a practice of mindfulness and connection.
Whenever I’m in nature, I’m always reminded that nature moves in rhythms and so should we. We are innately connected to the ebbs and flows that exist in the natural world around us and when we’re in sync with those, we are more in sync with ourselves. Whenever I feel like I’m disconnected from my body, my sleep patterns, or even from what I need to be eating, I step outside and reconnect with the nature around me.
Skydiving
Skydiving, an exhilarating part of my life, teaches me about surrender, trust, and living in the moment. It’s a powerful reminder of yoga’s teachings on detachment and presence, offering a unique perspective on fearlessness and freedom.
Both yoga and skydiving have taught me valuable lessons in letting go – letting go of fears, expectations, and the need for control. In yoga, this manifests in releasing tension and surrendering into poses, while in skydiving, it’s about trusting the process and embracing the unknown. This practice of letting go has been transformative, helping me to live more freely and authentically.
When I’m skydiving, I am fully present, experiencing a sense of liberation that’s both exhilarating and grounding. This unique combination of thrill and tranquility is reminiscent of the duality found in yoga – the interplay of effort and surrender, sthira (steadiness) and sukha (ease). Both yoga and skydiving teach me to embrace extreme moments with mindfulness and presence, whether holding a challenging pose or free-falling from thousands of feet. It’s a reminder that everything is energy and whatever I give attention to will manifest.
I even created a whole series, “Yoga for Skydivers” on YouTube!
Deeper Discovery and Growth
My favorite ways to practice yoga reflect my journey of growth, connection, and continuous discovery, allowing me to embrace life in all its facets and bring the principles of yoga into every moment. Yoga has transformed not only my personal life but also my professional endeavors, offering tools to approach challenges with a calm mind and to interact with others with empathy and understanding.
I think it’s safe for me to say that my favorite way to practice yoga is to simply live my life. Everything I’ve outlined above and talked about so far are great ways to practice yoga and amazing ways to bring yoga into different parts of my life. However, when it comes down to it, my favorite way to practice is by bringing the teachings into every little thing I do. When I’m implementing the teachings into everything, I am enjoying this life more than ever.
Being mindful, feeling aligned, and acknowledging that this life is a gift are some of the ways to really practice these teachings. My approach to yoga is a reflection of my life’s journey, infused with diverse experiences and guided by ancient wisdom. Yoga, for me, is more than just a physical practice; it’s a way of living that encompasses physical health, mental clarity, emotional balance, and spiritual growth. Through this integrative approach, I’ve discovered a deeper sense of self, a stronger connection with the world around me, and a more profound appreciation for life’s many gifts.
6 recommendations to help you find your favorite way to practice:
- Explore Different Styles: Try various yoga styles to find what resonates with you. There are so many teachers, trainings, studios, and ways to practice. Find something that keeps you coming back!
- Connect with Nature: Practice yoga outdoors to deepen your connection with the environment. Maybe you’ll like it and maybe you won’t. If you don’t love practicing the physical asanas outside, go for walks and be mindful of every step and every breath you take.
- Embrace New Experiences: Be open to trying new activities that challenge and inspire you. I always said that the only thing I’d never do was skydive. Then I did it and it’s something that is a deep part of my life now. Embrace the ‘nevers’!
- Incorporate Mindfulness: Practice mindfulness in all aspects of life, not just during yoga or meditation. Be present when you walk, eat, drink, and talk. Notice how you feel before you respond to something. Take time to pause before you react.
- Study Yoga Philosophy: Delve into the teachings of ancient texts to enrich your understanding and practice. Read a new book, listen to a new podcast, and keep an open mind. It’s okay to not agree with everything and it’s okay to be confused. In fact, being a little confused is sometimes intriguing for me and it makes me want to learn more.
- Don’t Quit!!!: The yoga practice is meant to be practiced for a long period of time and on a regular basis. This looks different for everyone. What one person does daily may not be conducive for you. Create something that works for you and find something that you are excited to keep coming back to.


 — Melanie Rodriguez, Yoga Teacher
 — Lisa Bermudez, Yoga Teacher and Ayurveda Coach
 — Lindsay Monal, Yin Yoga Teacher and Sound Healer